Samy Kamkar’s LED Balloon Network

Writing this in the frigid darkness of a Northern Hemisphere January evening, I have to admit to more than a little envy of Samy Kamkar and his friends. One of their summer events is a private party at a secluded campground somewhere that looks quite warm, which from here seems mighty attractive.

Samy wanted to provide a spectacle for his friends. What he came up with is glowing orbs; LED balloons that would float above the campsite and wow his friends with their pretty synchronised illumination. Thus an adventure in wireless communications, lighter-than-air flammable gasses versus electronics weight calculations, and code optimization began, the details of which were shared in Samy Kamkar’s 2018 Hackaday Superconference talk embedded below.

Continue reading “Samy Kamkar’s LED Balloon Network”

Glue Gun Teardown Reveals Microcontroller Mystery

[electrobob] got a Bosch GluePen cordless hot glue gun. The thing has some nice features — it heats up in fifteen seconds, and charges via USB, and is generally handy for those small and quick jobs that hot glue guns were made to perform. At first glance it seems like a huge improvement over the plug-in varieties, which seem to take forever to heat up when all you need is a quick dab of glue.

As cool as the product sounded, [bob] did what any right-minded hacker would do and opened it up to see how that sucker work and found an ATtiny24A inside. What’s most interesting is that there appears to be no temperature regulation or sensing capability, with the exception of the thermistor in the battery-charging circuit. It’s an intriguing mystery.
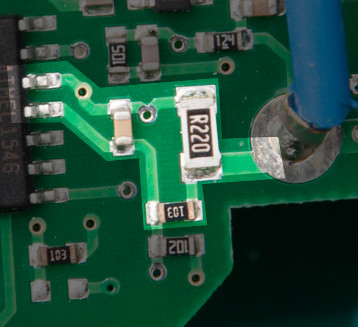
The ATtiny controls a power MOSFET that brings the heating element to “approximately 170 degrees” according to the manual. [bob] could find no temperature regulation of the hot end, which measures a steady 12 V at the gate of the transistor then entire time the glue gun is powered on.

That ATtiny24A that runs the whole thing packs 12 GPIO pins, 4 PWM channels, and 2 KB program memory. It appears a bit overpowered for a glue gun controller. [bob] found one of the Tiny’s pins connected the heating element and another to the charging circuit. Maybe a shutoff in case the battery catches fire?

Without a clear shot of the back of the board, it’s a bit of a guessing game, but eight of the twelve GPIO pins appear to be in use. Leave your theories in comments. And if you’ve got any bright ideas about what to do with the remaining four GPIO pins, have at it!

For another of [bob]’s tool hacks, check out his constant current sink we posted earlier this year.

Hacking A Sigma Lens To Work With A Canon Camera

sigma-lens-canon-camera

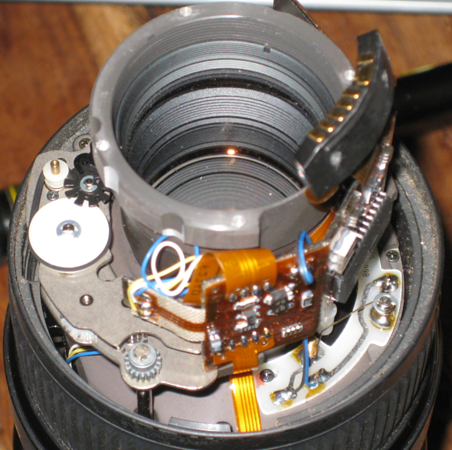
[Martin Melchior] wanted to use an older Sigma lens with his Canon camera. The problem in trying to do so is that the camera uses a different communications protocol than the lens is expecting. But if you don’t mind cracking it open and doing a little microcontroller work you’ll be using the lens in no time.

The hack uses an ATtiny24 chip, two resistors, and a capacitor. You won’t need to do any coding, but you do need to burn the firmware to the chip (you can use an Arduino if you don’t have a proper AVR programmer). There’s plenty of room for the add-on hardware inside the lens so after reassembling the enclosure you won’t even be able to tell that the unit was altered. Unfortunately it doesn’t look like [Martin] took any pictures of the lens with his added electronics, but the schematic he posted should be enough for you to get the job done yourself.

If you’re into these types of DSLR hacks you should try something extreme, like using view camera parts with your modern camera.

Programmable Computer Built From A Humble ATtiny84

attiny84-computer

Here’s a way to play around with simple computing concepts without going too crazy with the hardware side of things. [John Eisenmann] calls it the DUO tiny. It’s a programmable computer based around the ATtiny84. He wrote the operating system himself, building in a set of commands that make it quite functional, but allow the user to manipulate or even write the programs using the four button interface. Editing and running programs (which include some games) is demonstrated in the clip after the break.

The three major components used in the system are the ATtiny84, and EEPROM chip with 64 KB capacity to hold the programs, and the 102×64 pixel LCD screen seen above. The project began on a breadboard, but as he brought each part into being it transitioned to a strip-board prototype and finally this fab-house version.

Continue reading “Programmable Computer Built From A Humble ATtiny84”

LED Marquee Uses Discrete Through-hole Lights

through-hole-led-marquee

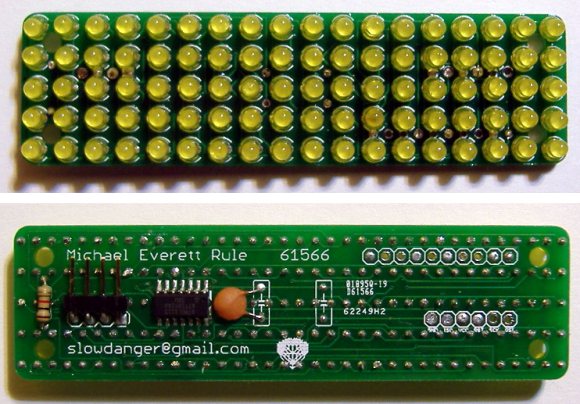
[Michael] built his own LED marquee using individual diodes. Despite his choice to forego the 8×8 or 5×7 modules we often see in these projects, his decision to spin a dedicated PCB saved him a lot of trouble during assembly. Sure, he still had to solder 180 leads on the 9×18 grid of lights, but at least he didn’t have to deal with wiring up the complex display layout.

The chip driving the display is an ATtiny24. You can see that it’s an SMD package and spans one row of the through hole LED footprint. There are way too few pins to drive a multiplexed display of this size. Instead of adding a separate driver IC he decided to design the display to use Charlieplexing. We didn’t see a schematic for the project, but judging from the board images all of the I/O pins are used by either the display itself, or the serial connection provided by that right angle pin header.

POV Wheels For A Longboard

If you don’t mind working with really small components this POV wheel project for a longboard will certainly attract some attention.

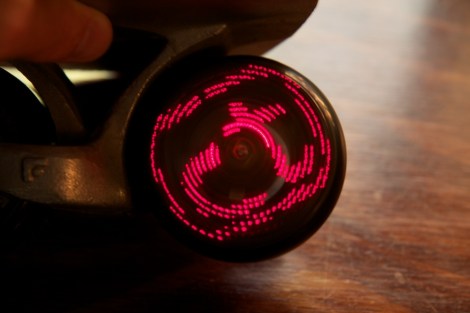
The name of the game here is small and cheap. Small because the wheels are only 72mm in diameter (about 2.8 inches). Cheap because [Ch00f] wants to produce and sell them locally. He went with an ATtiny24 microcontroller driving fifteen LEDs. Obviously this will present a problem as the uC uses a 14-pin SOIC package and that’s just not enough I/O to drive the LEDs individually. Add to that the issue of storing patterns to be displayed and you start to run out of program memory very quickly.

But obvious he pulled it off. The image above shows the wheel displaying the CT logo (for ch00ftech.com) and there are several other patterns shown off in the clip after the break. The LEDs are multiplexed, but the wheel spins fast enough that this turns out to be okay. The rotation is measured by an IR reflectance sensor aimed at the stationary axle. A CR2032 powers the device, with some counterweights added to keep the wheel balanced.

Our only concern is the fragility of the exposed electronics. But if you hit the right BOM price we guess you can just replace the board as needed.

Continue reading “POV Wheels For A Longboard”

4″ Seven Segment Displays Make A Fine Scoreboard

[Blark] took a few parts and turned them into a simple scoreboard. The centerpiece of the build is a set of 4″ seven-segment displays. With those in hand it was just a matter of choosing a controller to feed them data, and developing a user interface.

He seems to have had some issues as he mentions having blown up two PIC chips while soldering. He transitioned to an ATtiny24 chip and everything seems to work quite well now. The user interface depends on two buttons, each increments the score for one half of the display and pushing both at once zeros the game score. The displays use shift registers to store data so they’re quite easy to control with AVR chips. Check out the demo video after the break.

The only problem here is that someone needs to be on the sidelines to increment the score. We’ve seen some more intricate designs that let you use a remote control or even a smart phone.

Continue reading “4″ Seven Segment Displays Make A Fine Scoreboard”