Electric Skillet Reflow Soldering Guide

skillet-reflow-tutorial

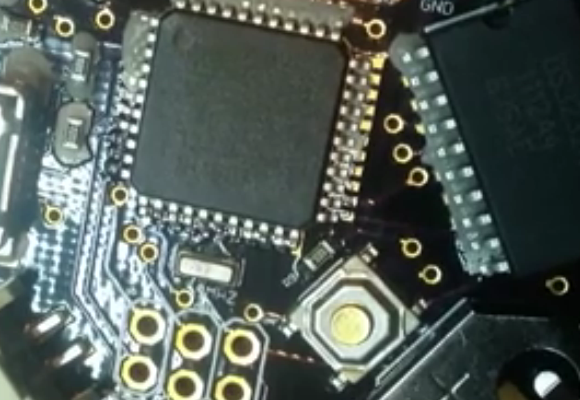
It’s no secret that we’re bizarrely drawn to macro videos showing solder paste during the reflow process. This electric skillet reflow guide provides the fix we’ve been jonesin’ for while including some helpful tips for first-timers and veterans alike. Not sure what we’re talking about? Look at the grey paste at the top of this image. As it heats up it’s drawn under each component as seen in the lower half of the image.

This particular guide is aimed at one-off assembly so a solder paste stencil is not used (we learned a lot about those earlier in the month). It instead uses the painstaking toothpick application technique. It takes time but the upside is that once you get the hang of it you’ll apply the perfect amount of solder each time. After placing all of the components [Count Spicy] carefully transfers the board to an electric skillet, covers it with the glass lid (so he can see what’s going on), and sets the temperature just above the solder’s specified melting point.

Since the skillet is cheap and easy to find you really just have to order the solder paste to get into this type of assembly. Our only gripe is that you can’t really follow a temperature profile with this rig. For that you need to move up to some PID controlled hardware.

Continue reading “Electric Skillet Reflow Soldering Guide”

Skillet Reflow Controller

Using an electric skillet to reflow surface mount circuit boards is a popular alternate use for those kitchen appliances. The real trick is monitoring and controlling the temperature. [Mechatronics Guy] built his own skillet temperature controller using a thermistor, a solid state relay, and an Arduino.

He was inspired by [Ladyada’s] work which used a servo to adjust the temperature dial on the skillet’s power supply. This started by attaching the thermistor to the bottom of the skillet using JB weld. since this area will be heating up he also attached a terminal block for connecting the feed wires as the heat would melt any solder joints. Those wires travel back to a control box housing the Arduino and solid state relay. To gain finer control over the heating element the relay is switched on and off, resulting in low-frequency Pulse Width Modulation, which should help maintain a consistent temperature better than just turning the temperature dial on the cord.

Pair this up with the vacuum tweezers hack and you’re on your way to a surface mount assembly line. If you want to see this process in action check out this post. It goes from stenciling, to populating, to reflowing in a toaster oven.

[Thanks Rob]