Lego Machine Predicts Future Eclipses

Hidden behind the white face plates of this machine are racks of gears that make up a replica of one of the oldest known mechanical computers. This is a working model of the Antikythera mechanism made from Lego pieces. In the video, which you absolutely can’t miss after the break, The machine is disassembled into its various components. Each mechanical unit takes advantage of gear ratio combinations to perform numerous levels of mathematical functions in order to display the date and time that future celestial events will occur.

The background information on the original device reads like the script for a sequel to The Goonies. Believed to date back to 100-150 BC, the stone bronze mechanism was recovered from a shipwreck around the turn of the twentieth century. The use of x-ray analysis helped to unlock the functions and confirm the theories of its operation.

Part of what makes this so interesting is the historical connection. But the production quality of the video (which to be fair, seems to be an advertisement) really brings home how complicated this process is. Now it’s time for us to watch the video a few more times, sketching out the gearing to see that this works as they say it does.

Want more of the Antikythera mechanism? Check out the model built by [Tatyana van Vark].

Continue reading “Lego Machine Predicts Future Eclipses”

Skillet Reflow Controller

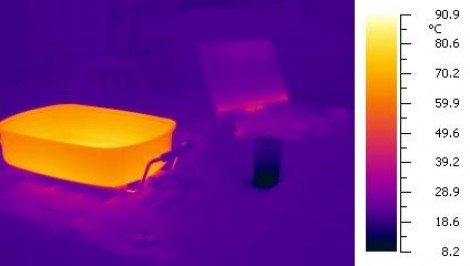
Using an electric skillet to reflow surface mount circuit boards is a popular alternate use for those kitchen appliances. The real trick is monitoring and controlling the temperature. [Mechatronics Guy] built his own skillet temperature controller using a thermistor, a solid state relay, and an Arduino.

He was inspired by [Ladyada’s] work which used a servo to adjust the temperature dial on the skillet’s power supply. This started by attaching the thermistor to the bottom of the skillet using JB weld. since this area will be heating up he also attached a terminal block for connecting the feed wires as the heat would melt any solder joints. Those wires travel back to a control box housing the Arduino and solid state relay. To gain finer control over the heating element the relay is switched on and off, resulting in low-frequency Pulse Width Modulation, which should help maintain a consistent temperature better than just turning the temperature dial on the cord.

Pair this up with the vacuum tweezers hack and you’re on your way to a surface mount assembly line. If you want to see this process in action check out this post. It goes from stenciling, to populating, to reflowing in a toaster oven.

[Thanks Rob]

ATX Psu Turned Into An Adjustable Voltage Bench Supply

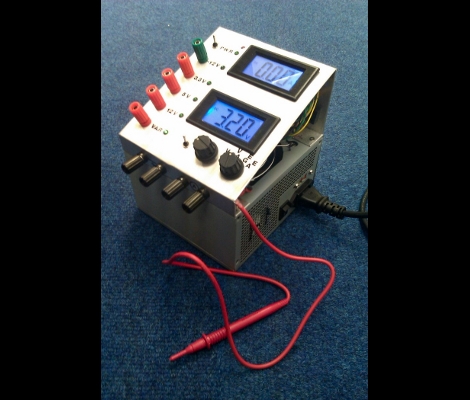
Here’s a fancy way to convert an ATX powers supply into a bench supply. [TG] didn’t just cut off the motherboard connector and add banana plugs, but improved the functionality. Right off the bat you’ll notice that he’s added a control panel. There is an Ammeter and Ohmmeter to let you know what the unit is putting out. He added an MIC29152WT adjustable voltage regulator so that he’s not limited to the fixed voltages of the psu. As a final touch he added an external voltage probe which can be used with the flick of a switch. It’s no replacement for a proper bench supply, especially since it doesn’t have adjustable current limiting, but it’s a nice improvement upon previous psu hacks.

Quick, Cheap, And Simple Vacuum Tweezers

[Ken] found that using traditional tweezers is a good way to lose tiny surface mount parts and so set out to make his own vacuum tweezers (PDF). He already had a small aquarium pump that he used as a bubbler for etching circuit boards. After opening up the case he found it was possible to connect tubing to the input of the pump to use as the source for the vacuum. The business end of the device is a syringe which he already had for applying oil in tight spaces. A file took off the sharp tip, and a small hole lined with a bit of soft tubing serves as a valve. Put the needle tip in place and plug the hole with your finger to pick it up. Works like a charm and will go well with our next feature, building your own reflow skillet.

We like [Ken’s] work. We just looked in on his copper clad enclosures yesterday.

Designing An RF Transceiver

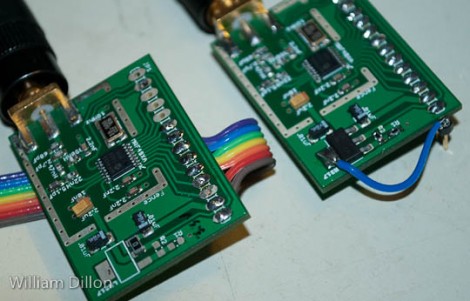
[William Dillon] is finishing up his degree. His final project as a student was to design an RF transceiver. He decided to work with the Microchip MRF49XA, which runs around $3 but will cost you $20 if you want it in a ready-to-use module. He didn’t find a lot of info on the Internet about communicating with these chips so he’s shared his design, code, and board files. If you’re ever wanted to delve into RF design this is a good primer. [William] talks about building around the example circuit from the datasheet but also includes a discussion of the calculations he made in working with the 434 MHz band, and an AVR-based library for using his module.

Part 2: Help Me Reverse Engineer An LED Light Bulb

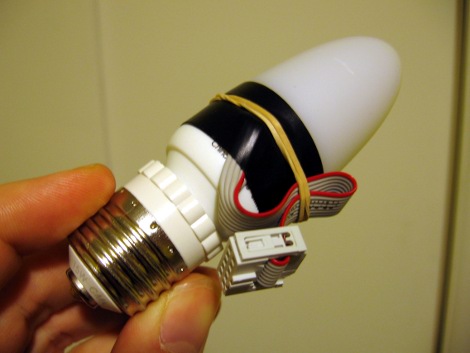
Almost a month ago I started trying to reverse engineer an inexpensive LED color changing light bulb. With your help I’ve mapped out the circuit, and taken control of the bulb. But there’s still a few mysteries in this little blinker. Join me after the break to see what I’ve done so far, peruse the schematic and source code, and to help solve the two remaining mysteries.

Continue reading “Part 2: Help Me Reverse Engineer An LED Light Bulb”

Ice Tube Clock, Meet The ChronoDot

[Alex] ramped up the precision of his timepiece by adding a ChronoDot to the Ice Tube Clock. These two items are among our favorites; the Ice Tube Clock for its old-style multi-digit display, and the ChronoDot for combining a DS3231, battery, and components into a nice small package.

There is a schematic link at the very bottom left of [Alex’s] writeup. He mentions that he depopulated the clock crystal and its capacitor pair from the board and patched into the clock input on the AVR. A 100K pull-up resistor is included in the wiring as called for in the DS3231 datasheet. Although not specifically referenced, we assume that [Alex] reprogrammed the ATmega168 clock select fuses to use an external clock signal.

Now he can sit back knowing that the clock will be within 10 seconds per year accuracy.