Lighted Fan Pull Saves You From Flailing Around In The Dark

lighted-fan-pull

Like many people, [yardleydobon] had a hard time locating his ceiling fan’s pull chain at night when his room is completely dark. Rather than continue to flail around blindly grasping for the chain, he decided to find a way to illuminate it instead.

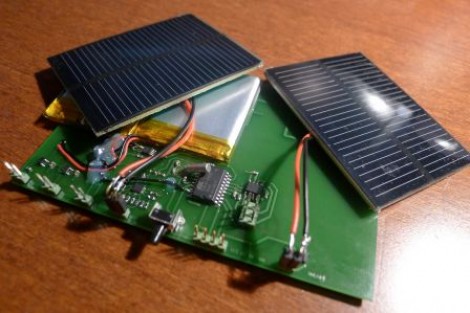
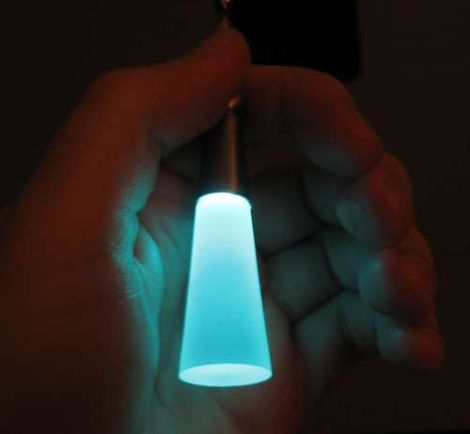
He started off by disassembling a solar garden light, retaining the solar cell, photoresistor, and batteries. After paring down the electronics to the bare essentials, he mounted them inside a plastic battery storage case which he attached to the outside of the fan’s lamp. [yardleydobon] then ran a pair of wires from the electronics box down to end of the chain, where he added an LED and a translucent pull to diffuse the light.

He admits that it’s not the nicest looking modification around, but it does the job in a pinch. He has some ideas that he may put into play if he has the time to revise the design, and we bet that many of you do as well. If so, be sure to share them in the comments.

Continue reading “Lighted Fan Pull Saves You From Flailing Around In The Dark”

Camping Light Retrofitted As A Solar Recharging Station

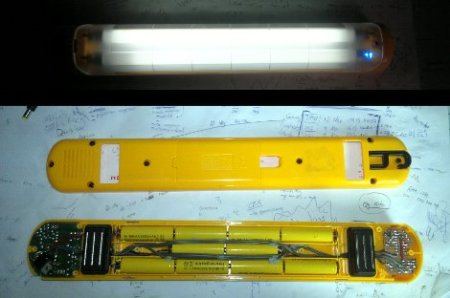
With grand plans of tenting out for several days at a music festival [Josh] needed a way recharge his portable devices. In the past he’s lugged around a 12V battery with him, but this year he wanted to make things easier. He ended retrofitting a camping light to do the job with the help of the summer sun.

The first step of the project was to source some rechargeable batteries. He toyed with the idea of Li-Ion cells but ended up going with NiMH because the charging is more forgiving and he got them at a great price. Because of the lower operating voltage (1.2V versus Alkaline’s 1.5V) he needed to squeeze two more into the lamp housing. Here you can see that he just managed to get them to fit in the wire-run area down the middle of the case.

Next comes the recharging circuit. He based his design around an ATmega44, using a voltage divider and the ADC to detect when the batteries are topped off. During the day this is connected to an external solar panel and it’s ready to charge his phone when he gets back at night.

Solar Charger For Occupy Boston

As soon as the team at Revolt Labs heard Occupy Wall Street was coming to Boston, they decided to pick up their soldering irons in support of the throngs of protestors. They came up with a Solar charging USB box to keep those cell phones and digital cameras charged.

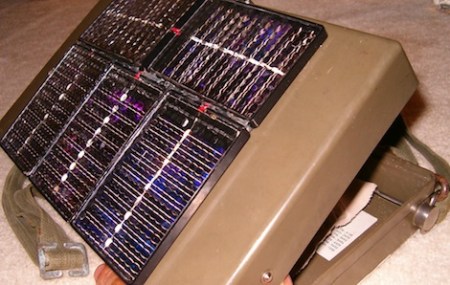
The case came direct from an Army surplus store. Originally, the box was used by the Dutch military to test the air for poison gas and signal when it was safe to remove a gas mask – hopefully not a portent of things to come.

On top of the box is five solar panels that output two watts each. A bit of breadboard holds a 7805 voltage regulator, a few caps and a diode. This regulated output goes to a USB hub and provides power for recharging.

For a cheap and easy project for our brothers without arms, we couldn’t think of a better project for the Occupy Boston tent city. Of course heating units will be needed at the Occupy protests this winter, but at least now the protesters have the means to power their communications equipment.


update: Once again, this has devolved into political argument and name calling. We, as hackaday, really couldn’t care less which party you are for or what your political beliefs are. We want to talk about the project, in this case a portable solar charger. We go to other sites to argue politics. Maybe you should try here.

Sustainability Hacks: Solar Panels Built From Old Windows And Factory Rejects

diy_solar_panels

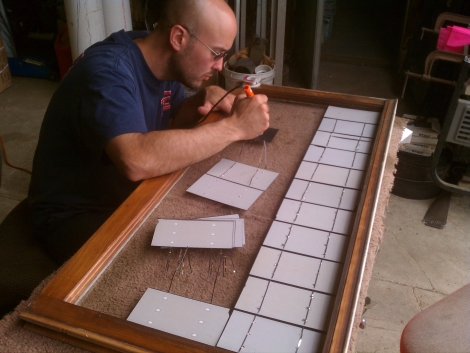
The crew over at The Tech Junkies recently took another look at solar power and thought that the pricing had come down enough for them to consider powering their entire shop via the sun. Cheaper or not, they still didn’t want to pay retail for solar panels, so they decided to build their own instead.

They scoured eBay for a bit and scored a nice batch of “production error” solar cells for about $0.25/watt, which is a great deal. After unpacking and sorting the cells, they began fitting them into a set of old window panels they had sitting around their shop. The cells were wired together using tabbing wire, and after a quick test to ensure everything was working correctly, the panel was permanently set using epoxy.

In its current state, they estimate that their panel can generate 35 watts of power, though they have a few design changes in mind to raise that number a bit. The total cost was roughly $375 for enough materials to build 9 panels, which is pretty reasonable.

Be sure to check out their blog for a quick overview of what it takes to build a solar panel if you’re thinking of putting together one of your own.

Sustainability Hacks: Solar Battery/smartphone Charger

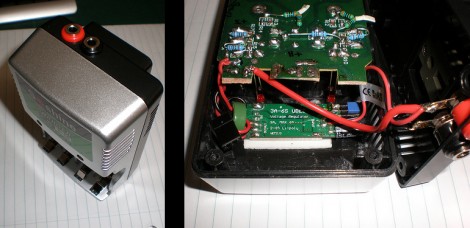
[Michael] took a battery charger meant to be connected to mains power and converted it to work with a solar panel. This was a traditional 4 cell charger which charges the batteries in pairs. He kept that functionality, but added USB charging with a special over-current feature. That’s because his Android phone has a fast and slow USB charging mode. The slow mode makes sure that it draws 500 mA or less to stay within USB specifications. But the fast mode draws more current when the phone detects that the USB connection is attached to a wall charger. [Michael] added a switch that patches a pull-up resistor to the data line, signaling to the phone that it’s okay to switch to fast charging mode.

As for the power supply itself, you can see that [Michael] snapped off the part of the circuit board that housed the original regulator. He’s added his own 5V switching regulator which offers a wide input voltage range. This is connected to two banana plug sockets which can be connected to the solar panel.

Solar-powered RepRap Prints Even When The Power Is Out

solar_powered_3d_printer_reprap

[Mark] wrote in to share a little creation that he is calling the first solar-powered 3D printer in existence. While we can’t say that we totally agree with him on that title, we will give him the benefit of the doubt that this is the first solar-powered RepRap we have seen thus far.

You might remember [Mark] from his previous exploits, but rest assured that there’s little possibility of anyone losing an eye with this one. He has taken his RepRap outdoors, and with the help of a solar panel plus a few batteries from Harbor Freight, he has the world’s first solar-powered RepRap*.

The trick behind keeping the RepRap running for such a long time with the sun as its only power source lies in the RAMPS board [Mark] uses. He has the 1.3 revision of the shield, which enables him to print objects loaded from an SD card rather than requiring a computer to be connected at all times.

So, if you happen to need the ability to print 3D objects where an extension cord cannot possibly reach, check out [Mark’s] setup and get to building!

* Maybe. Perhaps.

Continue reading “Solar-powered RepRap Prints Even When The Power Is Out”

Homebrew Weather Station Plus A Pan And Tilt Camera Rig

[Sebastian] wrote in to share his web site, where he has a bunch of different electronics projects. After looking through them, we found a pair that we thought you might find interesting.

The first project is a homebrew weather monitoring station that [Sebastian] put together. He designed a weather shield, incorporating humidity, pressure and light sensors, along with digital I/O ports for monitoring an anemometer. The entire setup is powered using solar panels, and data is relayed to his computer via an Xbee.

The second item that caught our eye was a digital camera pan and tilt rig. The system was built using a Lynxmotion pan and tilt kit, which is controlled by an Arduino. The code he provides allows him to capture very large composite images without having to spend too much time “sewing” them together. While this second project mostly consists of schematics for a base plate and pan/tilt code, it struck us as something that could be very useful for any budding photographers looking to take panoramic shots.

All of the schematics and code for his projects are available on his site, so be sure to look around – you might find something interesting!