Making Magnetic Tape From Scratch

The use of magnetic tape and other removable magnetic media is now on the wane, leading to scarcity in some cases where manufacture has ceased. Is it possible to produce new magnetic tape if you don’t happen to own a tape factory? [Nina Kallnina] took the effort to find out.

It’s probably one of those pieces of common knowledge, that magnetic media use iron oxides on their surface, which is the same as rust. But the reality is somewhat more complex, as there is more than one iron oxide. We follow [Nina] through this voyage of discovery in a Mastodon thread, as she tries first iron filings, the rust, and finally pure samples of the two iron oxides Fe3O4 and Fe2O3. She eventually achieves a working tape with a mixture of Fe2O3 and iron powder, though its performance doesn’t match manufactured tape. It turns out that there are two allotropes of Fe2O3, and she leaves us as she’s trying to make the one with better magnetic properties.

These results look promising, and while there is evidently a very long way to go before a home-made magnetic coating could replicate the exacting demands of for example a hard drive platter it’s evident that there is something in pursuing this path.

This may be the first time we’ve seen tape manufacture, but we’ve certainly seen extreme measures taken to rejuvenate old tapes.

This Packable Ham Radio Antenna Is Made From Nothing But Tape

On today’s episode of “Will It Antenna?”, [Ben Eadie (VE6SFX)] designs and tests an antenna made entirely of tape, and spoiler alert — it works pretty well.

By way of background, the basic design [Ben] uses here is known as a J-pole, a popular “my first antenna” design for amateur radio operators looking to go beyond the stock whip antenna that comes with that cheap handy-talkie you just can’t resist buying as soon as you get your license. Usually, though, hams will build their J-poles from rigid materials, copper water pipe being a typical choice. Copper has the advantage of being easily sourced, and also results in a self-supporting, weather-resistant antenna that’s easy to mount outdoors. However, copper is getting to be egregiously expensive, and a couple of meters of water pipe isn’t exactly amenable to portable operation, if that’s your jam.

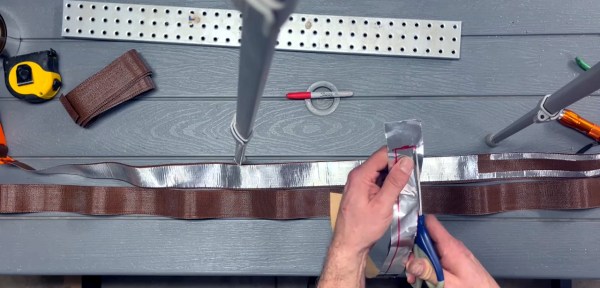
To solve those problems, [Ben] decided to keep his copper use to a minimum with a roll of copper foil tape. He doesn’t provide any specs on the tape, but it looks like it’s about 6 mm (1/4″) wide and judging by a quick Amazon search, probably goes for about $10 a roll. He starts the build with a couple of strips of plain old duck tape — we’ve already had the “duck vs. duct” argument — laid out with the sticky sides together. The copper foil is applied to the duck tape backing using dimensions from any of the J-pole calculators available online. Dimensions are critical to getting good performance from a J-pole, and this is where [Ben]’s tape design shines. Element too long? No problem, just peel up a bit and tear some off. Did you go too far and make an element too short? Easy — just stick on an extension piece of foil. Tuning the location of the feedline connection was a snap, too, with movable terminals held in place with magnets.

Once everything was tuned up, [Ben] soldered down the feed points and covered the foil with a protective layer of duck tape. The antenna performed swimmingly, and aside from costing almost nothing to build, it weighs very little, rolls up to fit in a pack for field operations, and can easily be hoisted into a tree for better coverage. Looks like we’ll be putting in an order for some copper tape and building one of these too. Continue reading “This Packable Ham Radio Antenna Is Made From Nothing But Tape”

TMD-3: Clever Hall Sensor Hack Leads To Better Turing Demo

We’ll beat everyone to the punch: yes, actually building a working Turing machine, especially one that uses a Raspberry Pi, is probably something that would have pushed [Alan Turing]’s buttons, and not in a good way. The Turing machine is, above all else, a thought experiment, an abstraction of how a mechanical computing machine could work. Building a working one seems to be missing the point.

Thankfully, [Michael Gardi] has ignored that message three times now, and with good reason: some people just grok abstract concepts better when they can lay their hands on something and manipulate it. His TMD-1 was based on 3D printed tiles with embedded magnets — arranging the tiles on a matrix containing Hall effect sensors programmed the finite state machine, with the “tape” concept represented by a strip of eight servo-controlled flip cards. While TMD-1 worked fine, it had some limitations, which [Mike] quickly remedied with TMD-2, a decidedly more complicated affair that used a Raspberry Pi, a camera, and OpenCV to read an expanded state machine with six symbols and six states, without breaking the budget on all the Hall sensors required.

TMD-3 refines the previous design, eschewing the machine vision approach and returning to the Hall effect roots of the original. But instead of using three sensors per tile, [Mike] determined that one sensor would suffice as long as he could mount the magnet at different depths within each tile. That way, the magnetic field for each symbol could be discerned by a single Hall sensor, greatly reducing complexity and expense. An LCD screen and a Raspberry Pi run a console app that shows the tape status, the state machine, and the state transitions.

[Mike] put a ton of work into this one — there are nineteen project logs — and he includes a lot of useful tips and tricks, like designing PCBs directly in KiCAD before even having a schematic. Of course, with a track record like his, we’d expect nothing less.

Continue reading “TMD-3: Clever Hall Sensor Hack Leads To Better Turing Demo”

Tape Is Very, Very Quiet

If someone stops by and asks you to help them make some noisy thing less noisy, you probably wouldn’t reach for a roll of tape. But [The Action Lab] shows some 3M tape made for exactly that purpose. For the right kind of noise, it can dampen noise caused by a surface vibrating. You can see how (and why) it works in the video below.

The tape works using a technique known as “constrained layer damping.” Obviously, the tape only works in certain applications. The video explains that it bonds a stiff surface to the vibrating surface using an elastic-like layer. The tape reduces vibrations from things like cymbals and a cookie tin. The noise reduction is both in amplitude and in the duration of the sound, making things noticeably quieter.

You sometimes see a similar material in cars to reduce vibration noise, but we aren’t sure if it uses the same technique. We’ve also seen different kinds of tape used to lower drums’ volume. Reduces the neighbor’s complaints about your practice jam sessions.

This tape reduces noise but can also reduce fatigue wear on metal and composite structures. The downside is it seems extraordinarily expensive. It also doesn’t help that most places want you to buy an entire case, which drives the price even higher. Depending on the size, you can expect to pay about $200 for each 36-yard roll of this tape. But it seems like the principle involved is simple enough that you could make your own, sort of like the video does with the aluminum plate.

Usually, when we talk about noise reduction around here, we mean the electronic kind. Or, sometimes, fungal.

Continue reading “Tape Is Very, Very Quiet”

Persistence Pays In TI-99/4A Cassette Tape Data Recovery

In the three or four decades since storing programs on audio cassettes has been relevant, a lot of irreplaceable personal computing history has been lost to the ravages of time and the sub-optimal conditions in the attics and basements where tapes have been stored. Luckily, over that time we’ve developed a lot of tools and techniques that might make it possible to recover some of these ancient treasures. But as [Noel] shows us, recovering data from cassette tapes is a tricky business.

His case study for the video below is a tape from a TI-99/4A that won’t load. A quick look in Audacity at the audio waveform seems to show the problem — an area of severely attenuated signal. Unfortunately, no amount of boosting and filtering did the trick, so [Noel] had to dig a bit deeper. It turns out that the TI tape interface standard, with its redundant data structure, was somewhat to blame for the inability to read this particular tape. As [Noel] explains, each 64-bit data record is recorded to tape twice, along with a header and a checksum. If neither record decodes correctly, then tape playback just stops.

Luckily, someone who had already run into this problem spun up a Windows program to help. CS1er — our guess would be “Ceaser” — takes WAV file input and loads each record, simply flagging the bad ones instead of just bailing out. [Noel] used the program to analyze multiple recordings of the same data and eventually got enough good records to reassemble the original program, a game called Dogfight — or was it Gogfight? Either way, he managed to get most of the data off the tape, and since it was a BASIC program, it was pretty easy to figure out the missing bytes by inspection.

[Noel]’s experience will no doubt be music to the ears of the TI aficionados out there. Of which we’ve seen plenty, from the TI-99 demoscene to running Java on one, and whatever this magnificent thing is.

Continue reading “Persistence Pays In TI-99/4A Cassette Tape Data Recovery”

Mod, Repair And Maintain Your Cassette Tapes With 3D Printed Parts

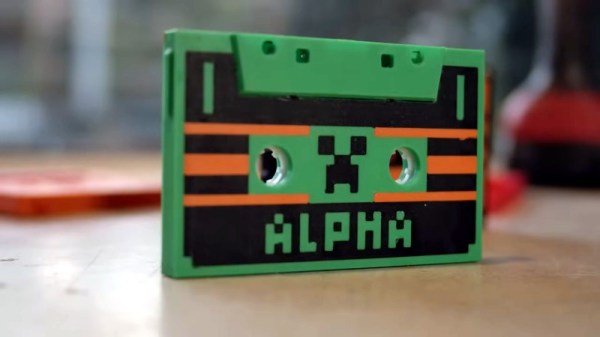
The benefit of 3D printers is that they have made it relatively easy to reproduce just about any little plastic thing you might happen to break. If you’re one of the diehards that still has a cassette collection, you might find these 3D prints from Thingiverse useful to repair and maintain any broken tapes you may have.

If you’ve ever stepped on a cassette tape, you’ll know it’s easy to crack the housing and render it unplayable. If you find yourself in this position, you can always 3D print yourself a new cassette tape housing as created by [Ehans_Makes]. The housing design only covers the outer parts of the cassette tape, and doesn’t include the reels, screws, or other components. However, it’s perfect for transplanting the guts of a damaged cassette into a new housing to make it playable once again. The creator recommends using Maxell cassette parts with the design, as it was based on a Maxell cassette shell.

For the modders and musique concrèters out there, [sveltema] designed a simple 3D printed guide for creating tape loops of various lengths. Simply adding a few of these guides to a cassette shell will let you wind a longer continuous loop of tape inside a regular cassette shell. Meanwhile, if you simply want to jazz up your next mixtape gift, consider this cosmetic reel-to-reel mod from [mschiller] that makes your cassettes look altogether more romantic.

Many called the Compact Cassette dead, and yet it continues to live on with enthusiasts. Meanwhile, if you want to learn more about keeping your cassette deck operating at its best, we’ve featured a masterclass on that very topic, too!

plantpot made from recycled audio tape filament in a 3D printer. Pot contains a succulent plant and is surrounded by tape

3D Printer Filament From Reel-to-Reel Audio Tapes

At heart, 3D printers are just machines that can melt plastic “wire” into interesting shapes. It’s well-known and oft-lamented that plastic of various sorts has been used to make all manner of household objects that might eventually end up in landfill or otherwise littering the environment. With these facts in mind and a surplus of tape, [brtv-z] decided to see if he could recycle some old reel-to-reel audio tapes into working filament for a 3D printer.

The homebrew rig to convert old audio tape into the unconventional filament

This isn’t the first time he has tried to print with unusual second-hand polymers, back in 2020 he pulled of a similar trick using VHS tape. Through experimentation, it was soon determined that seven strands of quarter-inch tape could be twisted together and fused to form a very tough-looking filament approximately 1.7 mm in diameter, which could then be fed into the unsuspecting printer.

The resulting prints are certainly different in a number of respects from using virgin filament. The material is porous, brittle and (unsurprisingly) rather rusty-looking, but it does have some interesting properties.  It retains its magnetism and it catches the light in an unusual way. The video is after the break (in Russian, but YouTube does a reasonable job of generating English captions).

Don’t have any tape handy? No worries, we’ve also covered machines that can recycle plastic waste into filament before. In fact, two of them even won the 2022 Hackaday Prize. What else could you melt down that might otherwise be thrown away?

Continue reading “3D Printer Filament From Reel-to-Reel Audio Tapes”