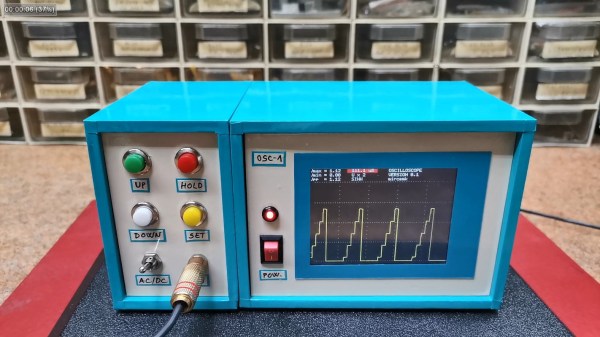
Entry-level oscilloscopes are a great way to get some low-cost instrumentation on a test bench, whether it’s for a garage lab or a schoolroom. But the cheapest ones are often cheap for a reason, and even though they work well for the price they won’t stand up to more advanced equipment. But missing features don’t have to stay missing forever, as it’s possible to augment them to get some of these features. [Tommy’s] project shows you one way to make a silk purse from a sow’s ear, at least as it relates to oscilloscopes.
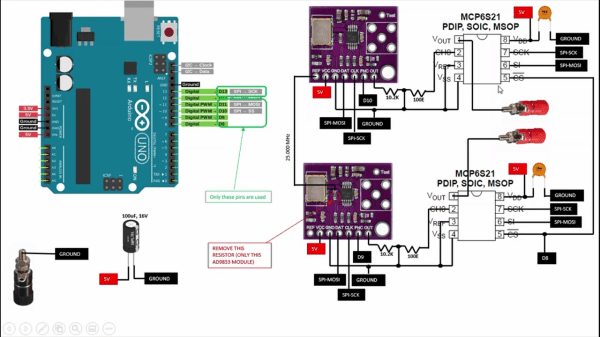
Most of the problem with these lower-cost tools is their low precision due to fewer bits of analog-digital conversion. They also tend to be quite noisy, further lowering the quality of the oscilloscope. [Tommy] is focusing his efforts on the DSO138-mini, an oscilloscope with a bandwidth of 100 kHz and an effective resolution of 10 bits. The first step is to add an anti-aliasing filter to the input, which is essentially a low-pass filter that removes high frequency components of the signal, which could cause a problem due to the lower resolution of the device. After that, digital post-processing is done on the output, which removes noise caused by the system’s power supply, among other things, and essentially acts as a second low-pass filter.
Continue reading “Low Cost Oscilloscope Gets Low Cost Upgrades”