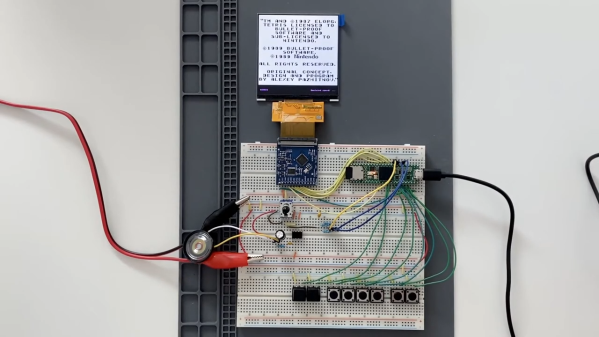
The original Nintendo Game Boy is a stout piece of hardware in a solid plastic enclosure. [Raphael Stäbler] recreated the popular handheld on a breadboard instead, in a fully-functional way, to boot.
[Raphael]’s build doesn’t rely on a real Game Boy CPU or components. Instead it’s emulated with the aid of a Teensy 4.1 microcontroller. [Raphael] coded up an emulator from scratch, instruction by instruction, something he’s documented on his own blog. The Teensy is placed on a breadboard, and hooked up with a series of 8 buttons to serve as the controls. Audio output is via a LM386 acting as a simple audio amp, hooked up with an original Game Boy speaker for more authentic sound. Display is thanks to a FT81x display driver running a small LCD. Games are loaded via an SD card formatted in the FAT32 file system.
While it’s not as ergonomic as the original Nintendo console, it works, and works well! It’s an impressive project to see the Game Boy recreated from scratch inside a powerful microcontroller. We’ve seen other projects go to similar lengths before. Video after the break.
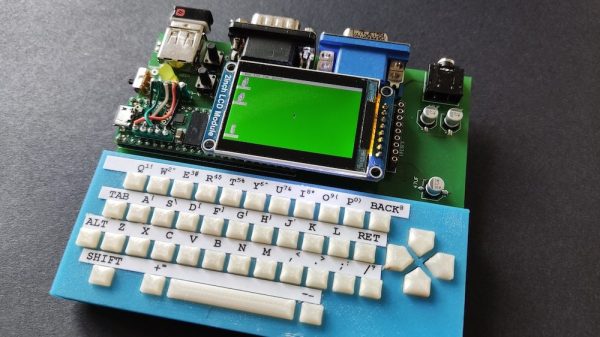
Science fiction predicted that we would one day all carry around tiny computers of great power. While smartphones are great, those predictions were more based on cuter systems that more closely approximated existing computers, with keyboards and screens. [Jean-Marc Harvengt] has built something along those very lines, and it’s called the T-COMPUTER.
This build centers around the mighty Teensy 4.1. That means it’s got an 800 MHz Cortex-M7 processor, 1 MB of RAM, and 8 MB of flash – eclipsing the specs of many retrocomputers of yesteryear. [Jean-MarcHarvengt] has paired the Teensy with a 42-key keyboard and a TFT screen, making a compact handheld computer platform. It’s also got VGA out for display on a bigger screen, along with USB and an old-school Atari joystick port! Power is via a small rechargeable lithium cell on the back, and 16-bit stereo audio is available via a standard 3.5mm jack. There’s also a little GPIO available if you need to interface with something.
It’s capable of emulating the Commodore 64 and Super Nintendo, as well as more obscure systems like the Atari Lynx. And before you ask – yes, it can run DOOM. It’s a fun little platform that would be enjoyable for retrogaming and hacking on the go. If you want to build your own, files are readily available on Github to recreate the system.
Handheld computer builds are always growing in popularity now that so much computing power can be had in a tiny devboard formats. If you’ve built your own neat little rig, be sure to let us know! Video after the break.
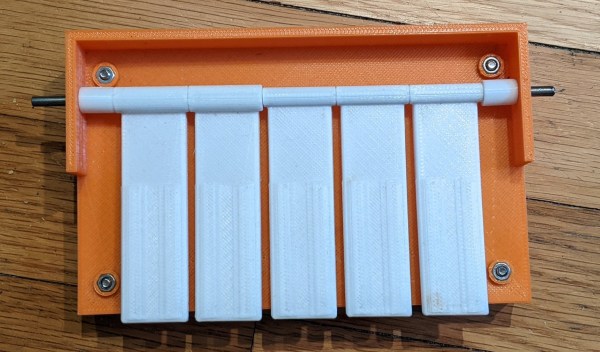
Douglas Engelbart’s 1968 “Mother of all Demos” introduced the world to a whole range of technologies we take for granted today, the most prominent being his great invention, the computer mouse. However, the MOAD also showcased things like cut-and-paste text editing, a point-and-click interface, video conferencing, and even online collaboration à la Google Docs. One of the innovations shown that for some reason didn’t stand the test of time was the chorded keyboard: an input device with five keys that can be pressed simultaneously in different combinations, the same way you would play chords on a piano.
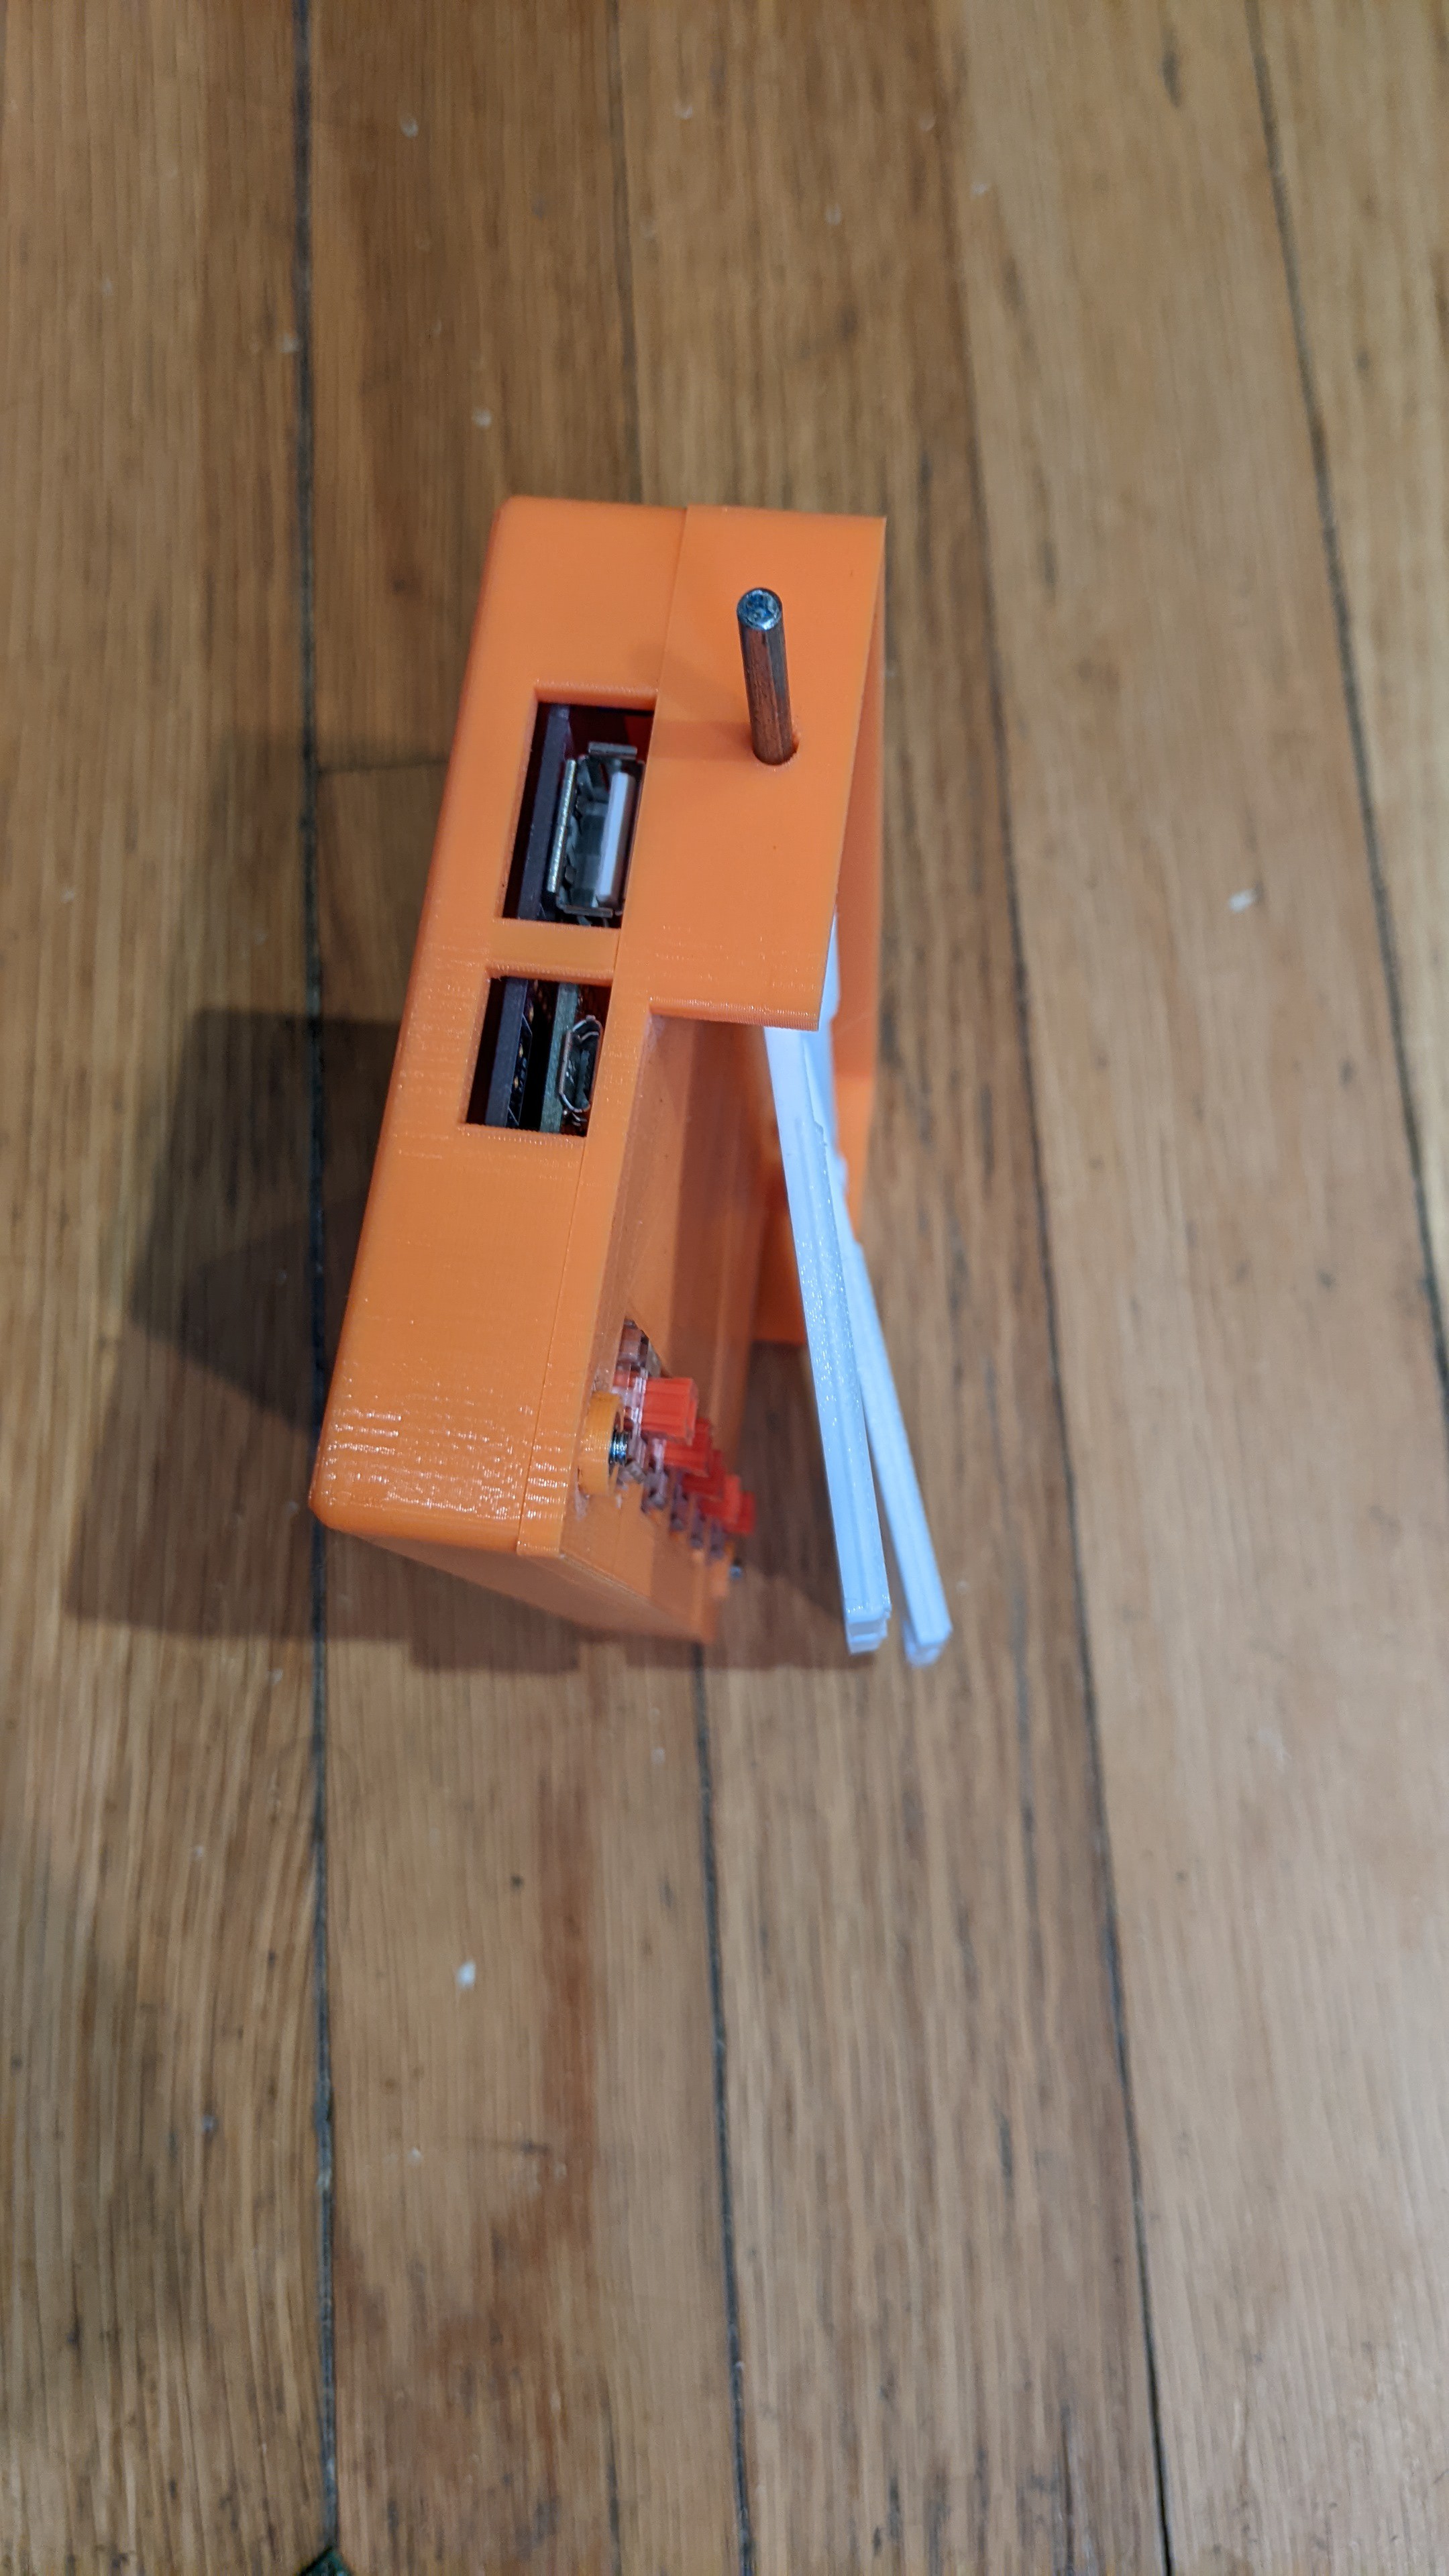
The Engelbart Keyset comes with both USB host and USB client ports
It’s important to note that the chorded keyboard was not meant to be just an additional set of five keys. Instead, Engelbart showed the clever interplay between the chorder and the mouse: the five keys under his left hand and the three mouse buttons under his right could be combined to create a full 8-bit input device. [Russ]’s device therefore includes a USB host interface to connect a USB mouse as well as a USB client interface that presents itself as a combination mouse/keyboard device to the PC.
The brains of the device are formed by a Teensy 4.1, which reads out the codes sent by the mouse as well as the five keys on top. If one or more of those keys are pressed together with a mouse button, then a keyboard code is generated corresponding to Engelbart’s original keycode mapping. We’re wondering how practical this whole setup would be in real life; it looks like something you’d have to try hands-on to find out. Fortunately, all the schematics, code and STL files are available on the project page, so with just a bit of work you can have your own MOAD setup on your desk today.
We’ve featured a couple of chorded keyboards on these pages; the Pico Chord, the Chordie and the BAT spring to mind. If you’re looking for a recap of Engelbart’s stunning presentation, check out our piece on the Mother of all Demos, 50 years on.
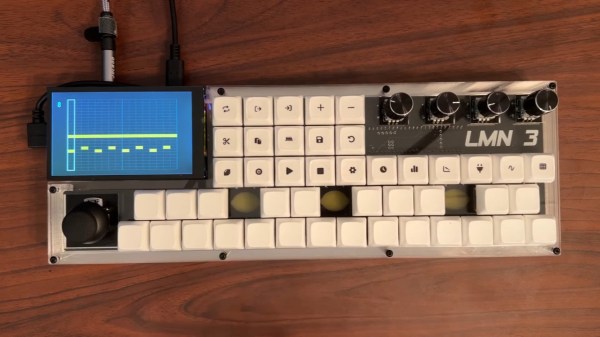
Some projects you come across simply leave you in awe when you look at the thought and the resulting amount of work that went into it, not only for the actual implementation, but everything around it. Even more so when it’s a single-developer open source project. [Stone Preston]’s synth / sampler / sequencer / DAW-in-a-box LMN-3 absolutely fits the description here, and it seems like he has set his heart on making sure everyone can built one for themselves, by providing all the design files from case down to the keycaps.
The LMN-3 (LMN as in “lemon”, not “comes before the OP“) is intended as a standalone, portable digital audio workstation, and is built around a Raspberry Pi 4 with a HyperPixel display for the user interface. The UI itself, and with it the core part of the software, was created using the Tracktion Engine, which itself uses the JUCE framework and combines your typical synthesizer, sequencer, and sampler features with the DAW part to handle recording, editing, and mixing. The remaining hardware is a custom-designed PCB with a set of function and keyboard buttons, along with a pitch bend joystick and four rotary encoders with push buttons that serve as main input handlers. Oh yes, and a Teensy board.
The UI is actually entirely controlled via MIDI commands, and custom firmware on the Teensy is translating the input events from buttons, encoders, and joystick accordingly. This essentially decouples the hardware from the software, and using a cross-platform framework underneath, you can also run the UI standalone on your computer and use any 3rd-party MIDI controller you like. Or then, as [Stone] thought really about everything, use a hardware emulator he created in addition. You could even leave out the Raspberry Pi and software altogether and turn this into a pure MIDI controller. If that sounds tempting, but you’re looking for something with more knobs and sliders instead of buttons, check out the Traktorino. And if you actually prefer a mouse as input device, there’s always something running in a browser.
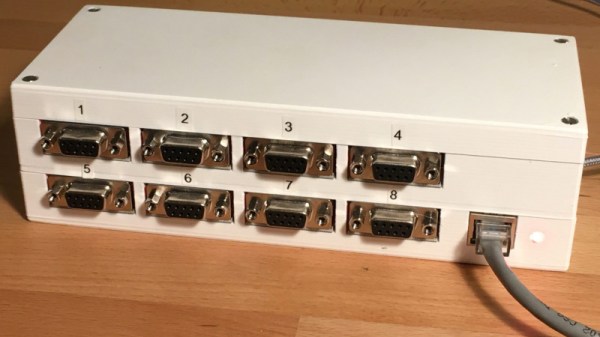
When it comes to impromptu enclosures, [Paul Wallace] is a man after our own hearts, for his serial-to-Ethernet converters allowing him to control older test equipment were housed in takeaway curry containers. Once the test equipment pile had grown it became obvious that a pile of curry containers was a bit unwieldy, even if the curry had been enjoyable, so he set about creating an all-in-one multiway serial to Ethernet box.
Reminiscent of the serial terminal access controllers that were found in dumb terminal sites back in the day, it’s a box with eight DB-9 connectors for serial ports and a single RJ45 Ethernet port. Inside is a Teensy 4.1 which packs a PHY and eight hardware serial ports, and a pile of MAX232 level converter modules. These have a small modification to wire in the CTS and RTS lines, and the whole is clothed in a custom 3D printed case.
The result is a very neat, almost commercial standard box that should save him quite a bit of space. Not everyone has eight devices to drive, so if you have just one how about using an ESP8266?
Do you need a microcontroller that runs at 1 GHz? No, probably not. But that didn’t stop [Visual Micro] from trying, and the results are pretty interesting. Not only did the plucky little chip not cook itself, it actually seemed to run fairly well; with the already powerful microcontroller getting a considerable boost in performance.
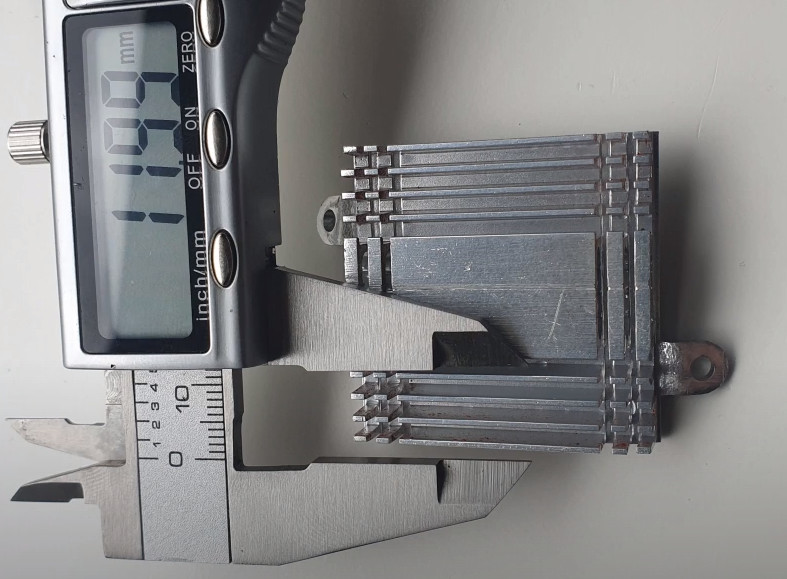
According to [Visual Micro] the Teensy 4.1, which normally has its ARM Cortex-M7 clocked at 600 MHz, can run at up to 800 MHz without any additional cooling. But beyond that, you’ll want to invite some extra surface area to the party. It’s easy enough to cut a chunk out of an old CPU/GPU cooler and stick it on with a dab of thermal compound, but of course there’s no shortage of commercially available heatsinks at this size that you could pick up cheap.
Cutting a custom heatsink.
With the heatsink installed, [Visual Micro] shows the Teensy running at around 62 °C during a benchmark. If that’s a little hot for your liking, they also experimented with an old laptop cooler which knocked the chip down to an impressive 38 °C while under load. It doesn’t look like a particularly practical setup to us, but at least the option is there.
[Visual Micro] unfortunately doesn’t go into a lot of detail about the benchmark results, but from what’s shown, it appears the overclock netted considerable gains. A chart shows that in the time it took a stock Teensy to calculate 15.2 million prime numbers, the overclocked chip managed to blow through 21.1 million. The timescale for this test is not immediately clear, but the improvement is obvious.
In prior centuries, it was common practice to tie the operation of a program to a computer’s clock speed. As computers got faster and faster, the programs tied to that slower clock speed sometimes had trouble running. To patch the issue temporarily, some computers in the early 90s included a “TURBO” button which actually slowed the computer’s clock speed down in order to help older software run without breaking in often unpredictable ways. [Ted Fried] decided that he would turn this idea on its head, though, by essentially building a TURBO button into the hardware of old computers which would greatly increase the execution speed of these computers without causing software mayhem.
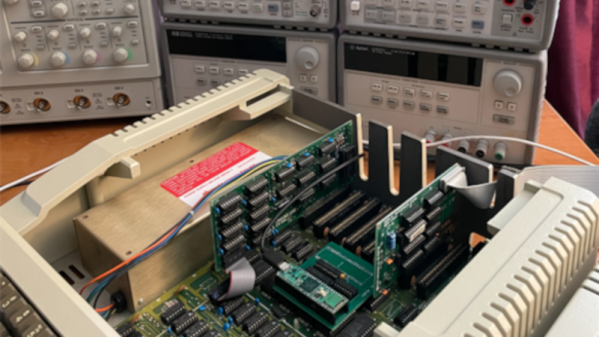
To accomplish this, he is running CPU emulators on Teensys (Teensies?), but they are configured to be a drop-in replacement for the physical CPU of several retro computers such as the Apple II, VIC-20, and Commodore 64 rather than an emulator for an entire system. It can be configured to run either in cycle-accurate mode, making it essentially identical to the computer’s original hardware, or it can be placed into an accelerated mode to take advantage of the Teensy 4.1’s 800 MHz processor, which is orders of magnitude faster than the original hardware. This allows (most of) the original hardware to still be used while running programs at wildly faster speeds without needing to worry about any programming hiccups due to the increased clock speed.
The video below demonstrates [Ted]’s creation running in an Apple II but he has several other cores for other retro computers. It’s certainly a unique way to squeeze more computing power out of these antique machines. Some Apple II computers had a 4 MHz clock which seems incredibly slow by modern standards, so the 800 MHz Teensy would have been considered wizardry by the standards of the time, but believe it or not, it’s actually necessary to go the other direction for some applications and slow this computer down to a 1 MHz crawl.