Alexa, Shoot Me Some Chocolate

[Harrison] has been busy finding the sweeter side of quarantine by building a voice-controlled, face-tracking M&M launcher. Not only does this carefully-designed candy launcher have control over the angle, direction, and velocity of its ammunition, it also locates and locks on to targets by itself.

Here comes the science: [Harrison] tricked Alexa into thinking the Raspberry Pi inside the machine is a smart TV named [Chocolate]. He just tells an Echo to increase the volume by however many candy-colored projectiles he wants launched at his face. Simply knowing the secret language isn’t enough, though. Thanks to a little face-based security, you pretty much have to be [Harrison] or his doppelgänger to get any candy.

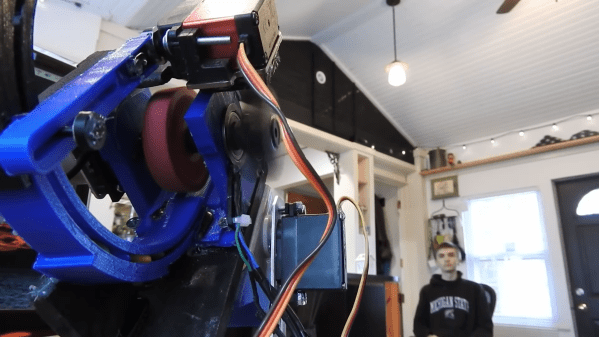
The Pi takes a picture, looks for faces, and rotates the turret base in that direction using three servos driven by Arduino Nanos. Then the Pi does facial landmark detection to find the target’s mouth hole before calculating the perfect parabola and firing. As [Harrison] notes in the excellent build video below, this machine uses a flywheel driven by a DC motor instead of being spring-loaded. M&Ms travel a short distance from the chute and hit a flexible, spinning disc that flings them like a pitching machine.

We would understand if you didn’t want your face involved in a build with Alexa. It’s okay — you can still have a voice-controlled candy cannon.

Continue reading “Alexa, Shoot Me Some Chocolate”

Free Cloud Data Logging Courtesy Of Google

Pushing all of your data into “The Cloud” sounds great, until you remember that what you’re really talking about is somebody else’s computer. That means all your hard-crunched data could potentially become inaccessible should the company running the service go under or change the rules on you; a situation we’ve unfortunately already seen play out.

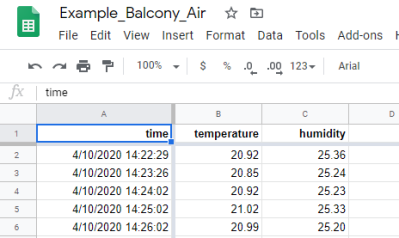
Which makes this project from [Zoltan Doczi] and [Róbert Szalóki] so appealing. Not only does it show how easy it can be to shuffle your data through the tubes and off to that big data center in the sky, but they send it to one of the few companies that seem incapable of losing market share: Google. But fear not, this isn’t some experimental sensor API that the Big G will decide it’s shutting down next Tuesday in favor of a nearly identical service with a different name. All your precious bits and bytes will be stored in one of Google’s flagship products: Sheets.

It turns out that Sheets has a “Deploy as Web App” function that will spit out a custom URL that clients can use to access the spreadsheet data. This project shows how that feature can be exploited with the help of a little Python code to push data directly into Google’s servers from the Raspberry Pi or other suitably diminutive computer.

Here they’re using a temperature and humidity sensor, but the only limitation is your imagination. As an added bonus, the chart and graph functions in Sheets can be used to make high-quality visualizations of your recorded data at no extra charge.

You might be wondering what would happen if a bunch of hackers all over the world started pushing data into Sheets every few seconds. Honestly, we don’t know. The last time we showed how you could interact with one of their services in unexpected ways, Google announced they were retiring it on the very same day. It was probably just a coincidence, but to be on the safe side, we’d recommend keeping the update frequency fairly low.

Back in 2012, before the service was even known as Google Sheets, we covered how you could do something very similar by manually assembling HTTP packets containing your data. We’d say this validates the concept for long-term data storage, but clearly the methodology has changed considerably in the intervening years. Somebody else’s computer, indeed.

A Backpack That Measures Your Heart Rate

It’s interesting to see the different form-factors that people utilize for their portable biometric sensors. We’re seeing heart rate monitors and other biometric sensors integrated into watches, earbuds, headbands, sports bras, and all sorts of other garments and accessories. [Gabi] took an intriguing approach, integrating an electrocardiogram (ECG) into a backpack. This type of heart rate project is pretty popular here on Hackaday, so it was great running across [Gabi’s] design during our daily perusing for the new and exciting.

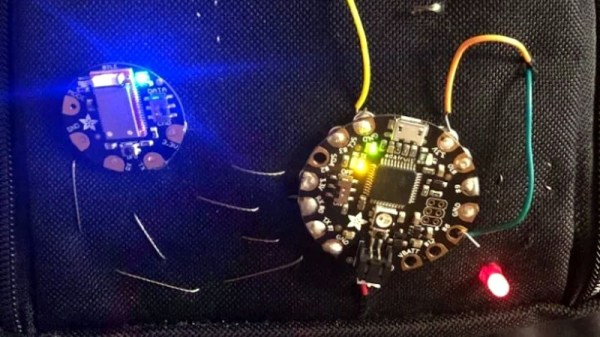
[Gabi] used an Adafruit FLORA, a BLE module, an ECG sensor from Bitalino, a few other ancillary components, and, of course, a backpack. We appreciate that she walked us through the list of stumblingblocks she came across and how she got around them. So much of the time in our excitement to share our projects we remove the gory details and only present the finished project when really, we learn most from all the things that didn’t work more so than the things that did. Finally, [Gabi] walks through the intricacies of the threading and the particular placement of the snap connectors to attach the circuit to the ECG electrodes. Things get pretty tricky, but luckily [Gabi] documents her project pretty meticulously with schematics, pictures, and early notice of pitfalls.

[Gabi] made sure to remind her readers that this is a prototype, not a medical device. She also brought up electrical safety. Biometric devices such as ECGs need to include a strict set of isolation circuits to prevent potential harm to the user. Fortunately, there are a few well-characterized methods to accomplish this.

So thanks for a really cool project, [Gabi], and to our readers, why not enjoy some of our other ECG projects while you’re at it?

Side-Channel Attack Turns Power Supply Into Speakers

If you work in a secure facility, the chances are pretty good that any computer there is going to be stripped to the minimum complement of peripherals. After all, the fewer parts that a computer has, the fewer things that can be turned into air-gap breaching transducers, right? So no printers, no cameras, no microphones, and certainly no speakers.

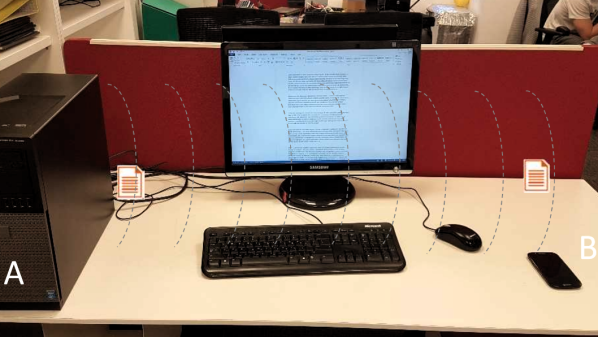
Unfortunately, deleting such peripherals does you little good when [Mordechai Guri] is able to turn a computer power supply into a speaker that can exfiltrate data from air-gapped machines. In an arXiv paper (PDF link), [Guri] describes a side-channel attack of considerable deviousness and some complexity that he calls POWER-SUPPLaY. It’s a two-pronged attack with both a transmitter and receiver exploit needed to pull it off. The transmitter malware, delivered via standard methods, runs on the air-gapped machine, and controls the workload of the CPU. These changes in power usage result in vibrations in the switch-mode power supply common to most PCs, particularly in the transformers and capacitors. The resulting audio frequency signals are picked up by a malware-infected receiver on a smartphone, presumably carried by someone into the vicinity of the air-gapped machine. The data is picked up by the phone’s microphone, buffered, and exfiltrated to the attacker at a later time.

Yes, it’s complicated, requiring two exploits to install all the pieces, but under the right conditions it could be feasible. And who’s to say that the receiver malware couldn’t be replaced with the old potato chip bag exploit? Either way, we’re glad [Mordechai] and his fellow security researchers are out there finding the weak spots and challenging assumptions of what’s safe and what’s vulnerable.

Continue reading “Side-Channel Attack Turns Power Supply Into Speakers”

Open Source Pick And Place Has A $450 BOM Cost

Give your grizzled and cramped hands a break from stuffing boards with surface mount components. This is the job of pick and place machine, and over the years these tools of the trade for Printed Circuit Board Assembly (PCBA) have gotten closer to reality for the home shop; with some models diving below the $10,000 mark. But if you’re not doing it professionally, those are still unobtanium.

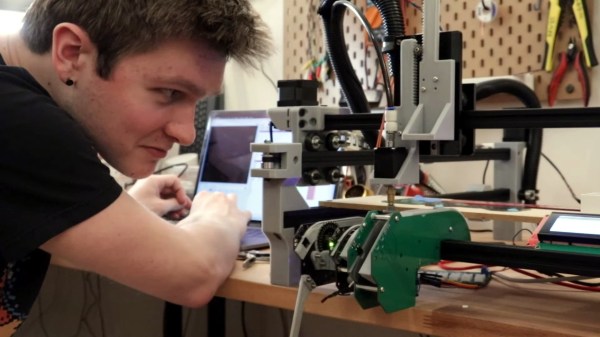
The cost of this one, on the other hand, could be explained away as a project in itself. You’re not buying a $450 shop tool, you’re purchasing materials to chase the fever dream of building an open source pick and place machine. There are two major parts here, an X/Y/Z machine tool that can also rotate the vacuum-based parts picker, and the feeders that reel out components to be placed. All of this is working, but there’s still a long road to travel before it becomes a set and forget machine.

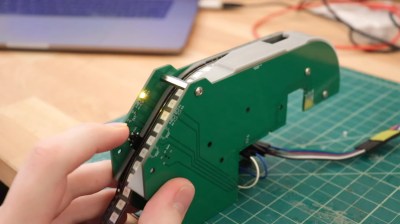
The rubber hits the road in two ways with pick and place machines: the feeders, and the optical placement. The feeders are where [Stephen Hawes] has done a ton of work, all shown in his video series that began back in January. The stackup of PCBs and 3D-prints hangs on the front rail of the gantry assembly, is adjustable for tape widths, and uses an interesting PCB encoder wheel and worm-gear for fine-tuning the feed. [Stephen’s] main controller board, a RAMPS shield for and Arduino Mega that runs a customized version of Marlin, can work with up to 32 of these feeders.

So far it doesn’t look like he’s tackled a vision system, although the Bill of Materials does include  “Downwards Camera”, confirming this is a planned feature. Vision is crucial in commercial offerings, with at least one downward camera for precise board positioning, and often an up-facing camera as well to ensure component position and orientation (if not multiple cameras for each purpose). Without these, the machine would be dead reckoning and that can lead to drift over the size of the board and the duration of the placement run as well as axial misalignment. Adding vision shouldn’t be a ground-up effort though, as [Stephen] chose to use OpenPnP to drive the machine and that project already has vision support. This will be much simpler to add when compared to the complexity of the feeders.

[Stephen] admits that much work still needs to be done and he would love to have help dialing in the performance of the feeder design, and fleshing out features on the road to perfection. Although we suspect that as in the early days of bootstrapping 3D printers, a project like this can never be truly finished. At least it’ll make his next run of LED glowties a lot easier to fabricate.

Continue reading “Open Source Pick And Place Has A $450 BOM Cost”

Teardown: Generation NEX

Today if you wanted a little gadget to sit on your shelf and let you play classic games from the early console era, you’d likely reach for the Raspberry Pi. With slick emulator front-ends like RetroPie and DIY kits available on Amazon, you don’t even need to be a technical wizard or veteran penguin wrangler to set it up. If you can follow an online tutorial, you can easily cram the last few decades of gaming into a cheap and convenient package.

But things were a bit different back in 2005. There weren’t a lot of options for playing old games on the big screen, and what was out there tended to be less than ideal. You could hack an original Xbox or gut an old laptop to make an emulation box that could comfortably blend in with your DVD player, but that wasn’t exactly in everyone’s wheelhouse. Besides, what if you had the original cartridges and just wanted to play them on a slightly more modern system?

I’m willing to bet whoever wrote this owns a katana.

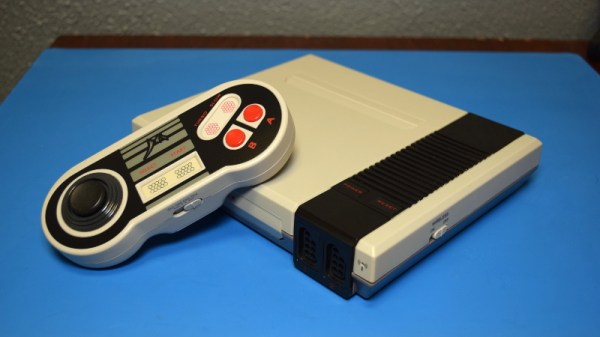
Enter Messiah, and their Generation NEX console. As you might have gathered from their ever-so-humble name, Messiah claimed their re-imagined version of the Nintendo Entertainment System would “Bring Gaming Back to Life” by playing the original cartridges with enhanced audio and visual clarity. It also featured integrated support for wireless controllers, which at the time was only just becoming the standard on contemporary consoles. According to the manufacturer, the Generation NEX used custom hardware based on the “NES algorithm” that offered nearly 100% game compatibility.

Unfortunately, the system was a complete bomb. Despite Messiah’s claims, the Generation NEX ended up being yet another “NES-on-a-chip” (NOAC) clone, and a pretty poor one at that. Reviewers at the time reported compatibility issues with many popular titles, despite the fact that they were listed as working on Messiah’s website. The touted audio and video improvements were nowhere to be found, and in fact many users claimed the original NES looked and sounded better in side-by-side comparisons.

It didn’t matter how slick the console looked or how convenient the wireless controllers were; if the games themselves didn’t play well, the system was doomed. Predictably the company folded not long after, leaving owners stuck with the over-priced and under-performing consoles. Realistically, most of them ended up in landfills. Today we’ll take a look inside a relatively rare survivor and see just what nostalgic gamers got for their money in 2005.

Continue reading “Teardown: Generation NEX”

New Teensy 4.1 Arrives With 100 Mbps Ethernet, High-Speed USB, 8 MB Flash

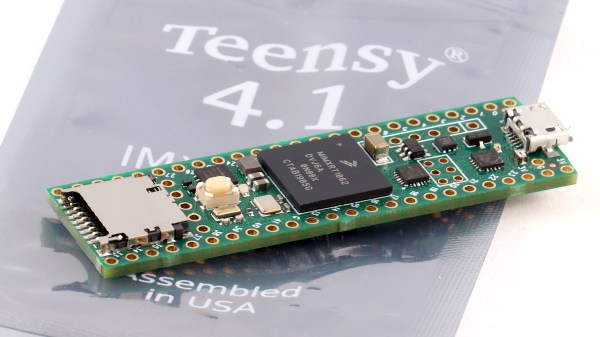
It was only last August that PJRC released Teensy 4.0. At that time, the 4.0 became the fastest microcontroller development board on the planet, a title it still holds as of this writing — or, well, not exactly. Today the Teensy 4.1 has been released, and using the same 600 MHz ARM Cortex M7 under the hood, is now also the fastest microcontroller board. What the 4.1 brings to the table is more peripherals, memory, and GPIOs. While Teensy 4.0 used the same small form factor as the 3.2, Teensy 4.1 uses the larger board size of the 3.5/3.6 to expose the extra goodies.

The now slightly older Teensy 4.0 — released on August 7th of last year — is priced at $19.95, with the new 4.1 version offered at $26.85. It seems that the 4.1 isn’t intended as a replacement for the 4.0, as they serve different segments of the market. If you’re looking for an ultra-fast affordable microcontroller board that lives up to its Teensy name, the 4.0 fits the bill. On the other hand, if you need the additional peripherals broken out and can afford the space of the larger board, the not-as-teensy-sized 4.1 is for you. How big is it? The sample board I measured was 61 x 18 mm (2.4 x 0. 7″), not counting the small protrusion of the micro-usb jack on one end.

Let’s have a look at all the fun stuff PJRC was able to pack into this space. Continue reading “New Teensy 4.1 Arrives With 100 Mbps Ethernet, High-Speed USB, 8 MB Flash”