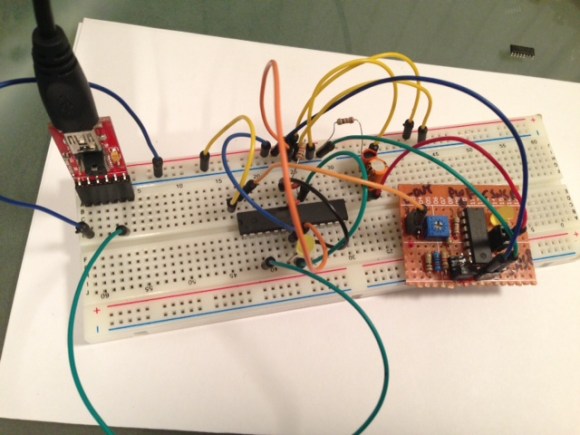
Extending The Range Of Wireless Weather Stations With Walkie Talkies

[Roel] wanted to put a wireless weather station in his greenhouse. Even though the weather station was supposed to transmit over fairly long distances, the geometry of his back yard and a few stone walls killed the radio signal even after putting a good antenna on the receiving side of his wireless weather station setup. Wanting to get his weather station working, [Roel] did the sensible thing and built a packet radio setup out of a pair of walkie talkies, greatly increasing the range of his weather station.

This build comes after [Roel] spent a great deal of time reverse engineering the wireless protocol of his Thierry Mugler weather station. With a little bit of code, [Roel] is able to get the current temperature and humidity reading into his Linux box. This system relies on the transmitter inside the weather station, so the system falls apart over any sufficiently large distance.

To increase the range of his weather station, [Roel] took his existing hardware and added a pair of inexpensive FRS walkie talkies. The build uses the hardware from his previous build to get the radio data from the weather station. This data is sent over to an ATmega88 where it’s converted to packet radio and sent over the walkie-talkie. On the receiving side, the output of a second walkie-talkie is piped into the Linux soundmodem app (link, but it’s down as of this writing) where it’s decoded. Sending the received data to gnuplot makes a very nice graph of the temperature and humidity.

[Roel] put the code for both the tx and rx sides of the build up on his build page. Very nice work that uses very inexpensive hardware.

Reverse Engineering Wireless Weather Stations

lacrosse_wireless_temp_sensor

[Fred] got a La Crosse wireless weather station as a gift and thought the LCD display was great, but he was dismayed that there was no means of extracting the temperature data for use on a computer. He thought that the modular design of the system would make it great for use in his home automation project if he could only get his hands on the data.

He tore into the base station and started looking around for easy places to get at the data he was looking for. He thought about tapping into the bus that controls the LCD in hopes of finding an easy to decode signal, but the weather station used a proprietary chip with an integrated LCD controller, making it all but impossible. Instead, he started sniffing the data coming across the wireless link, and while he didn’t quite yet know what he was seeing, it was a start.

He sniffed the signals using Audacity, and eventually found that the base station received 40-bit data bursts from each sensor. He dug further, and with the help of some data he found online, he was able to decode the data packets. The last hurdle he ran into was figuring out how the system’s CRC encoding worked. It took a bit of work but he eventually got it, and can now record data packets knowing that the data has come over the air intact.

So far, it looks like his temperature monitoring system is working quite well, though he has several improvements planned for the near future. If you have a similar unit and are interested in extending its capabilities, [Fred] has posted plenty of code on his site.

Wireless 4 Channel Temperature Monitor From Arduino Libraries

Say what you will about the Arduino platform but there certainly are a ton of libraries one can choose from. That is precisely what [Dan Julio] set out to do when building his slick looking 4 channel temperature monitor. The monitor consists of an Arduino RBBB, 2×16 character LCD and four DS18B20 1-wire digital thermometers. [Dan] also includes a bluesmirf to interface with an OS X monitoring program.  Using libraries for the Bluetooth, LCD, and temperature monitors the Arduino code is only about 200 lines, and pretty easy to follow. Check out more at [Dan]’s site.

If you’d like more temperature sensor projects check out this mug or this PIC based monitor or perhaps you’d like to keep it in the Atmel family.

Temperature Sensing Mug Means Never Burning Your Mouth Again

temp_sensing_mug

Some people tend to get awfully attached to their favorite mug. Like an old friend, the mug holds a special place in their hearts, and there’s a weird sadness when it finally gives up the ghost. Through the winter months [Ben’s] girlfriend is never without hers, and when it broke, he decided to give her a new one with some added functionality.

He built her a temperature sensing mug that uses a rather novel way of determining how hot or cold the contents are. Instead of using a thermistor to determine the drink’s temperature, he opted to use a simple diode since it is well known that a diode’s forward voltage varies with temperature. After determining the diode’s voltage range using hot and cold beverages, he hooked it up to the ADC of a PIC12F615 micro controller. The temperature is displayed via 10 LEDs, which are driven through a pair of 8-bit shift registers and buffers since his PIC did not have enough pins to control them on its own.

He had some PCBs made, and after a handful of setbacks got everything put together. He says the mug works pretty well, though the display changes a bit more slowly than he would like. He also mentions that if he builds a second version, he will be sure to select a different PIC that has enough I/O pins to do the job, as well as use a thermistor instead of a simple diode for sensing the temperature.

Continue reading to see a brief demo video [Ben] put together.

Continue reading “Temperature Sensing Mug Means Never Burning Your Mouth Again”

PIC-based Temperature Logger With Onboard Storage

pic_temp_logger

Last summer, [Rajendra Bhatt] built himself a simple PIC-based temperature monitor with data logging abilities and recently got around to sharing it on his site. The sensor is based on a PIC12F683 micro controller and measures the ambient temperature on a set interval, storing the values on the MCU’s internal EEPROM.

He used a Maxim DS18B20 temperature sensor, which communicates with the PIC over a 1-wire bus. The sensor is read based upon the interval chosen by the user, and can be configured to measure the temperature every second, every minute, or every 10 minutes. The data is stored on the aforementioned EEPROM and can be uploaded to a computer via a serial connection. The PIC has the ability to store 254 readings before the data must be cleared from the device.

It’s a great beginner project, and has plenty of room for improvement. As [Rajendra] points out, an external EEPROM could be added to expand the recording capacity, and it would be nice to have a real-time clock on hand for accurate time stamping. If we were to build one ourselves, a means of wireless data transfer would be first on our list of potential enhancements.