2014 Advent Calender Of Circuits

Every day this month and until Christmas, [vk2zay] is (has already been!) posting a simple but useful hack in his 2nd sort-of-annual “Advent Calender of Circuits” that many of you will want to be bookmarking. For those already saturated with the season of holiday hacks, don’t worry – other than being festively generous of him to tutor and demo a new hack every day, the hacks themselves have nothing to do with Christmas. Though he missed the last couple years we here at Hackaday covered his first month of hacks back in 2011 (now in playlist).

The daily hacks posted so far cover a wide variety of useful projects (leaning towards HV) for the electronics hobbyist who might not have all the fancy tools in their shop: DIY high voltage probes, a 1-hour tesla coil from junk, measuring RF power, a stud detector, how to test an  unknown transformer’s saturation, and many others. We cannot predict what will be posted the rest of the calender (the author hints to be making them up as he goes), but by now it is safe to say that they will not disappoint.

We would be stealing his thunder to cover them all, so, we will just pick our favorite for now:

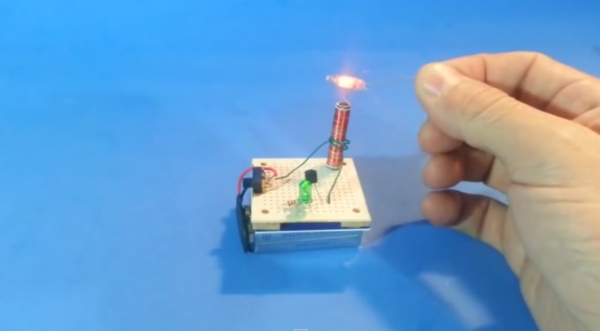
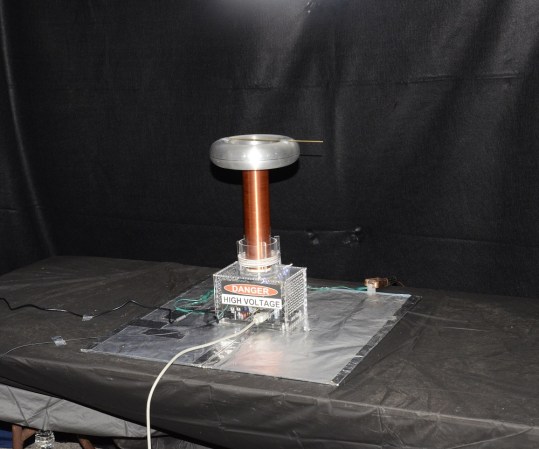
The 1-hour tesla coil is a delightful all-shortcuts-taken hack project. If one were to listen to aficionados, teslacoiling is a highly precise hobby to get into. It appears to require careful planning, much calculation, special-ordered or soviet-surplus parts, custom jigs, fine tuning, etc. [vk2zay] shows otherwise.

Every single component of the assembly is itself a hack.

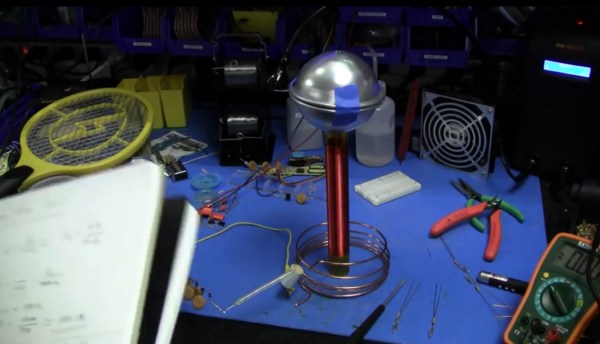
No fancy tungsten-infused grade 8 copper being water-cooled via heat pump here – the spark gap is just the bent leg of a capacitor hovering near the start of the primary winding. The power supply is a backlight inverter with a chain of Cockcroft-Walton voltage doublers. The high voltage resistor is a bunch of series-chained resistors shoved into a silicone tube. The topload is a couple cheap pie tins masking-taped together to “resemble something like a sphere.” The primary is a loose, unsupported spring of copper wire. The secondary was calculated to be whatever the height of the tube he had handy and coiled only as smoothly as a first attempt would allow. He does not even bother using wires or a switch – the circuit is completed by clipping a couple of test leads.

After all this hodgepodgery the circuit was then carefully tuned to optimize how little time it took to build (additional time used: zero). Since the frequencies do not match (1.7 vs. 2.6 mhz – 35% apart) the only thing this circuit resonates with is a hacker’s appeal for making do. Does not matter, still works. The streamers easily reach 2 inches and the author claims double that in dark lighting.

In the just 6 minute video he also manages to explain roughly what is going on theory-wise and suggest the time-effective things to considering upgrading. Almost a dozen hacks in the bag and over a dozen more to come before Christmas.

Continue reading “2014 Advent Calender Of Circuits”

Solid State Tesla Coil Plays Music

If you’ve ever wanted to build a Tesla coil but found them to be prohibitively expensive and/or complicated, look no further! [Richard] has built a solid-state Tesla coil that has a minimum of parts and is relatively easy to build as well.

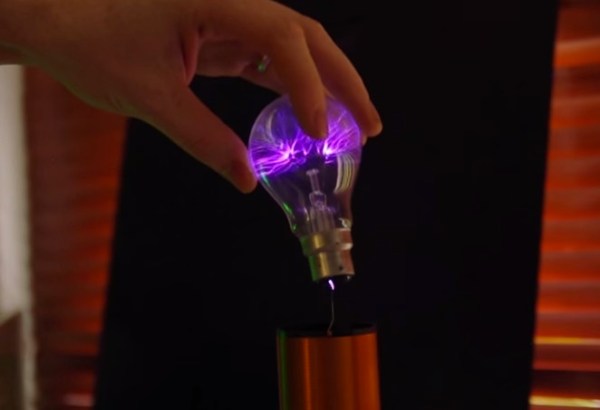
This Tesla coil is built around an air-core transformer that steps a low DC voltage up to a very high AC voltage. The core can be hand-wound or purchased as a unit. The drive circuit is where this Tesla coil built is set apart from the others. A Tesla coil generally makes use of a spark gap, but [Richard] is using the Power Pulse Modulator PWM-OCXi v2 which does the switching with transistors instead. The Tesla coil will function with one drive circuit but [Richard] notes that it is more stable with two.

The build doesn’t stop with the solid-state circuitry, though. [Richard] used an Arduino with software normally used to drive a speaker to get his Tesla coil to play music. Be sure to check out the video after the break. If you’re looking for a Tesla coil that is more Halloween-appropriate, you can take a look at this Tesla coil that shocks pumpkins!

Continue reading “Solid State Tesla Coil Plays Music”

Arc Attack Shows Off Tesla Backpack Which Is Certainly Not A Weapon

[youtube=https://www.youtube.com/watch?v=tc5SFMxTzyI&w=580]


[Steve Ward] showed us his Tesla coil project which looks very much like a video game weapon. The hand-crafted masterpiece really packs a punch, able to throw off fat white arcs or a bit less threatening bolts of purple plasma. The video above is noisy and dark, but the look at the electronics in the backpack (holy huge capacitors batman!) and the quick functional demo are both more than worth posting. Unfortunately we didn’t get audio of the gun in action so you’ll have to image those sound effects.

The rig is powered by a 5Ah lithium battery which provides the 60V that gets boosted to 400V. The giant caps already mentioned store about 2k Joules (we love it how [Steve] can’t say that 2,000 Joule figure without beaming with joy). This project is the most advanced version of the prototype we saw a few years ago in Kansas. If you want to see more of what these guys are up to head over to their homepage.

Tesla Coil Auto-Winder

tesla winder

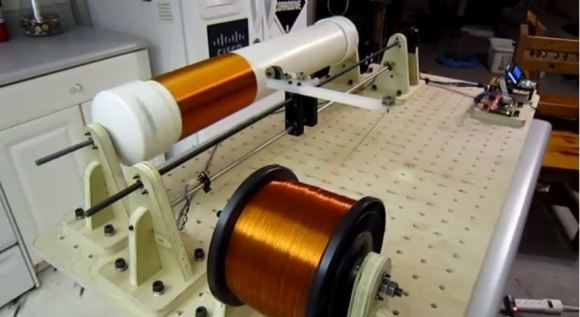
Tesla coils are awesome. But if you’ve ever built one, you know how tedious winding the secondary coil is. So [Krux] decided to build a machine to do it for him.

He’s currently working on his first Tesla coil — code-named Project Icarus — he doesn’t have all the logistics ironed out quite yet, but he’s been slowly collecting the components. What he does know is that he wants to use a 4.5″ secondary coil, using 22AWG magnet wire, meaning that’s a lot of turns! Since he’s also a member of a local hackerspace, he decided to make it a modular machine that can wind different sized coils for different sized projects.

Essentially, he’s built his own CNC lathe to accomplish this, well, missing one axis. There’s the main rotary axis, and a wire-guide that moves along it ensuring the coils are wrapped tightly without gaps. It’s an impressive build and you can tell he’s put a lot of thought into the design — He’s even got a semi-flexible 3D printed motor coupler on the wire-guide axis, to help mitigate quick acceleration! The main rotary axis is also driven by a 3D printed herringbone style gear — similar to the style used on Printrbot extruders. The rest of the build is made of plywood and pegboard — allowing for even larger coils to be wound by shuffling around the components. He’s even got a full featured command console with manual/automatic controls and an LCD giving feedback on the coil being wound!

Stick around after the break to see [Krux] explain the fascinating build, and to see a fun time-lapse of an 814-turn Tesla coil winding!

Continue reading “Tesla Coil Auto-Winder”

“Professor Kill A. Volt” Shocks Pumpkins With His Tesla Coil

jj

[JJ Dasher] is back again this year, shocking some pumpkins! (Volume warning). We featured [JJ] two years ago for his Halloween candy shocking Tesla coil. He apparently has been busy in his mad scientist laboratory doing some upgrades. This year his coil is producing 5 foot long streaming arcs!

[JJ’s] Tesla coil is a uses two microwave oven transformers as a power supply. He also uses an Asynchronous Rotary Spark Gap (ASRG). As the name implies, a rotary spark gap uses a motor to turn a rotor. At certain points in the rotation, the rotor creates a small enough gap that a high voltage spark can jump across, energizing the primary coil. This idea is similar to an automotive ignition system distributor. [Pete] gives a great example of an ASRG in this video. Most ASRG based Tesla coils use the small motor to spin up the spark gap. Varying the speed of the motor creates the characteristic “motor revving” noise heard in the final arcs of the Tesla Coil.

[JJ] made things a bit more interesting by installing a couple of fluorescent bulbs inside a pumpkin near the coil. The coil lights them easily, and they glow even brighter when the pumpkin is struck. Still not satisfied, he also donned his grounded chainmail gloves and drew the arc to himself. We always love seeing people safely taking hits from massive Tesla coils, but this definitely falls under the “don’t try this at home” banner.

Continue reading ““Professor Kill A. Volt” Shocks Pumpkins With His Tesla Coil”

OneTesla Electrifies Maker Faire NY 2013

onetesla

Throughout the maker pavilion, the siren song of a musical Tesla coil could be heard. Those who followed their ears found themselves at the oneTesla booth. OneTesla is a hobby Tesla coil, with the added twist of polyphonic MIDI input.

Started by three MIT students, oneTesla had a successful Kickstarter campaign last year. Like many kickstarters, they are a bit behind in the shipping department. They are shipping out their third run of kits to backers now. The group had a small number of oneTesla coils for sale at the show, which appeared to have sold out by midday Sunday.

The actual process of generating sound with a Tesla coil is fascinating. All Tesla coils are resonant at high frequency. In oneTesla’s case, this is 220kHz. Human hearing ends around 20kHz, so this is well beyond the range of perception. Since the coil is locked in at this frequency, the power to the coil is modulated at the desired sound frequency. Playing an A note for example, would mean modulating the coil at 440Hz.

Continue reading “OneTesla Electrifies Maker Faire NY 2013”

Building The Electronics For A Tesla Coil… And Watercooling Them

A few years ago [Patrick] was offered the Tesla coil of a friend of a friend. This was an opportunity too good for him to pass up.

He then began the creation of an Off-Line Tesla Coil (OLTC), where no supply transformer is used. The incoming mains supply is rectified and directly fed into the tank capacitor.

[Patrick] therefore had to build a huge capacitor bank and more importantly his own primary coil, made with a 1.6mm (0.064″) copper sheet to handle the immense current involved. Air cooling the electronics was sufficient until he started using his three phase input supply. As more power involves more heat, a waterblock was designed to cool the main transistor.

Patrick’s write-up is very detailed and worth the read. Once you’re finished with it, we advise you to browse through his website, where a lot more cool projects are described.