Tesla Coil Auto-Winder

tesla winder

Tesla coils are awesome. But if you’ve ever built one, you know how tedious winding the secondary coil is. So [Krux] decided to build a machine to do it for him.

He’s currently working on his first Tesla coil — code-named Project Icarus — he doesn’t have all the logistics ironed out quite yet, but he’s been slowly collecting the components. What he does know is that he wants to use a 4.5″ secondary coil, using 22AWG magnet wire, meaning that’s a lot of turns! Since he’s also a member of a local hackerspace, he decided to make it a modular machine that can wind different sized coils for different sized projects.

Essentially, he’s built his own CNC lathe to accomplish this, well, missing one axis. There’s the main rotary axis, and a wire-guide that moves along it ensuring the coils are wrapped tightly without gaps. It’s an impressive build and you can tell he’s put a lot of thought into the design — He’s even got a semi-flexible 3D printed motor coupler on the wire-guide axis, to help mitigate quick acceleration! The main rotary axis is also driven by a 3D printed herringbone style gear — similar to the style used on Printrbot extruders. The rest of the build is made of plywood and pegboard — allowing for even larger coils to be wound by shuffling around the components. He’s even got a full featured command console with manual/automatic controls and an LCD giving feedback on the coil being wound!

Stick around after the break to see [Krux] explain the fascinating build, and to see a fun time-lapse of an 814-turn Tesla coil winding!

Continue reading “Tesla Coil Auto-Winder”

The 8 Bit Harmonica Blows In From Japan

8bit-harmonica

From [Basami Sentaku] in Japan comes this 8bit harmonica. [Basami] must remember those golden days of playing Famicom (or Nintendo Entertainment System for non-Japanese players). As the systems aged, the contacts would spread. In the case of the NES, this would often mean the infamous blinking red power light. The solution for millions of players was simple. Take the cartridge out, blow on it, say a few incantations, and try again. In retrospect, blowing on the cartridges probably did more harm than good, but it seemed like a good idea at the time. We’d always assumed that the Famicom, being a top loading design, was immune from the issues that plagued the horizontal slot on the NES. Either [Basami] spent some time overseas, or he too took to tooting his own cartridge.

Blowing into cartridges has inspired a few crafty souls to stuff real harmonicas into cartridge cases. [Basami] took a more electronic route. A row of 8 microphones picks up the players breath sound. Each microphone is used to trigger a specific note. The katakana in the video shows the traditional Solfège musical scale: do, re, mi, fa, so, la ti, do. A microcontroller monitors the signal from each microphone and determines which one is being triggered. The actual sound is created by a Yamaha YMZ294. The ‘294 is an 18 pin variant of the venerable General Instrument AY-3-8910, a chip long associated with video game music and sound effects. While we’re not convinced that the rendition of Super Mario Bros’ water theme played in the video wasn’t pre-recorded, we are reasonably sure that the hardware is capable of doing everything the video shows.

Continue reading “The 8 Bit Harmonica Blows In From Japan”

FaBrickation: Combining Lego And 3D Printing

faBrickation

While 3D printing gives you the ability to fabricate completely custom parts, it does have some drawbacks. One issue is the time and cost of printing large volumes. Often these structures are simple, and do not require completely custom design.

This is where the faBrickation system comes in. It allows you to combine 3D printed parts with off the shelf LEGO bricks. The CAD tool that lets you ‘Legofy’ a design. It creates directions on how to assemble the LEGO parts, and exports STL files for the parts to be 3D printed. These custom bricks snap into the LEGO structure.

In their demo, a head mounted display is built in 67 minutes. The same design would have taken over 14 hours to 3D print. As the design is changed, LEGO blocks are added and removed seamlessly.

Unfortunately, the tool doesn’t appear to be open source. It will appear for the ACM CHI Conference on Human Factors in Computing Systems, so hopefully we will see more in the future. Until then, you can watch the demo after the break.

Continue reading “FaBrickation: Combining Lego And 3D Printing”

Hackaday Visits The Clark Magnet High School

school

Thought Hackaday’s trip to LA was all about hackerspaces, parties, and rummaging through piles of awesome junk? Nope. We’re also tasked with some community outreach that brought us to the Clark Magnet High School in Glendale, CA.

This isn’t your usual high school. Each year, it accepts around 300 new freshmen (grade 9) from the other high schools in the Glendale district. Selection is done through a lottery system, ensuring it’s not just the kids “on the good side of the tracks” or whose parents are active in the PTA that are selected; about 52% of the students at Clark can be classified as at or below the poverty line.

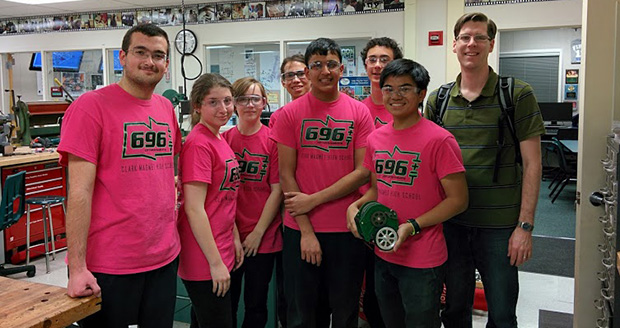
The curriculum? Instead of stopping at the classical comprehensive high school education, the students at Clark Magnet are focused primarily on the STEM fields. They’re also the home base for Team 696, a FIRST robotics team that has done very well in robotics competitions. A few mentors from JPL and IBM help the students out on their projects, and the head of Clark’s engineering program, [David Black], as well as the principal, were once students themselves.

As far as their engineering program goes, they have a very impressive setup; their workshop features a Haas minimll with a 10-tool carousel, a huge CNC wood router, more than one 3D printer, a small woodshop, a CAD classroom – in short, enough tools to make just about anything. Because Clark Magnet is in sunny California, they’ve been able to get a few grants and build a 358kW peak solar array behind the football field. It’s enough to keep the lights on, and the electric bill down, allowing them to hire an additional teacher or two.

In addition to an impressive engineering/shop class, there’s also an audio and video production suite filled with Mac Pros, cameras, mixing boards and 96 Terabytes of storage. It’s not an exaggeration to say this high school is better equipped than some colleges.

Clark also does some other very interesting stuff outside of class; they’ve launched and recovered high altitude balloons, traveled to elementary schools to play with Lego robots, and some students also have impressive home-built projects they bring in to tinker with. We saw a homebrew quadcopter and a very awesome Mecanum wheel robot that we expect to see in the Hackaday tip line shortly.

Despite how awesome the Clark engineering department is, and how capable the students are, they’ve said the FIRST robotics team has been getting a lot of flak from the rest of the maker community. Apparently some people see an amazing engineering program as a waste of resources. From our short time at Clark, we think nothing could be further from the truth. These students are quickly becoming experts at CAD design and CNC operations. They’re competent embedded programmers and well on their way to becoming awesome engineers. Students who don’t want to build a robot or program firmware get involved in project planning, marketing, and all the rest of the business that goes into running a initiative of this size. It’s a truly awesome program, and I have to say I’m a little bit jealous I didn’t graduate from Clark.

Gallery of pics and two videos below: going over the workshops at Clark and a robot project. Our fanboyism for Clark also demands we link to the (very small and very resonable) Kickstarter the FIRST robotics team is using for their 2014 budget.

Continue reading “Hackaday Visits The Clark Magnet High School”

Retrotechtacular: Salvaging A Capsized Ocean Liner

salavaging-a-capsized-ocean-liner

The scale of this salvage operation is nothing short of daunting. The SS Normandie was an ocean liner put into service in 1935 and capable of carrying 1,972 people across the Atlantic Ocean. The ship is still the fastest turbo-electric-propelled passenger vessel ever built, so it’s no surprise that it was seized by the US Navy during World War II for conversion to a troop carrier called the USS Lafayette. But in 1942, during retrofit operations, the vessel caught fire and capsized. The topic of today’s Retrotectacular is the remarkable salvage operation that righted the ship. Unfortunately, it was subsequently scrapped as bringing it into service was going to be too costly. Lucky for us the US Navy documented the salvage operation which makes for a fascinating 35-minutes of footage.

Continue reading “Retrotechtacular: Salvaging A Capsized Ocean Liner”

A Deep Dive Into NES Tetris

Tetris AI

Back in 1989, Nintendo released Tetris for the NES. This detailed article first explains the mechanics of how Tetris works, then builds an AI to play the game.

To understand the mechanics of the game, the ROM source was explored. Since the NES was based of the MOS 6502 microprocessor, this involves looking at the 6502 assembly. The article details how the blocks (called Tetriminos) are created and how they move across the screen. The linear feedback shift register used for random number generation is examined. Even details of the legal screen and demo mode are explained.

After the tour through how Tetris works, an algorithm for the AI is presented. This AI is implemented in Lua inside of the FCEUX NES/Famicom emulator. It works by evaluating all of the possible places to put each new Tetrimino, and choosing the best based on a number of criteria. The weighting for each criterion was determined by using a particle swarm optimization.

The source for both the Lua version and a Java version of the code is available with the article. Everything you need to run the AI is available for free, except the Tetris ROM. If you’re interested in how 8 bit games were built, this dissection is a great read.

[via Reddit]

3D Printed Netduino Remote Controlled Car

netduinocar

[Matt] lives in South Africa, where homes have smallish crawlspaces (some only 30cm high!) that he can’t quite squeeze himself into. Even if he could, he probably wouldn’t: they’re apparently vacation homes for the local rats. He did, however, want to explore these spaces to get a better idea what’s going on inside, so he built a Windows Phone-controlled car with a Netduino and 3D-printed parts.

Such a specialized application requires unique parts, so [Matt] designed and 3D-printed the wheels and frame from scratch. You’ve probably noticed that the wheels aren’t your typical cylinders. The terrain [Matt] faces is sand, so the spiked shape provides better grip. The body’s design required extra attention because it holds the motors, the Netduino, the motor driver, and the battery.

A Bluetooth module connects to the Netduino and allows [Matt] to drive the car with his Windows Phone, and an inexpensive 5V LED board provides some light for those dark corners. How does it see once inside the crawlspace? It looks like [Matt’s] getting to that part. His plan is to simply mount a second phone running Skype and watch the stream. Stick around after the break to see [Matt] use the car to both confuse and excite his dog.

Continue reading “3D Printed Netduino Remote Controlled Car”