Extrinsic Motivation: P = NP If You Have A Time Machine

Not all of the entries to The Hackaday Prize were serious – at least we hope not – and this one is the most entertaining of the bunch. [Eduardo] wants to put a flux capacitor in a CPU pipeline. Read that last sentence again, grab a cup of coffee, mull it over, and come back. This post will still be here.

Assuming the events portrayed in BTTF could be real in some alternate history or universe, consider the properties of a DeLorean time machine: It requires 1.21 Jiggawatts (we’re assuming this is Gigawatts from now on), has a curb weight of about three thousand pounds with the nuclear reactor and/or hovercar conversion, and is able to travel in time ± 30 years. If the power required to travel time were to scale proportionally with mass, sending a CPU register back in time would only require a Watt or so. Yes, ‘ol [Doc Brown] had it wrong with wanting to send a car back in time – sending information back is much, much easier. Now, what do you do with it?

[Eduardo] is using this to speed up pipelined CPUs. In a CPU pipeline, instructions are executed in parallel, but if one instruction depends on the output of another instruction, bad things happen CPU designers have spent long, sleepless nights figuring out how to prevent this. Basically, a MEMS flux capacitor solves all outstanding problems in CPU design. It’s brilliant, crazy, and we’re glad to see it as an entry to The Hackaday Prize.

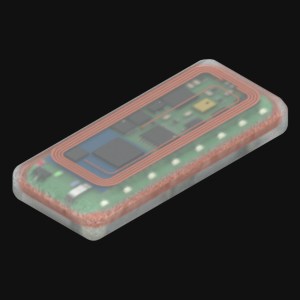
[Eduardo], though, isn’t seeing the forest for the trees. If you have a flux capacitor in your CPU, why even bother with optimizing a CPU? Just take a normal CPU, add a flux capacitor register, and have the output of a long and complex calculation write to the time traveling register. All calculations then happen instantly, your Ps and NPs are indistinguishable. All algorithms run in O(1), and the entire endeavor is a light-hearted romp for the entire family.


SpaceWrencherThis project is an official entry to The Hackaday Prize that sadly didn’t make the quarterfinal selection. It’s still a great project, and worthy of a Hackaday post on its own.

THP Semifinalist: The Medicycle

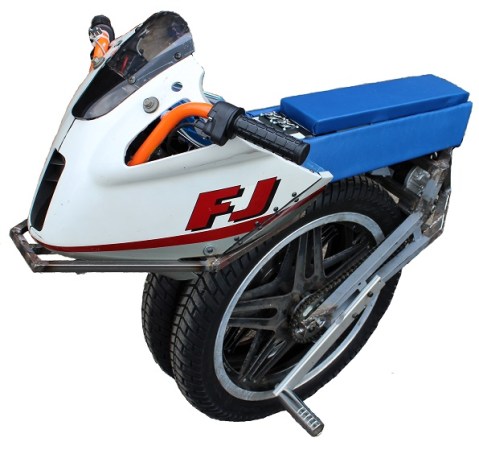
Despite a seeming lack of transportation projects for The Hackaday Prize, there are a few that made it through the great culling and into the semifinalist round. [Nick], [XenonJohn], and [DaveW]’s project is the Medicycle. It’s a vehicle that will turn heads for sure, but the guys have better things in mind than looking cool on the road. He thinks this two-tire unicycle will be useful in dispatching EMTs and other first responders, weaving in and out of traffic to get where they’re needed quickly.

First things first. The one-wheeled motorcycle actually works. It’s basically the same as a self-balancing scooter; the rider leans forward to go forward, leans back to break, and the two tires help with steering. It’s all electronic, powered by a 450W motor. It can dash around alleys, parking lots, and even gravel roadways.

The medi~ part of this cycle comes from a mobile triage unit tucked under the nose of the bike. There are sensors for measuring blood pressure and oxygen, heart rate, and ECG. This data is sent to the Medicycle rider via a monocular display tucked into the helmet and relayed via a 3G module to a physician offsite.

Whether the Medicycle will be useful to medics remains to be seen, but the guys have created an interesting means of transportation that is at least as cool as a jet ski. That’s impressive, and the total build cost of this bike itself is pretty low.

Video of the Medicycle in action below.


SpaceWrencherThe project featured in this post is a semifinalist in The Hackaday Prize.
Continue reading “THP Semifinalist: The Medicycle”

THP Semifinalist: Retro Populator, A Pick And Place Retrofit For A 3D Printer

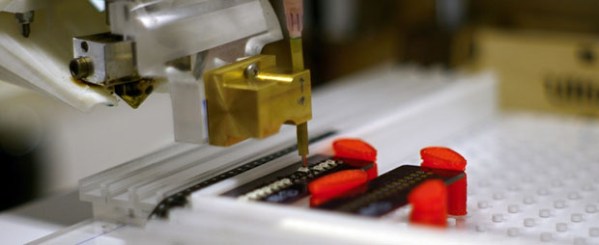
A huge theme of The Hackaday Prize entries is making assembly of electronics projects easier. This has come in the form of soldering robots, and of course pick and place machines. One of the best we’ve seen is the Retro Populator, a project by [Eric], [Charles], [Adam], and [Rob], members of the Toronto Hacklab. It’s a machine that places electronic components on a PCB with the help of a 3D printer

The Retro Populator consists of two major parts: the toolhead consists of a needle and vacuum pump for picking up those tiny surface mount parts. This is attaches to a quick mount bolted right to the extruder of a 3D printer. The fixture board attaches to the bed of a 3D printer and includes tape rails, cam locks, and locking arms for holding parts and boards down firmly.

The current version of the Retro Populator, with its acrylic base and vacuum pen, is starting to work well. The future plans include tape feeders, a ‘position confirm’ ability, and eventually part rotation. It’s a very cool device, and the ability to produce a few dozen prototypes in an hour would be a boon for hackerspaces the world over.

You can check out a few videos of the Retro Populator below.


SpaceWrencherThe project featured in this post is a semifinalist in The Hackaday Prize. 

Continue reading “THP Semifinalist: Retro Populator, A Pick And Place Retrofit For A 3D Printer”

THP Semifinalist: Theta Printer

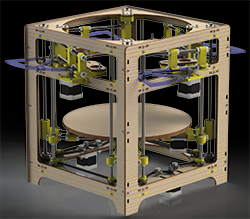
thetaThe early 3D printers of the 80s and 90s started off as cartesian bots, and this is what the RepRap project took a cue from for the earliest open source 3D printer designs. A bit later, the delta bot came on the scene, but this was merely a different way to move a toolhead around build plate. We haven’t really seen a true polar coordinate 3D printer, except for [Tyler Anderson]’s incredible Theta printer.

[Tyler]’s theta printer is designed to print in as many different materials as possible, without the reduction in build volume that comes with multiple toolheads on more traditional printers. It will be able to lay down different colors of plastic in a huge build volume, and even some of the weirder filaments out there, all in a single print.

The theta printer is based on a polar coordinate system, meaning instead of moving a hot end around in the X and Y axes, the build plate rotates in a circle, and the extruders move along the radius of the circle. This spinning, polar coordinate printer is the best way we’ve seen to put multiple extruders on a printer, and has the added bonus of being a great platform for a 3D scanner as well.

With four extruders, four motors to control the position of each extruder, a rotation motor, and the Z axis (that’s 10 steppers if you’re counting), this is very likely the greatest number of motors ever put in a 3D printer. Most electronics boards don’t support that many stepper drivers, and the one that will won’t be ready for the end of The Hackaday Prize. Right now, [Tyler] is running a fairly standard RAMPS board, running two extruders and R axes in parallel. Still, it’s good enough for a proof of concept.

One interesting aspect of [Tyler]’s design is something even he might not have realized yet: with a single bed and four extruders, he’s effectively made a 3D printer geared for high-volume production; simply by printing the same part with all the extruders, he’s able to quadruple the output of a 3D printer with the same floor space as a normal one. This may not sound like much, but when you realize Lulzbot has a bot farm producing all their parts, the Theta printer starts to look like a very, very good idea.

Videos of [Tyler]’s Theta below.


SpaceWrencherThe project featured in this post is a semifinalist in The Hackaday Prize.

Continue reading “THP Semifinalist: Theta Printer”

THP Semifinalst: Laser Solder Paste

laser

A relative latecomer to The Hackaday Prize, [AltMarcxs] has nevertheless come up with a very interesting tool for fabrication, the likes of which no one has ever seen before. It’s a rotating laser soldering paste applicator, meant to be an add-on to a CNC machine. What does it do? RIght now it looks extremely cool while being an immense time sink for [AltMarcxs], but the potential is there for being much more than that, ranging from a pick and place machine that also dispenses solder paste, to the closest thing you’ll ever get to a carbon fiber printer.

[AltMarcxs]’s build consists of two 3W laser diodes focused just beyond the tip of the syringe. The syringe dispenses solder paste, and rotating the diodes around, [Alt] is able to put a melted solder blob anywhere on a piece of perfboard. He put up a reasonably well focused video demonstrating this.

With a few homebrew pick and place machines making the semifinalist cut for The Hackaday Prize, it’s easy to see the utility of something like this: Putting a board in a machine, pressing a button, and waiting a bit for a completely populated and soldered board is a dream of the electronic hobbyist rivaled only by a cheap and easy way to make PCBs at home. [AltMarxcs]’s machine could be one step on the way to this, but there are a few other ideas he’d like to explore first.

The build also has wire feeders that allow a bit of copper wire to be soldered to the newly formed metal blob. There are plans to replace this with a composite fiber, replace the paste in the syringe with a UV resin, cut the fiber and cure the resin with the laser, and build something much better than other carbon fiber 3D printers we’ve seen before.


SpaceWrencherThe project featured in this post is a semifinalist in The Hackaday Prize. 

The Hackaday Prize: Unofficial Statistics

Hackaday Prize entries over time. You people really know how to procrastinate. Click to embiggen.

What is the Hackaday crew doing this weekend? Judging Hackaday Prize entries, of course! We need to pare down the hundreds of entries we received to 50 primo entries for the quarterfinals round. We’re going to be slammed the entire weekend, so don’t expect any news on who’s in and who’s out of the competition until Monday.

Each of us has about 15 hours of video to go through (multiply the number of entries by two minutes. It’s a lot), and of course we need to read each entry and rate them. We’re literally looking at more than a man-month of work here, and yes, we’ve all read the book.

Until then, here’s some totally unofficial statistics, courtesy of [Greg Kennedy] and his web scraping skills. The graph above shows the number of Hackday Prize entries over time, from the first announcement of the contest to the cutoff time. You people really, really like to procrastinate. The day with the most entries was August 20th, the deadline to get your project in. The day with the most validated entries (i.e. meeting the requirements of a video and four project logs) was August 19th. Needless to say, it’s been a busy week on Hackaday.io.

As a side note, the rules for THP say you must upload a video to qualify for the quarterfinals. This video may be uploaded to YouTube or Youku. Only one project uploaded a video to Youku. Now you know what to do next time to get some free publicity.

It’s highly unlikely we’re going to publish this many official stats, especially now that [Greg] has it pretty much covered. We’ll get the list of all the quarterfinalists out on Monday. Until then you can entertain yourself by watching nearly 15 hours of Hackaday Prize entry videos, all embedded below.

Continue reading “The Hackaday Prize: Unofficial Statistics”

Thumbnail that say The Hacklet

Hacklet #12 – Last Minute Hackaday Prize Submissions

12

If hackers and engineers are notorious for anything, it’s for procrastinating. Many of us wait until the absolute last-minute to get things done. The Hackaday Prize has proved to be no exception to that. Anyone watching the newest projects could see the entries fly in the last few days. Let’s take a quick look at a few.

handuino

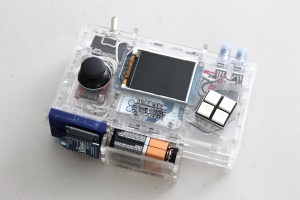
[Cyrus Tabrizi] submitted Handuino just a few short hours before the deadline. Handuino is an Arduino based human interface device. You can use it to control anything from R/C cars to 3D printers, to robots to Drones. Input is through the joystick, switches, and buttons, and output through the on-board 2.2″ LCD. Projects can interface to the Handuino via a USB port, or an XBEE radio. Nice Work [Cyrus].

bionicYoSelf

[txyz.info] wants to make us more human than human with Bionic Yourself, an implantable device to make you a bionic superhero. [txyz] plans to use sensors such as an electromagnetic field sensor, accelerometers, and Electromyography (EMG) muscle activity detectors. The idea is to not only sense the implanted wearer, but the world around them. The wearer can then use an embedded Bluetooth radio to send commands. The entire system runs on the Arduino platform, so updating your firmware will be easy. Not everyone has a charging port, so [txyz] has included wireless battery charging in the system.

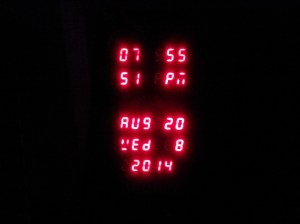
HAD-alarm-clock[Laurens Weyn] wants to wake us all up with Overtime: the internet connected alarm clock. Overtime is a Raspberry PI powered clock with a tower of 7 segment displays. The prototype displays were sourced from an old exchange rate sign. Overtime does all the normal clock things, such as display the time, and date. It even allows you to set and clear alarms. The display is incredible – there are enough pixels there to play Tetris. Overtime is currently running on an Arduino Mega, but [Laurens] plans to move to a Raspberry PI and hook into the internet for information such as Google calender events.

We’re going to cut things a bit short this week. Your work is done (for now) but for the Hackaday staff, the work is just beginning. We’re already on task, reviewing the entries, and picking which submissions will move on to the next round. Good luck to everyone who entered.

As always, See you in next week’s Hacklet. Same hack time, same hack channel, bringing you the best of Hackaday.io!