AVRphone Is A Barebones Touchscreen Cellphone

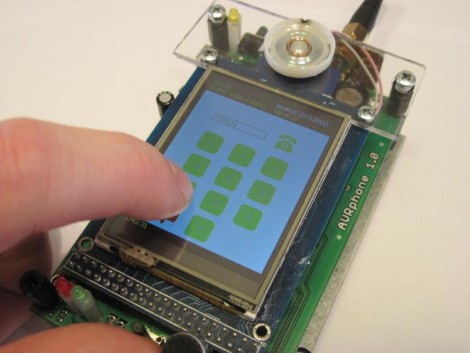
This little device is a prototype cellphone based on the ATmega128 microcontroller (translated). It boasts a 2.4″ touchscreen display which serves as the keypad, and uses the SIM100S module which takes care of the GSM radio communications. But the hardware isn’t the only attractive part. Judging from the screen shots a fair amount of time went into building the user interface too.

We seem to have a bounty of cellphone builds recently. This one is quite clean, and boasts a smaller footprint, and larger screen than this barebones example. There is a white paper available if you’re interested in digging a little deeper than the overview post. But it’s written in Czech and we didn’t see a way to provide a machine translation other than copying the text from the PDF file and pasting it into a translator.

Hackday Links: March 10, 2012

We’re throwing money at our monitor and nothing’s happening!

Sometimes we get hacks sent into our tip line that are outrageously awesome, but apart from a YouTube video we’ve got nothing else to write about. So begins the story of the flying Back to the Future DeLorean quadrocopter. Sadly, the story ends with the video as well. (If you’ve got any info, send it in!)

Fine, we’ll throw in another cool car

Mercedes covered a car with LEDs and made the James Bond’s invisible car from Die Another DayThe Mercedes video cost tens of thousands of dollars to produce, so of course there’s camera trickery; we’re just wondering how much credit Adobe After Effects gets for this build.

Microsoft touchscreen demo might be impossible

Yes, Microsoft does care about user experience. Just take a look at this video from their applied sciences group. They did user testing with touchscreens that updated every 1 millisecond, compared to the ~100ms our phones and tablets usually update. Of course the result was a better UX, but now we’re wondering how they built a touch screen that updates every millisecond? That’s a refresh rate of 1 kHz, and we’ve got no clue how they bodged that one together. We’re probably dealing with a Microsoft Surface projector/IR camera thing here, but that doesn’t answer any questions.

Edit: [Philip Rowney] sent in a tip that it could be this TI touch screen controller that can sample above 1 kHz. The only problem is this chip uses a resistive touch screen, instead of a multitouch-enabled capacitive screen. At least that solves one problem.

And now for something that can measure 1 kHz

[Paleotechnologist] posted an excellent guide to the care and feeding of an oscilloscope. Most of our readers probably already know the ins and outs of their awesome Techtronix and HP units, but that doesn’t mean the younglings won’t have to learn sooner or later.

Good idea, except the part about saving it for spring

In a moment of serendipity, [Valentin] figured out how to use touchscreens with wool gloves. The answer: rub thermal grease into the tip of the index finger. It works, and doesn’t look to be too much of a mess. We’ll remember this for next winter.

The last one didn’t have a picture, so here’s this

[Darrell] used a little bit of LaTeX and Ruby to make colored labels for his resistor collection. We’re struck with the idea of using test tubes to organize resistors. It’s cool and makes everything look all sciencey and stuff.
The Basics Of Reading Data From Resistive Touchscreens

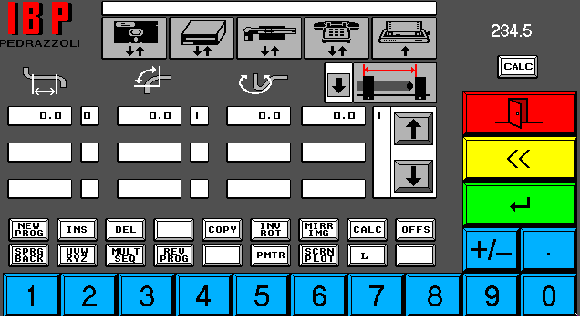
[Chris] just posted his latest tutorial which shows you how to read position data from a resistive touchscreen. These devices are fairly simple, and since they’re used in a lot of consumer electronics you can pick one up for a few bucks. This looks like it is overstock for an old Palm device.

The interface is simple, there’s just four conductors on the tab at the top of the overlay. But connecting to these is a bit of an issue since you can’t really solder directly to them. [Chris] ended up using scotch-tape to hold wires in place, with a paperclip to keep them presses against the conductors. Those conductors are used in pairs, with a positive and negative lead for the X and Y axis. To take a measurement you use I/O pins to connect voltage and ground, then read the voltage that makes it to the gound side using an ADC. This works because the point that’s being pressed on the screen acts as a variable resistor for the circuit. Data for the two axes must be read in separate operations so that the positive voltages don’t interfere with each other.

The nice thing is that once you’ve got it working with a small screen it is easily scaled up. In fact, the 23″ touchscreen used on this Android hack is just another 4-wire resistive device.

You can see a video demonstration of [Chris’] test rig embedded after the break.

Continue reading “The Basics Of Reading Data From Resistive Touchscreens”

How To Build A 23″ Android Tablet

If you’re looking to build a really big Android tablet the trick is not to start from scratch. [Peter] pulled off a 23″ Android Tablet hack using a collection of easily acquired parts, leaving the hard work up to hardware that was designed to do it.

He didn’t really build a tablet, as much as he built a big touch-screen add-on for one. He already had a couple of inexpensive tablets on hand to play around with. One of them has an HDMI out port, which let him easily push the display onto a 23″ monitor. He knew the tablet was a 4-wire resistive touchscreen, but he didn’t know if other touchscreens with the same number of connectors and be directly swapped and still work. To test this, he cracked open a second tablet device and connected its touchscreen to the first one’s hardware. When he was met with success it was time to source a couple of 23″ touchscreen overlays to test with the external monitor. As you can see in the clip after the break, it works like a charm!

[Peter] was inspired to write about his experiences after seeing the 23″ Android tablet video in our recent links post.

Continue reading “How To Build A 23″ Android Tablet”

Extending The Usability Of Touchscreens

Fanboys may be in shock from seeing duct tape applied to the screen of an iPad, but we can assure you it’s in the name of science. [Michael Knuepfel] is working on his thesis for the ITP graduate program at the Tisch School for the Arts. He managed to augment the usability of touchscreen devices by adding hardware to them.

What he’s come up with are devices for both input and output. The output devices generally rely on light and color of light displayed on the screen itself which is picked up by a light sensor. The input devices use conductive material to complete a path between your hand and your screen. This lets the capacitive sensing screen detect the presence of your hand, through the conductor. Some of his example devices include gaming controller overlays, encoder rings, and multiple stylus designs.

After the break we’ve embedded [Michael’s] teaser trailer which jumps through several demonstrations. It’s plenty to get your mind rolling, but if you want to know more you must watch his thesis presentation. It’s available as an MP4 download on this page. Just search for his name, [Michael Knuepfel] for the proper link.

Continue reading “Extending The Usability Of Touchscreens”

Converting A Scanner Into A Touchscreen

[Sprite_TM] was cleaning up his hacking workbench when he came across an all-in-one device that had seen better days. After a bit of consideration he decided to tear down the scanner portion of the device and ended up turning it into a multi-touch display.

The scanner relies on a long PCB with a line CCD sensor. This sensor is read in a similar way that information is passed along a shift register. Tell it to take a reading, and then start a clock signal to pulse out each analog value from the pixels of the sensor. In order to scan color images it uses multicolored LEDs to take different readings under different illumination.

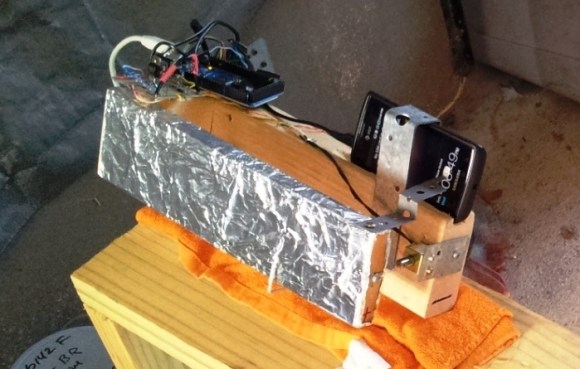
[Sprite_TM] takes advantage of this functionality to turn it into a multitouch sensor. The sensor board itself is mounted below an LCD display along with a shield with a slit in it to help filter out ambient light. Above the screen a series of LEDs shine down on the sensor. When you break the beams with your finger it casts a series of shadows which are picked up by the sensor and processed in software. Watch the clip after the break to see it for yourself. It has no problem detecting and tracking multiple contact points.

Continue reading “Converting A Scanner Into A Touchscreen”