Illustrated Kristina with an IBM Model M keyboard floating between her hands.

Keebin’ With Kristina: The One With The Music Typewriter

This edition’s community build comes from the Yes They Could, But Should They Have? file. Well, I ultimately say yes, this is intriguing. Redditor [dj_edit] looked at the venerable Model M and thought, this buckling-spring masterpiece can yet be improved upon. Yeah! Well, to each their own. I must say that it does sound great, especially with the solenoid feedback enabled via rotary encoder. Just check out the typing test.

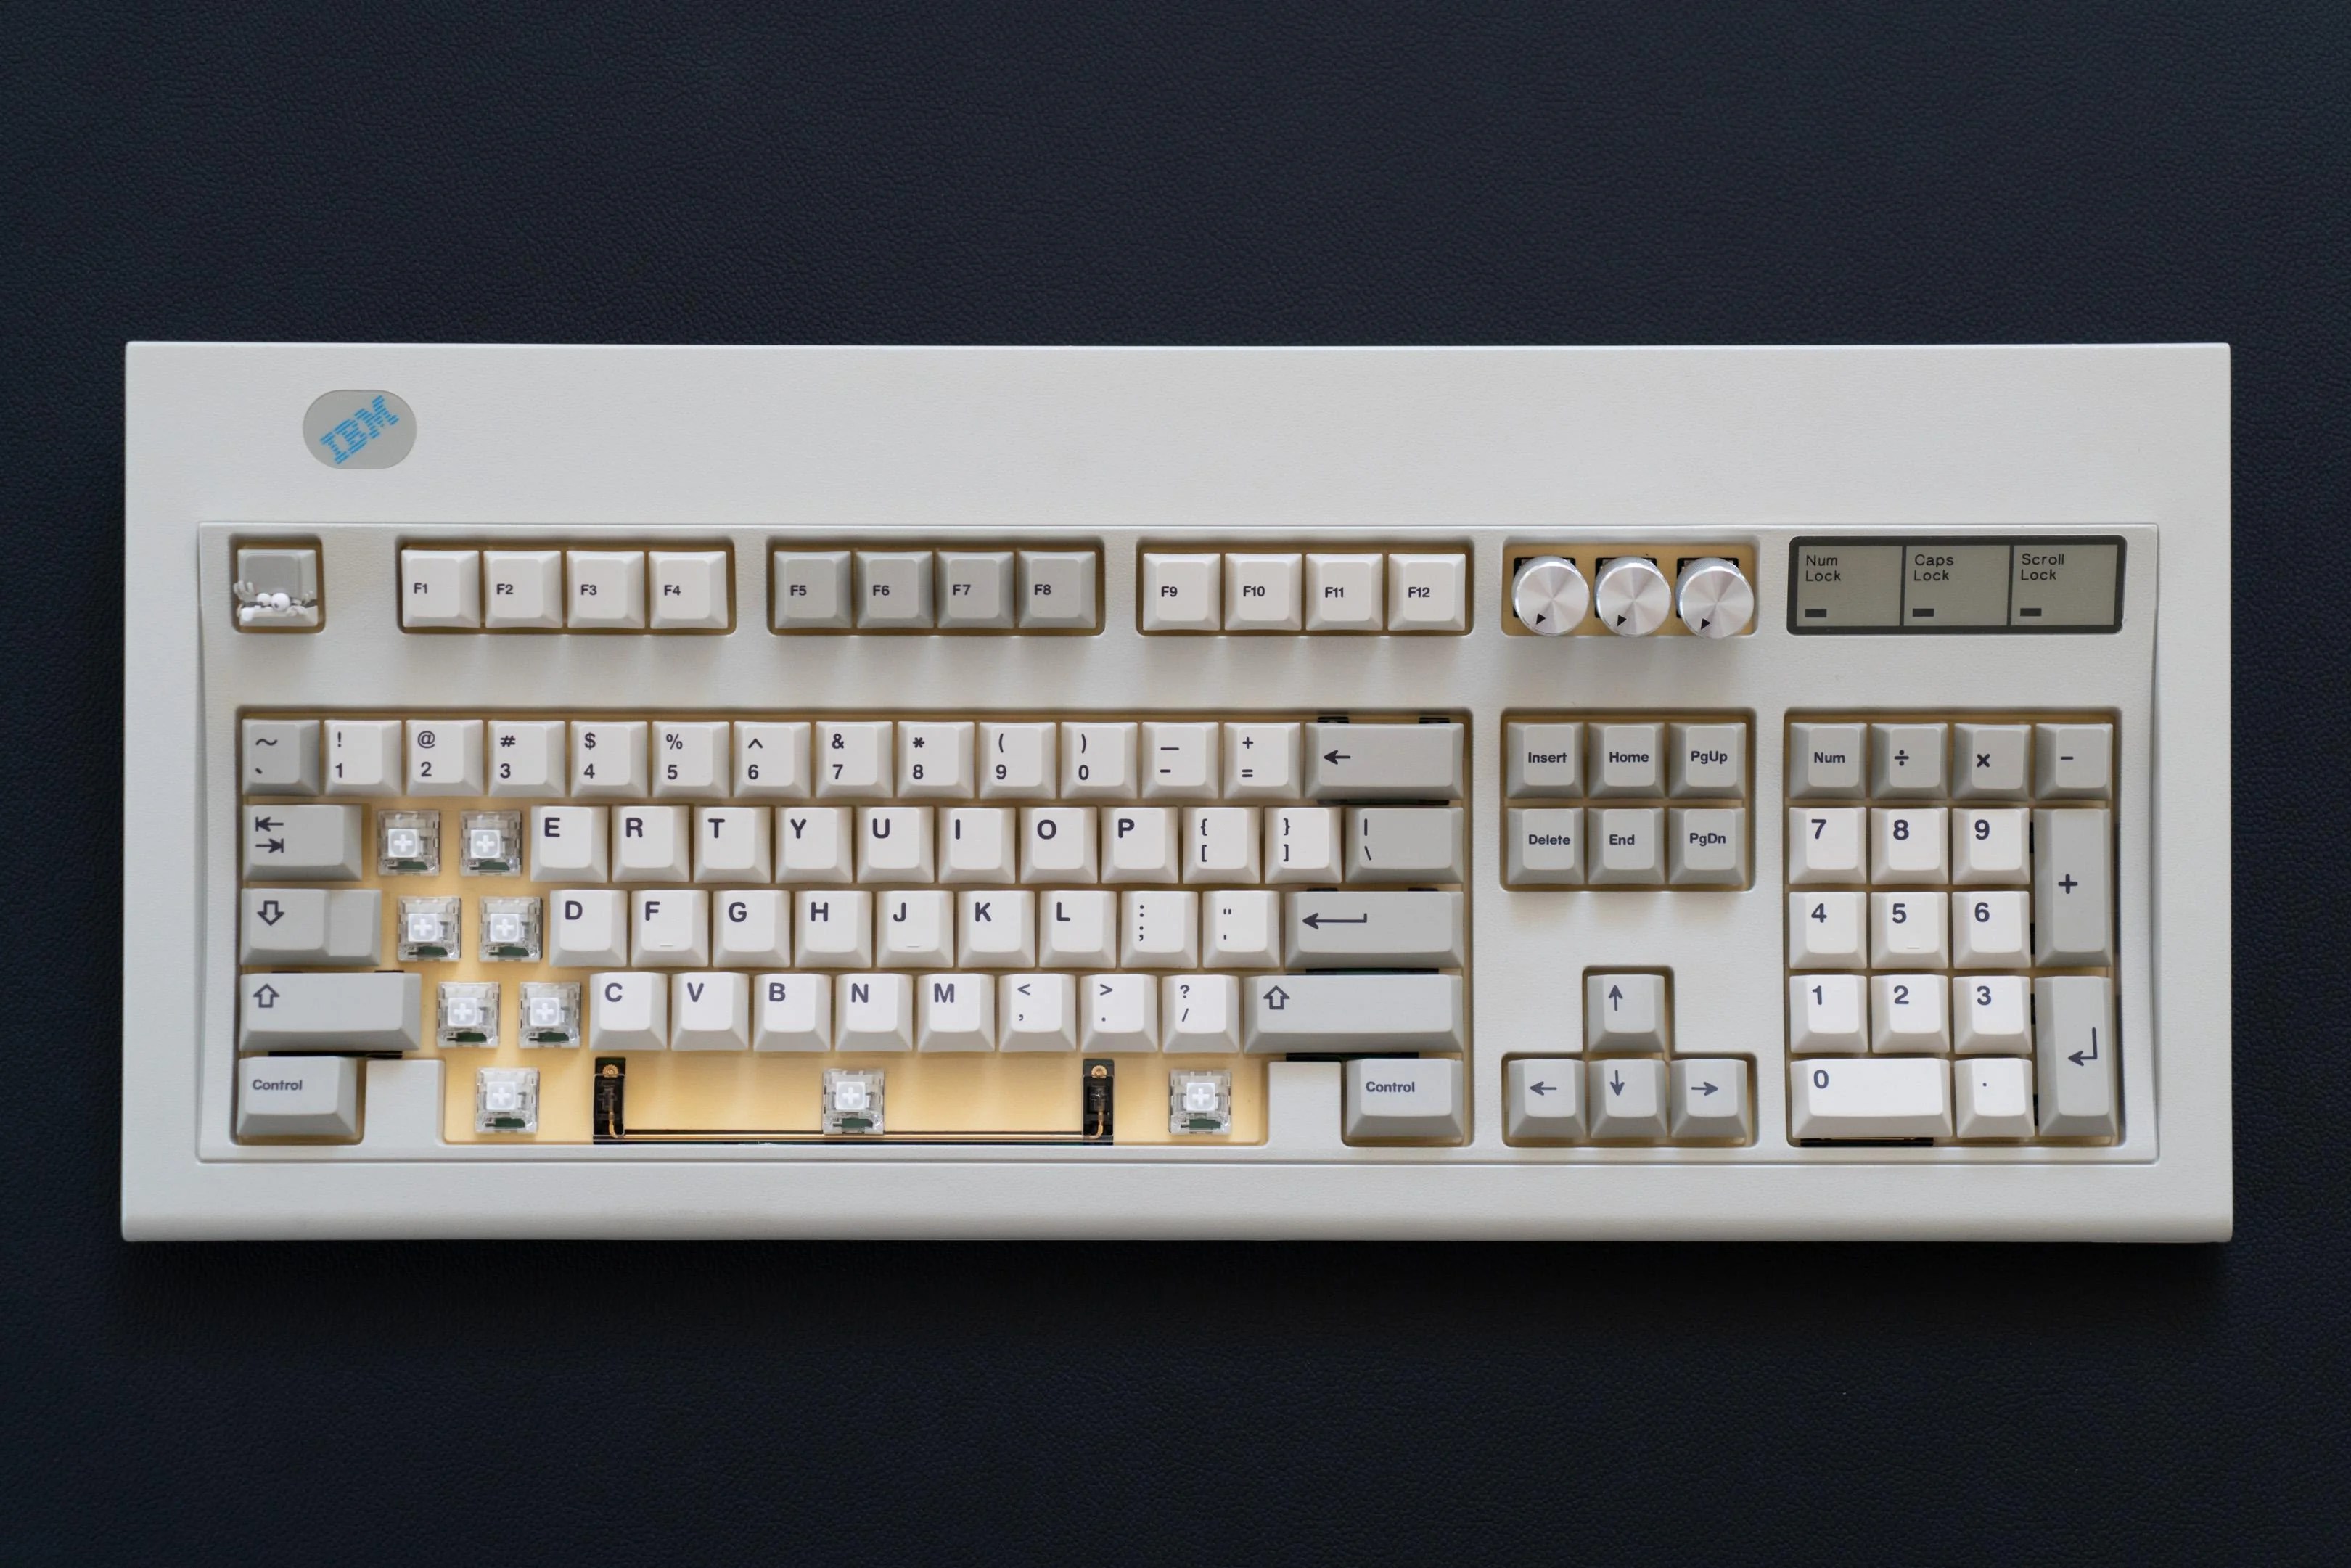
To be clear, this is essentially a new keyboard that fits inside a Model M case, but that alone is quite a feat, especially if you consider the curvature of the backplate. Because of this hurdle, [dj_edit] went with 1 mm FR4 for the switch PCB, which is a nice compromise of sturdiness and flexibility.

Underneath those stunning reproduction keycaps are Kailh box white switches, which are pretty chonky-sounding on their own. But turn on that sweet solenoid action and you really get noisy.

Those box whites are sitting in hot-swap sockets, a design decision that kind of made things difficult because of the curvature. [dj_edit] ended up using an acrylic plate that gets bent to match the curvature by the switches themselves.

Continue reading “Keebin’ With Kristina: The One With The Music Typewriter”

IBM Selectric Typewriters Finally Get DIY Typeballs

IBM’s Selectric line of typewriters were quite popular in the 1960s, thanks in part to an innovation called the typeball which allowed for easy font changes on a single machine. Unfortunately, as if often the case when specialized components are involved, it’s an idea that hasn’t aged particularly well. The Selectric typewriters are now around 60 years old and since IBM isn’t making replacement parts, those restoring these machines have had to get somewhat creative like using a 3D printer to build new typeballs.

It sounds like it would be a simple, but much like the frustration caused with modern printers, interfacing automated computer systems with real-world objects like paper and ink is not often as straightforward as we would like. The main problem is getting sharp edges on the printed characters which is easy enough with metal but takes some more finesse with a printed plastic surface. For the print, each character is modelled in OpenSCAD and then an automated process generates the 3D support structure that connects the character to the typeball.

This process was easier for certain characters but got more complicated for characters with interior sections or which had a lot of sharp angles and corners. Testing the new part shows promise, although the plastic components will likely not last as long as their metal counterparts. Still, it’s better than nothing.

Regular Hackaday readers may recall that the ability to 3D print replacement Selectric typeballs has been on the community’s mind for years. When we last covered the concept in 2020 we reasoned that producing them on resin printers might be a viable option, and in the end, that does indeed seem to have been the missing element. In fact, this design is based on that same one we covered previously — it’s just taken this long for desktop resin 3D printing technology to mature enough.

Can You Help 3D Print A Selectric Ball?

The IBM Selectric changed typewriters as we knew them. Their distinctive ball element replaced the clunky row of typebars and made most people faster typists. When [Steve Malikoff] thought about 3D printing a type ball — colloquially known as a golf ball — it seemed like a great idea.

The problem? It just doesn’t work very well. According to [Steve], it is likely because of the low resolution of the printer. However, it isn’t clear the latitudes of the characters are correct. and there are a few other issues. It is possible that a resin printer would do better and there’s a call for someone out there to try it and report back. We are guessing a finer nozzle and very low layer height might help on an FDM printer.

Judging from the images, it looks like some of the balls do pretty well, but don’t get a full strike at the tilt angle. So it could be something else. However, it does sound like cleaning up the print so it fits is a major problem.

The Selectric was notable for several reasons — you can see an ad for the machine in the video below. The type ball meant you couldn’t jam keys. Since you didn’t have to unjam keys and you had the ribbon in a cartridge, you would have to work really hard to get ink on your fingers, even if you used the cloth ribbon instead of the arguably better carbon film ribbon. The Selectric II could even use a special tape to lift the carbon ribbon off the paper for correcting mistakes. No white-out liquid or fussing with little strips of correction paper. The fact that the ball moves means you don’t have to clear space on the side of the machine for the platen to travel back and forth.

Can you help? If you have a Selectric I or II and a high-quality printer, this would be a fun project to try and report back your results to [Steve]. If you are familiar with the later issue typeballs, you might not have seen the wire clip that [Steve] uses to hold the ball in place. However, you can see them in the video ad below. More modern balls use a plastic lever that acts as a handle so even with cloth ribbons you have less chance of getting ink on your hands.

Although there were Selectrics meant to interface with a computer, you can refit any of them to do it with some work. The Selectric also has a role in one of the great techno spy stories of all time: The GUNMAN project.

Continue reading “Can You Help 3D Print A Selectric Ball?”