ATtiny85 Data Acquisition

85

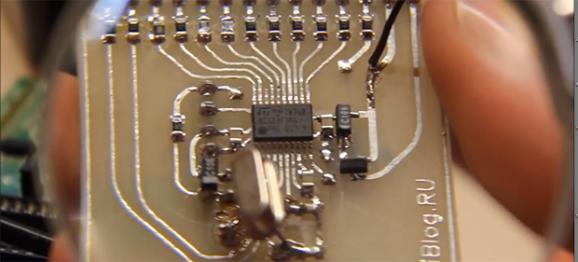
The folks at Ivmech recently had a need for some new hardware. They needed a small, cheap device able to sense some analog values, toggle a few digital pins, and log everything to a computer. What they came up with is the IViny, an extremely small data acquisition device built around the ATtiny85, capable of logging data to a computer.

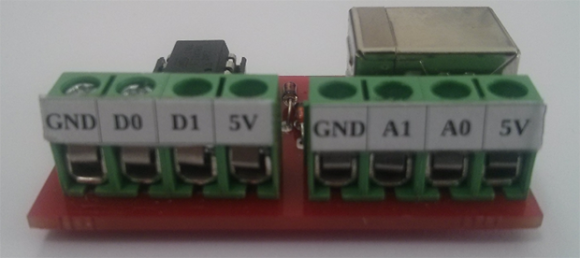
The IViny features two digital channels and two 10 bit analog channels, just like you’d find in any ATtiny85 project. Power is supplied over USB, and a connection to a computer is provided by V-USB. There’s also a pretty cool Python app that goes along with the project able to plot the analog inputs and control the digital I/O on the device.

It’s not exactly a fast device – the firmware only supports 100 samples per second, but an upcoming firmware upgrade will improve that. Still, if you ever need to read some analog values or toggle a few pins on the cheap, it’s a nice little USB Swiss army knife to have.

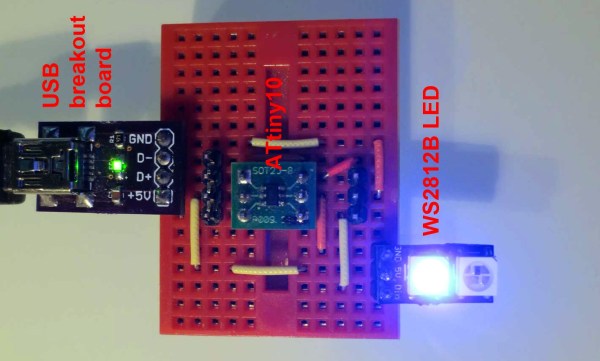
USB On The ATtiny10

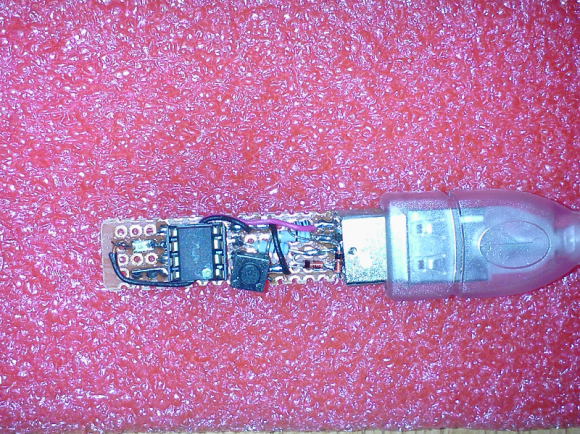
Atmel’s ATtiny10 is their smallest microcontroller in terms of physical size – it’s an SOT-23-6 package, or about the same size as surface mount transistors. The hardware inside this extremely bare-bones; three I/O lines, 1kB of Flash, 32 bytes of RAM, and a reduced AVR core with 16 registers instead of 32. With such a minimal feature set, you would think the only thing this micro would be good for is blinking a LED. You’d be right, but [cpldcpu] can blink a LED with the ‘tiny10 over USB.

The V-USB interface usually requires about 1.5kB of Flash in its most minimal implementation, and uses 50 bytes of RAM. This just wouldn’t do for the ‘tiny10, and although [cpldcpu] is working on a smaller, interrupt-free V-USB, there were still some hurdles to overcome.

The biggest issue with putting code on the ‘tiny10 is its reduced AVR core – on the ‘big’ 32-register core, direct memory access is two words. On the ’10, it’s only one word. AVR-GCC doesn’t know this, and no one at Atmel seems to care. [cpldcpu] worked around this problem using defines, and further reduced the code size by completely gutting V-USB and putting it in the main loop.

It’s not much, but now [cpldcpu] can blink an LED with a ‘tiny10 over USB. If you’re wondering, 96.4% of the Flash and 93.8% of the SRAM was used for this project.

Interrupt Free V-USB

resync

[Tim’s] new version of Micronucleus, Micronucleus 2.0, improves upon V-USB by removing the need for interrupts. The original Micronucleus was a very small implementation of V-USB that took up only 2KB. Removing the need for interrupts is a big leap forward for V-USB.

For those of you that do not know, “V-USB is a software-only implementation of a low-speed USB device for Atmel’s AVR® microcontrollers, making it possible to build USB hardware with almost any AVR® microcontroller, not requiring any additional chip.” One tricky aspect of using V-USB is that the bootloader requires interrupts, which can lead to messy problems within the user program. By removing the need for interrupts, Micronucleus 2.0 reduces the complexity of the bootloader by removing the need to patch the interrupt vector for the user program.

With the added benefit of  speeding up the V-USB data transmission, Micronucleus 2.0 is very exciting for those minimal embedded platforms based on V-USB. Go ahead and try out Micronucleus 2.0! Leave a comment and let us know what you think.

Software USB On The STM8

STM8

Thanks to V-USB, software-based USB is all the rage now, with a lot of uses for very small and low power microcontrollers.[ZiB] wondered if it would be possible to implement a USB controller on the STM8 microcontroller (Google translation) in software and succeeded.

The STM8 is a bit of a change from the usual 8-bit micros we see like AVRs and PICs. [ZiB] chose the STM8S103F3, although any chip in the STM8 family will work with this project when a 12MHz crystal is attached.

The build began by generating USB signals with the help of a whole lot of NOPs. This code doesn’t take up much space – only 300 bytes, and the receiving code (Google translation) is similarly sized.

The code isn’t quite there yet, but [ZiB] has proven a software-based USB implementation on the STM8 is possible. All the code is available for download (comments in Russian) and a video demoing the project available below. If anyone cares to translate this project to English, we’ll post a link to your work here.

Continue reading “Software USB On The STM8”

Introducing The SquareWear Mini, With Its Chainable Color LED Matrix

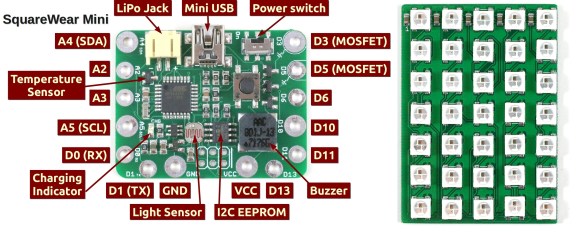
[Ray] just tipped us about his latest project: the SquareWear Mini, which basically is an improved version of the SquareWear 2.0 that we featured a month ago. For our readers that may have missed it, the SquareWear is essentially a wearable Arduino platform running at 3.3V and 12MHz. Both versions are based on an ATMega328 microcontroller running the V-USB library to provide USB connectivity, put together with diverse onboard peripherals.

As you can see in the picture above, the Mini includes 2 N-MOSFETs, one temperature sensor, one light sensor, a 16KB EEPROM memory, one buzzer, a one cell LiPo battery connector together with one charging controller, and finally a power switch (USB/battery). It is supposed to be 25% smaller than the SquareWear 2.0 and is optimized to work with a WS2812B-based 5×7 RGB LED matrix that [Ray] also designed. The latter can easily be cascaded in X/Y directions with other LED matrices in order to expand the overall display.

At last, [Ray] created a software to design animations and upload them to the SquareWear . A presentation video of the complete system is embedded after the break and you can download all the design files on GitHub.

Continue reading “Introducing The SquareWear Mini, With Its Chainable Color LED Matrix”

Chachka: A Trinket Clone

Why would you clone something as cheap as the adafruit Trinket? Well, because you can, of course. And that’s exactly why [Ray] started to build a clone two days after his Trinket came in the mail. He encourages you to support adafruit by buying at least one Trinket before attempting a clone, and we agree. Besides, you’ll be able to use the support forum with a clear conscience.
[Ray]’s design uses an 1800Ω pull-up resistor rather than the 1500Ω in the Trinket. He made this change based on his experience with V-USB and the ATtiny85. He has a lot more information on his build on the Arduino forum. Check out a short video of Chachka responding to a Sony-esque remote control after the break.

Need an application for your Trinket clone? Check out this incredibly well-built USB volume knob.

Continue reading “Chachka: A Trinket Clone”

USB Datalogging With Arduino Using V-USB

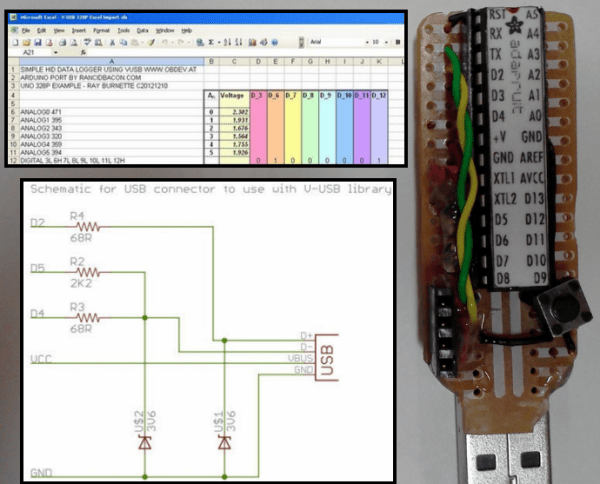
Adding USB functionality to your Arduino projects used to be a pain, but thankfully, the V-USB project came along and gave your ATMEGA328 the ability to control the USB lines directly and mimic simple (low-speed) USB peripherals. [Ray] shows an implementation of the V-USB project by logging the status of the Arduino’s I/O pins to an open Excel spreadsheet

V-USB (Virtual USB) is especially useful for those of us who build standalone Arduino projects with the ATMEGA328. Unlike the Arduino Leonardo and its ATMEGA32U4, the ATMEGA328 does not have a built-in USB controller. The circuit required to tie into the USB lines is made up of just a few basic components, and [Ray] provides a reference schematic and BOM to get you started. The Arduino is programmed to mimic a keyboard, so the datalogging is achieved by allowing the Arduino to ‘type’ the data into an open Excel spreadsheet. In this example, the status of 8 digital pins and all 6 Analog Input pins are logged.

For those of you who prefer the PIC microcontroller and are in a similar position of not having a built-in USB controller, there is the 16FUSB project to help you out.