Handmade Acrylic Skeleton Clock Is An Impressive Feat Of Scroll Sawing

Handmade Acrylic Skeleton Clock

For one of his mechanical engineering school projects, [Ben Murton] decided to design and build a clock from scratch — and while it may look like it was laser cut… He cut it out all by hand.

It’s a cross between the mechanical workings of an old Grandfather clock and a Skeleton clock — the goal was to have all movements visible to see how the clock operates. He designed it using Autodesk Inventor, and has provided the files online for anyone to use — He notes it would be especially easy to make if you have a laser cutter or CNC router!

Anyway, the clock is made out of 3mm thick acrylic, 5mm brass shafts, nylon string, some heavy weights (lead), and some nuts and screws. After printing out his CAD templates, [Ben] carefully used a scroll saw to cut out every gear and linkage — We’re impressed.

Continue reading “Handmade Acrylic Skeleton Clock Is An Impressive Feat Of Scroll Sawing”

ATtiny85 Data Acquisition

85

The folks at Ivmech recently had a need for some new hardware. They needed a small, cheap device able to sense some analog values, toggle a few digital pins, and log everything to a computer. What they came up with is the IViny, an extremely small data acquisition device built around the ATtiny85, capable of logging data to a computer.

The IViny features two digital channels and two 10 bit analog channels, just like you’d find in any ATtiny85 project. Power is supplied over USB, and a connection to a computer is provided by V-USB. There’s also a pretty cool Python app that goes along with the project able to plot the analog inputs and control the digital I/O on the device.

It’s not exactly a fast device – the firmware only supports 100 samples per second, but an upcoming firmware upgrade will improve that. Still, if you ever need to read some analog values or toggle a few pins on the cheap, it’s a nice little USB Swiss army knife to have.

Droning On: The Anatomy Of A Drone


drone3

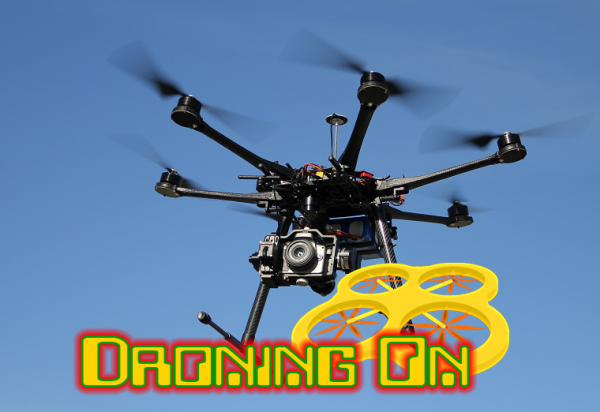
These last few weeks I’ve been ordering parts for the Hackaday Testbed, a basic quadcopter to be used here at Hackaday. The top question I see when surfing multicopter forums is “What should I buy”. Which frame, motors,  props, speed controller, and batteries are best?  There aren’t easy answers to these questions with respect to larger quads (300mm or more) . There are a myriad of options, and dozens of vendors to choose from.

Advice was simple in the pre-internet days of R/C planes and helicopters: just head down to your local hobby shop, and see what lines they carry. Hook up with a local club and you’ll have some buddies to teach you to fly. This advice still holds true to a certain extent. Some hobby shops carry the DJI and Blade lines of multicopters. However, their flight control systems are closed source. If you really want to dig in and adjust parameters, you have to either buy a combo package with an open source flight control system, or buy every part separately. Unfortunately, very few local hobby shops can afford to stock individual parts at that level.

In the online world there are several “big” vendors. The classic names in the USA have always been Tower Hobbies and Horizon Hobby. Some new US-based companies are All e RC and ReadyMadeRC. Several Chinese companies, including HobbyKing and RcTimer, maintain warehouses in several parts of the world. I’m only listing a few of the big names here. If I’ve left out your favorite site, drop some info in the comments section.

The killer with many of these companies is supply. A popular component will often go out of stock with no hint as to when it will be available again. When it comes to single parts like batteries, it’s easy to just order a different size. But what about motors or speed controls? These components need to be matched on a multicopter. Changing one for a different model means changing all of them, so it pays to buy a spare or two when ordering! Click past the break for a breakdown of some multicopter parts.

Continue reading “Droning On: The Anatomy Of A Drone”

What If You Experienced Lag In Real Life?

If you’re a gamer, lag is one of your worst enemies. But what would it be like if you experienced lag in real life? Imagine how frustrating that would be!

Introducing Living With Lag — a cute experiment put on by an internet provider called Ume. Using an Oculus Rift development kit, a Raspberry Pi, noise cancelling headphones and a webcam, Ume’s thrown together a fun social experiment. The webcam captures both audio and video and repeats it to the Oculus Rift via the Pi at a variable delay to show the effects of slow internet speeds.

They attempt four different scenarios. Ping pong is pretty much impossible. Dance class is just embarrassing. And attempting to cook or eat is absolutely hilarious. They even try bowling, which also proves more difficult than you could imagine!

Stick around to see for yourself.

Continue reading “What If You Experienced Lag In Real Life?”

Hackaday Space: Transmission 1

major-tom-profile-pic-cropped

Phew, what a month!

As most of you by now are probably sick of hearing, we ran a series of puzzles throughout April in the run up to the announcement of The Hackaday Prize. We had a lot of fun putting this together, and a great many of you pitched in and tried to solve the problems we presented. In all we were very impressed at the community spirit that came out of these challenges, so we thought we would do a write up of what was in the puzzles, how we built them, and the fantastic solutions that you all came up with.

We’ll be doing these as a series of posts this week since they’re quite long, for details on Transmission 1 keep reading after the break.

Continue reading “Hackaday Space: Transmission 1”

A DIY Atomic Force Microscope

AFM

For looking at really small stuff, an optical microscope will only go so far. Looking at things at the nanometer level, though, usually requires some sort of electron microscope, with all the hassle of vacuum chambers and high voltages. There is another way to investigate the domain of the very small: an atomic force microscope. Unlike their electron spewing brothers, they don’t require high voltages or hard vacuums. They can also be built for about $1000, as [whoand] over on the Instructables shows us.

Instead of shooting light or electrons at an object and picking up the reflections, an atomic force microscope drags a very, very tiny stylus across an object. This stylus is attached to a probe that will reflect laser light off of it into a photosensor, eventually rendering an image on a display. [whoand] is using a laser diode and pickup unit from a DVD-ROM drive for the optical pickup unit, a frame made from soldered together PCBs, and a few piezos to vibrate the probe.

The probes themselves are incredible pieces of engineering with a tip size of a few nanometers. They’re consumable, and expensive, ranging from $20 to $500 per probe. Still, with these probes, [whoand] can look at the pits in a CD or DVD, measure the surface of an eraser, or check out the particulate matter floating around in the atmosphere in Beijing.

Thanks [Rob] for the tip.

Solderless Pogo-Pins For Flashing Routers

Solderless Router Pins

Low-cost wireless routers are a dime a dozen these days — but what happens if you need to flash the firmware? Normally you’d have to solder in a serial connection in order to access it, but [Luka Mustafa] had another idea — pogo-pins!

It’s actually quite easy to make a small PCB with pogo-pins and then use a 3D printed bracket or alignment jig in order to make connection. They currently only have designs for a few TP-Links (WR740 and WR741ND) on their GitHub, but more will be added soon. They’ve also included instructions on how to restore firmware on any of these devices with their handy-dandy pogo-pin PCB.

[Luka] is one of the guys behind IRNAS (the acronym is in Slovenian), a non-profit open-source company that makes lots of cool projects. They believe in open-source and sharing technology in order to empower the world.

And if you’ve royally bricked your router it could be possible to unbrick it with a Raspberry Pi!