USB Keyboard And Mouse For The PS4

If you’d like to play BattleCallSpaceMarine on the Playstation 4 with a keyboard and mouse – and have an unfair advantage over everyone else playing on a console – you’d normally be out of luck. Sony implemented a fair bit of software to make sure only officially licensed controllers are able to talk to the console. It took a while, but [Frank Zhao] has figured out why keyboard and mouse doesn’t work on PS4, and created a device to enable these superior input devices.

Sony engineers decided – or were told – that the PS4 shouldn’t be able to connect to any old USB device. To that end, they made the console issue challenges to a DualShock controller to make sure the official controller is always connected over Bluetooth.

[Frank]’s device solves this problem by taking the USB output from a keyboard and mouse, doing the CRC calculations, and sending them out over Bluetooth. Because the PS4 constantly issues challenges and responses of the authentication procedure, a real DualShock controller needs to be connected to the device at all times. Still, if you want a keyboard and mouse on the PS4, this is the way to do it.

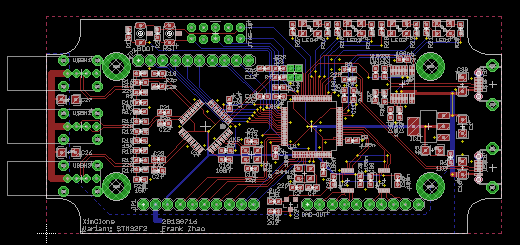
All the sources and layouts are up on [Frank]’s github where you’re free to create your own. This isn’t a finished product quite yet; [Frank] still needs to do a redesign of the circuit. Judging from the response of his earlier attempt at keyboards and mice on the PS4, though, this may be a successful product in the works.

The Stepper Driver Driver

KONICA MINOLTA DIGITAL CAMERA

The Stepstick and Pololu motor drivers are the heart of just about every Reprap electronics board, but they can go bad. The usual way of testing these things is to rig up a microcontroller on a breadboard, grab some cables, and wire something up. [Ken]’s Easy Stepper Motor Controller is a much simpler solution to the problem of testing these drivers and could, with a bit of practice, be constructed on a single-sided homebrew PCB.

The Easy Stepper Motor Controller is a very simple board with connections to a motor, a power supply, and headers for a single Pololu or Stepstick motor driver. Two buttons and a pot control the rotation of the motor with the help of an ATtiny10, and jumpers for up to 16x microstepping are right there on the board.

There’s a video after the break showing what this stepper motor driver driver can do. It’s not much, but if you’re just testing a driver, it’s all you need.
Continue reading “The Stepper Driver Driver”

Hackaday Links: March 3, 2014

hackaday-links-chain

If you’re playing along with Twitch Plays Pokemon, you might as well do it the right way: with the smallest Game Boy ever, the Game Boy Micro. [Anton] needed a battery replacement for this awesome, discontinued, and still inexplicably expensive console and found one in a rechargeable 9V Lithium battery. You get two replacement cells out of each 9V battery, and a bit more capacity as well.

Every garden needs garden lights, right? What does every garden light need? A robot, of course. These quadruped “Toro-bots” react to passersby by brightening the light or moving out of the way. It’s supposed to be for a garden that takes care of itself, but we’re struggling to figure out how lights will do that.

Flexiable 3D prints are all the rage and now resin 3D printers are joining the fray. The folks at Maker Juice have introduced SubFlex, a flexible UV-curing resin. The usual resins, while very strong, are rock solid. The new SubFlex flexible resins are very bendable in thin sections and in thicker pieces something like hard rubber. We’re thinking custom tank treads.

Remember this post where car thieves were using a mysterious black box to unlock cars? Looks like those black boxes have moved from LA to Chicago, and there’s still no idea how they work.

Have a Google Glass? Can you get us on the list? [Noé] and [Pedro] made a 3D printed Google Glass adapter for those of us with four eyes.

Making OLEDs In The Kitchen Sink

When [Ian] first set out to create a homebrew OLED, he found chemical suppliers that wouldn’t take his money, manufacturers that wouldn’t talk to him, and researchers that would actively discourage him. Luckily for us, he powered through all these obstructions and created his own organic LED.

Since at least one conductor in an OLED must be transparent, [Ian] settled on ITO – indium tin oxide – for the anode. This clear coating is deposited on glass, allowing it to conduct electricity and you can buy it through a few interesting suppliers. For the cathode, [Ian] is using a gallium-indium-tin eutectic, an alloy with a very low melting point that allowed him to deposit a small puddle in his OLED stack.

With the anode and cathode taken care of, the only thing left was the actual LED. For this, [Ian] had some success with MEH-PPV, a polymer that is capable of electroluminescence. On top of this is a film of PEDOT:PPS, another polymer that serves to block electrons.

The resulting yellow-green blob of an OLED actually works, and is at least as good as some of the other homebrew semiconductor illumination projects we’ve seen around here. This is only a start, though, and [Ian] plans on putting a whole lot more time into his explorations of organic LEDs.


Reverse Engineering Candle Flicker LEDs, Again

Flickering candle LEDs are seemingly everywhere these days, and like all fads, someone has to take a very close look at the engineering behind them.

[cpldcpu] had earlier taken a look at the controller chip in these candle flicker LEDs by measuring the current used and developing a statistical model of how these LEDs flicker. That’s math, of course, and much more fun can be had by decapsulating one of these flicker LED controller chips. It’s not very advanced tech; the LED controller is using a 1 or 2um process and a pair of RC oscillators, but it appears there could be a hardware random number generator in the silicon of this chip.

Earlier, [Cpldcpu] had taken a look at the tiny controller in these flickering LEDs and determined they used a linear feedback shift register to generate pseudorandom LED intensities. The new teardown seems to confirm that a linear feedback shift register is being used to drive the flickering LED.

Custom chips are only one way to skin a cat, or flicker a LED, and PICatout used the the tiniest PIC microcontroller (French, translation) to create his own flickering LED. Seems like making a few custom flickering LED throwies shouldn’t be too hard.

This Desktop Air Conditioner Is Really Cool!

[Mike] works in a 50+ year old building with unreliable air conditioning. It often reaches 80°F inside during the summer, and he once measured it at 98°F. Rather than burn sick days, he became the envy of the office when he built this awesome desktop air conditioner.

The problem with knocking holes in the office walls and installing window units is that they must vent heat somewhere. [Mike] has overcome adversity and harnessed the power of the heatsink, only in reverse. His desktop a/c unit is made from two 28oz cans plus a 20oz can for the ice bucket. [Mike] used a side-vented CPU fan, which is vital to his design. He secured the heatsink to the base of one 28oz can with a self-tapping screw. This can is the upper chamber. [Mike] made a base from the other 28oz can, drilling holes for the CPU fan wires, the power cord, and a sweet light-up rocker switch. He used Gorilla Glue to affix the CPU fan to the base can.

Hot, stale office air is drawn through the ice in the 20oz can, which is nestled in aluminum foil to maximize heat transfer to the heatsink. The heat in the air gets absorbed by the heatsink, and the CPU fan kicks out cool air in 20-30 seconds.

Software USB On The STM8

STM8

Thanks to V-USB, software-based USB is all the rage now, with a lot of uses for very small and low power microcontrollers.[ZiB] wondered if it would be possible to implement a USB controller on the STM8 microcontroller (Google translation) in software and succeeded.

The STM8 is a bit of a change from the usual 8-bit micros we see like AVRs and PICs. [ZiB] chose the STM8S103F3, although any chip in the STM8 family will work with this project when a 12MHz crystal is attached.

The build began by generating USB signals with the help of a whole lot of NOPs. This code doesn’t take up much space – only 300 bytes, and the receiving code (Google translation) is similarly sized.

The code isn’t quite there yet, but [ZiB] has proven a software-based USB implementation on the STM8 is possible. All the code is available for download (comments in Russian) and a video demoing the project available below. If anyone cares to translate this project to English, we’ll post a link to your work here.

Continue reading “Software USB On The STM8”