Vintage TV play The Brady Bunch on loop using modern electronics

Groovy TV Gets A Very Brady Makeover

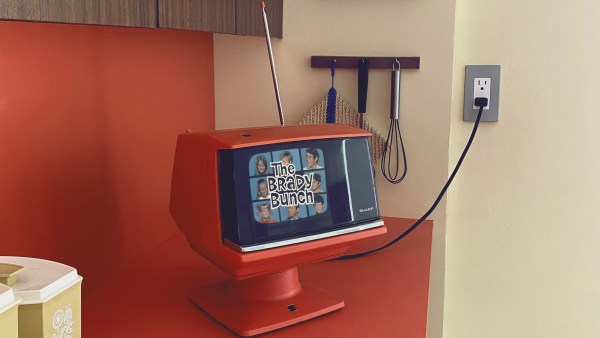
Here’s the story of an old Sharp TV, which was donated to [mandy] to be hacked. Just one look and you can see, very clearly, it plays old Brady Bunch tracks.

Upon inspection of the old television, [Aaron] and [mandy] found that the unit first hit the local Montgomery Ward in 1969. And what just momentous event played on televisions across North America in 1969? Well yes, the Apollo moon landing. And David Bowie’s Space Oddity. And Abbey Road. And Woodstock. But no, we’re talking about that other momentous event that would shape young minds for generations to come:

The pilot episode of The Brady Bunch.

Vintage TV play The Brady Bunch on loop using modern electronics
The wood base keeps all the electronics in formation.

Yes, The Brady Bunch, that campy TV show that first aired in 1969 and ended in 1974. It just so happens that [mandy]’s favorite TV show is The Brady Bunch, so when the bright orange Sharp TV came along, she knew what had to be done.

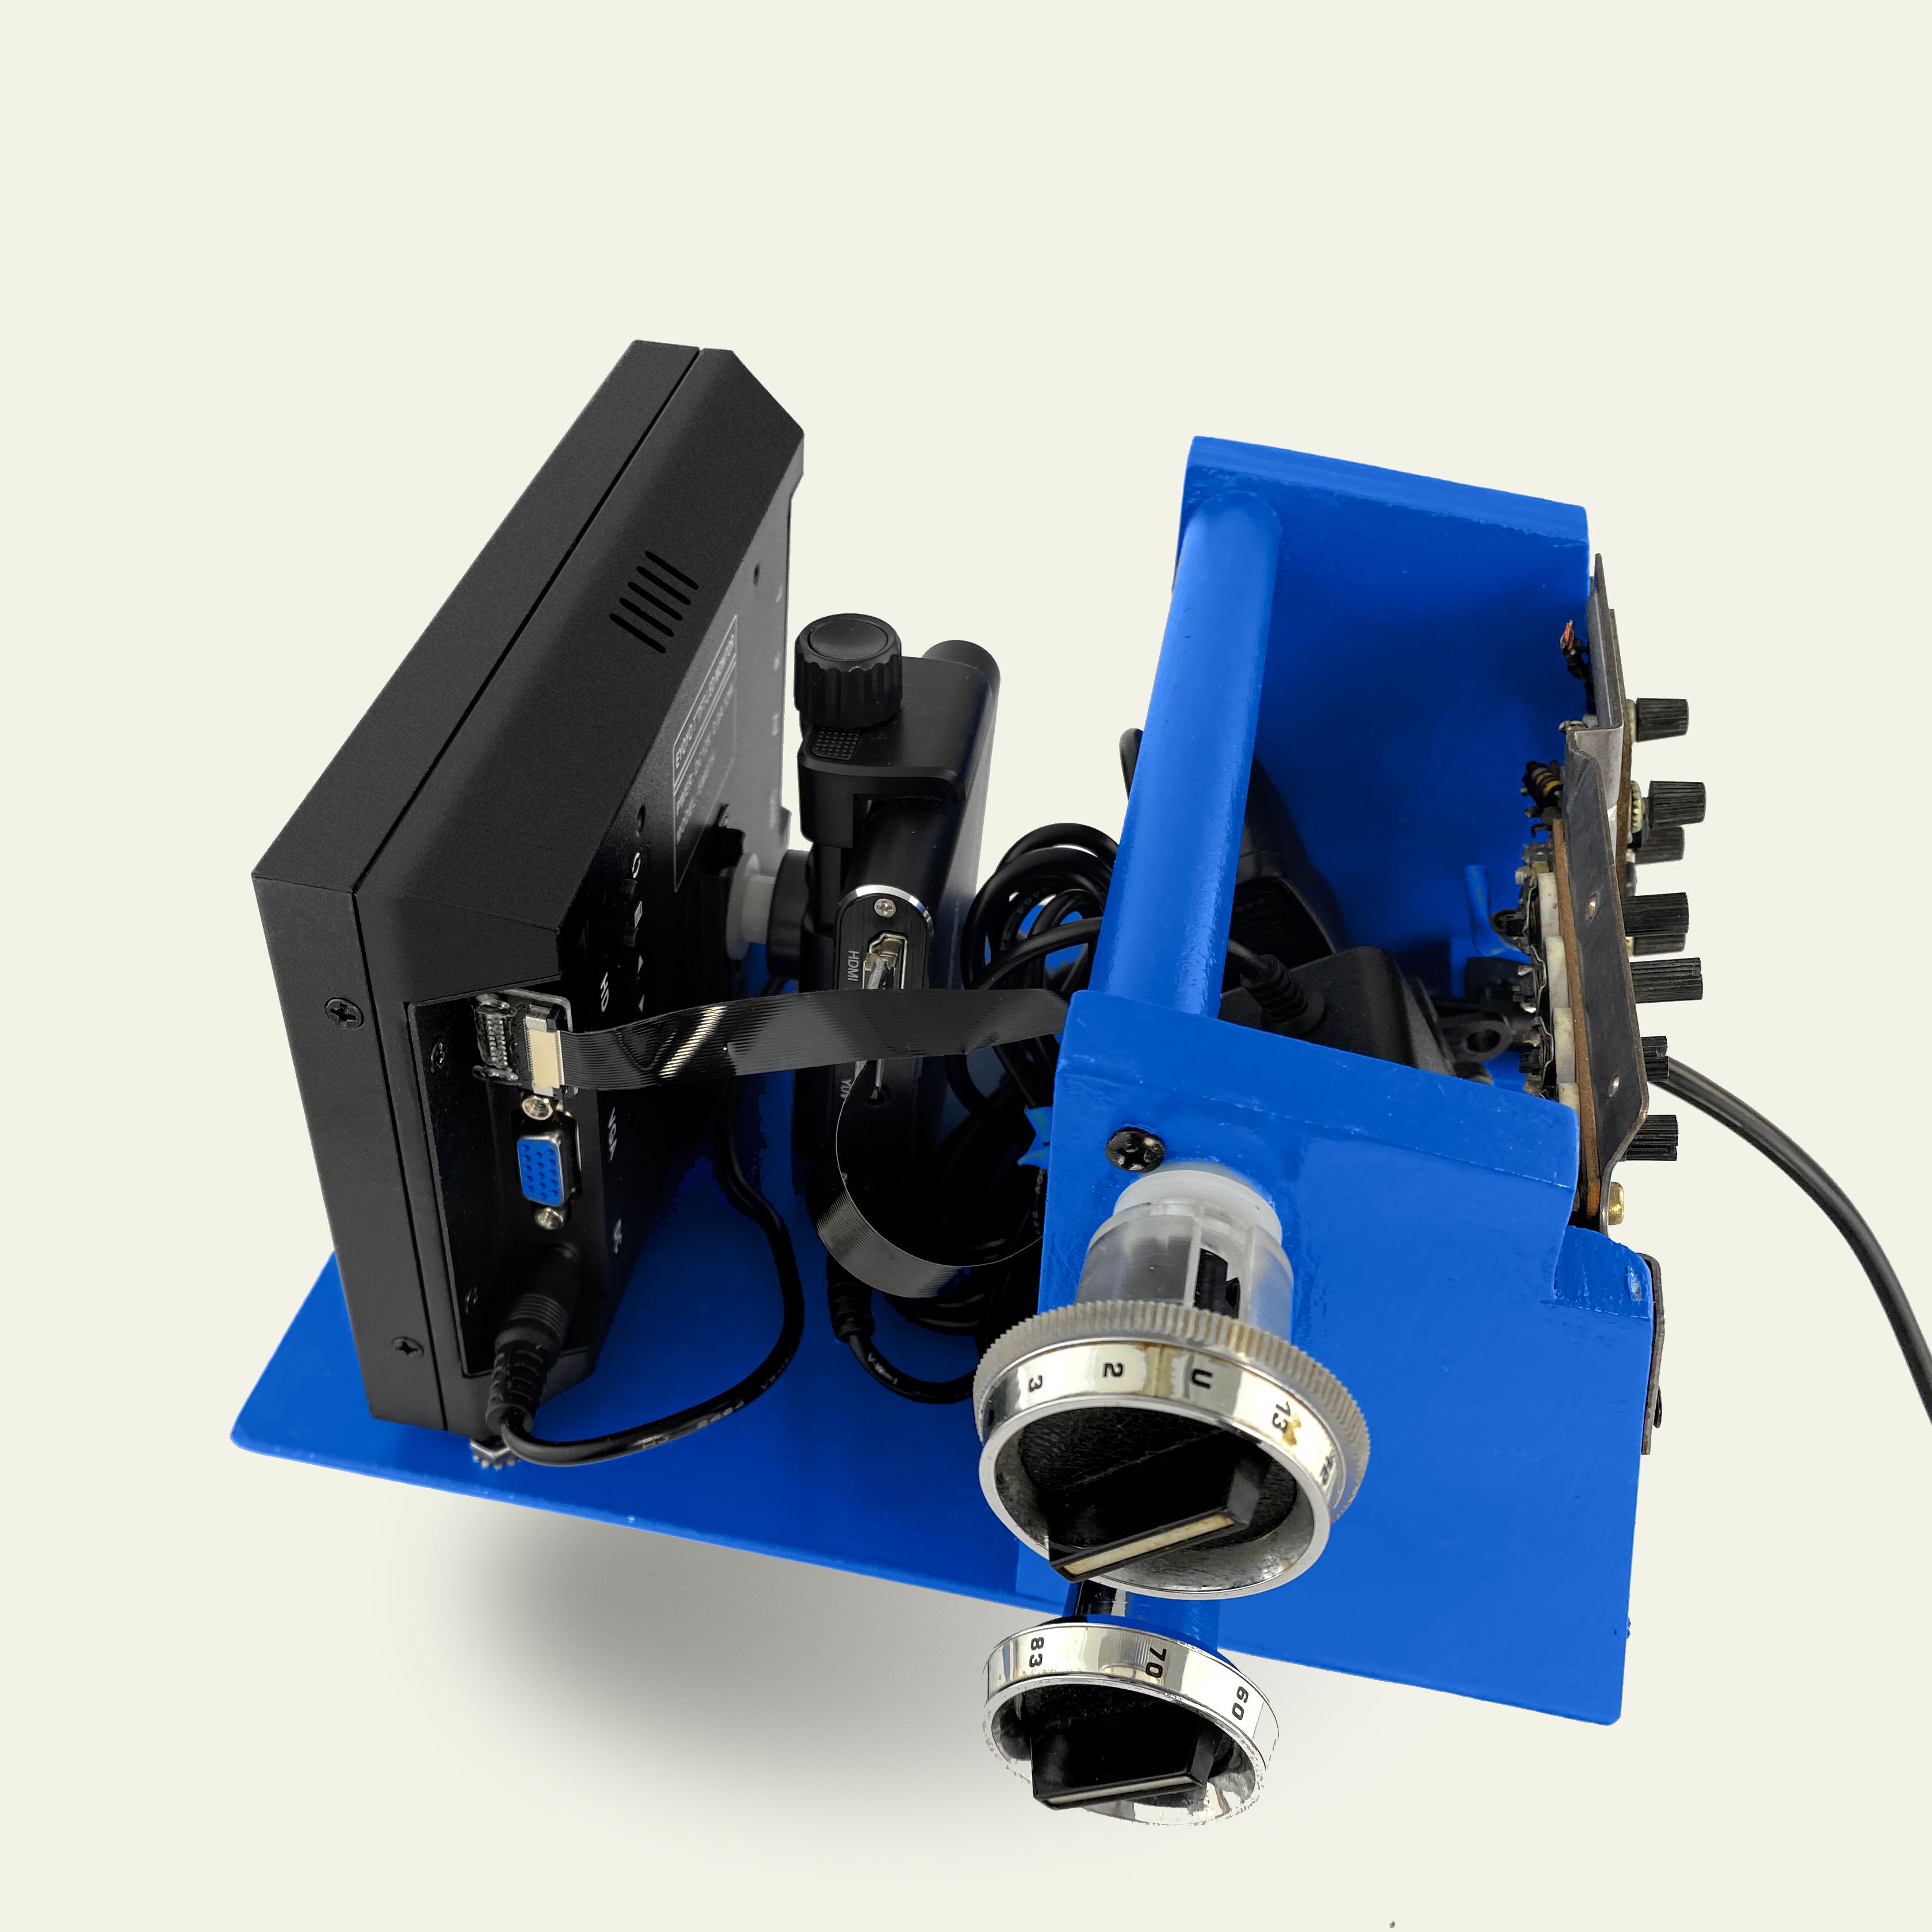
While the style of the television may be timeless, the internals weren’t. They were removed, and a new internal frame was built from a naturally occurring cellulose/lignin composite adorned in Brady Blue. Inspired by in-store advertising displays and billboards that play the same content on a loop, [mandy] and [Aaron] added an Eyoyo 7” monitor and an Aptek video player.

Leaving no question as to what era the TV came from, the revamped piece now plays about 50 of [mandy]’s favorite Brady clips on loop, all modified to be centered properly on the off-center screen. Groovy! To round out the experience and keep things mellow, the knobs were re-attached using Lego pieces, and are reportedly very satisfying to spin.

If you’ve got a thing for vintage hacks, you might like this Pi-powered NuTone home intercom or this vintage camera flash turned clock. And if you have any awesome hacks you think we’d like to see, be sure to send them on over to the Tip Line!


TV Output From Arduino — 1980s Style!

We’ll admit it, we’re all spoiled. A few bucks can now buy a computer that would have been the envy of everyone back in the late 1970s or early 1980s. So it’s no surprise that [krallja] was able to use an old-style video output chip to drive a TV with an Arduino. The TMS9918A is a venerable output device, and if the old computers could drive it then it makes sense that a modern computer could too. You can see a video of the whole experiment, below.

The Internet has also spoiled us, in that it’s dead simple to find datasheets for nearly anything, even these old chips. The only real problem with such aged silicon is that they typically expect a processor with a data and address bus, but most microcontrollers now keep all of that internal. But with enough fast I/O you can simulate a bus just fine. For now, the experiment just cycles through the color output.

Continue reading “TV Output From Arduino — 1980s Style!”

Hackaday Prize Entry: Arduino Video Display Shield

The Arduino is the standard for any introduction to microcontrollers. When it comes to displaying video, the bone stock Arduino Uno is severely lacking. There’s just not enough memory for a framebuffer, and it’s barely fast enough to race the beam. If you want video from an Arduino, it’s either going to be crappy, or you’re going to need some magic chips to make everything happen.

[MagicWolfi]’s 2017 Hackaday Prize entry consists of an video display shield that would be so easy to use that, according to the project description, it could be a substitute for the classic Blink sketch.

The project centers around the VLSI VS23S010D-L chip, which packs 1 Megabit SPI SRAM with serial and parallel interfaces. An integrated video display  sends the composite video signal to display, with the mode depending on how many colors and what resolution is desired: for instance, at 640×400 you can display 16 colors. As he describes it, not 4K video but definitely Joust. The chip expects 3.3 V logic so he made use of a MC74LVX50 hex buffer to tailor the Arduino’s 5 V. Currently he’s working on revision two of the shield, which will include SPI flash memory.

You can follow along with the project on Hackaday.io or the current shield design can be found in [MagicWolfi]’s GitHub repository.