A chicken's egg with many holes glows beneath a glass globe set atop an inverted wooden bowl.

Glowing Egg Is A One-Oeuf Solution For Tracking Cycles

Look, if something happened to you every three weeks or so to basically turn you into a different person and factored heavily into whether any new humans were created, you’d probably want to keep abreast of the schedule, yeah? Yeah. So, while there are, of course, a ton of ways to do this with your phone, most of those apps do gross things with your data. Are you angry yet?
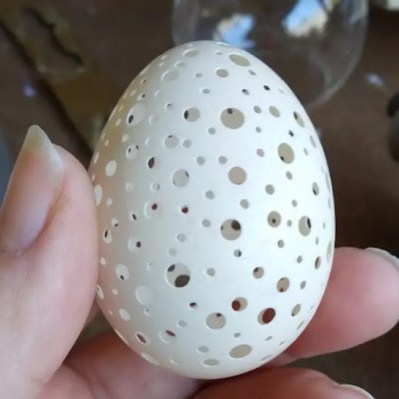
A standard chicken's egg with many holes both large and small.[Jakoba the Online Witch] certainly was, or if not angry, at least annoyed. So she built a glowing egg timer, which shines a different color based on current point in her cycle, to let her know when she is fertile and expecting Aunt Flo.

The coolest part is that this is an actual egg from one of [Jakoba]’s backyard chickens. No. The coolest part is how she was able to make so many holes without breaking it. (It took four tries.)

After bleaching the insides, the egg was ready to glow. As [Jakoba] says, the guts are simple — just a Wemos D1 Mini ESP8266, a WS2812 LED, and a heatsink. The enclosure consists of an inverted peanut bowl with a glass ornament hot-glued in place.

Once it was put together, all she had to do was add it in Home Assistant and use the current calendar state to trigger services from the YAML configuration.

Would you prefer an on-body solution? Here’s an earring that tracks temperature.

Absolem Is A Rabbit Hole Keyboard Build

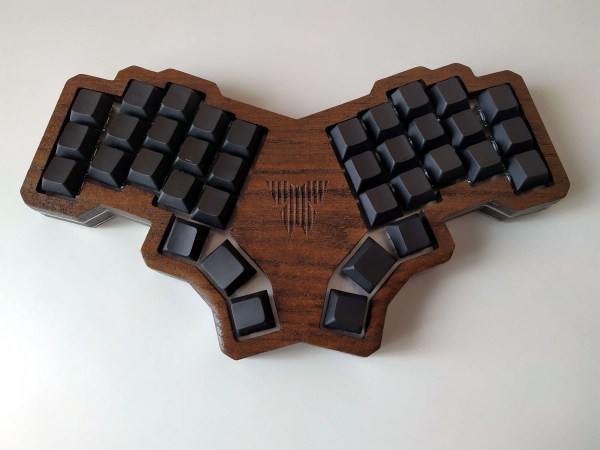
This is usually how it happens — [mrzealot] had been using some awful chiclet-style keyboard without much of a care, and topping out at 50-60 WPM using an enhanced hunt-and-peck method. But he really wanted back-lighting, and so got his first taste of the mech life with a Master Keys Pro S. Hooked, [mrzealot] started researching and building his endgame keyboard, as you do once bitten. It looked as though his type would have as few keys as possible, and thumb keys laid out in arcs.

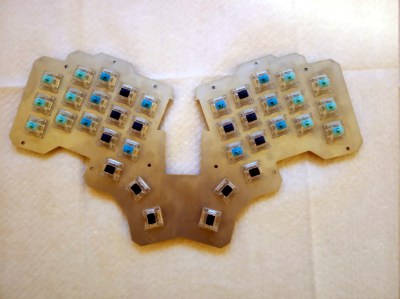
And so the cardboard prototyping began, with real switches and keycaps and a split design. After getting tired of adjusting the halves’ position on the desk, [mrzealot] threw that plan out the window and started scheming to build a monoblock split. He had a steel switch plate cut for this prototype, and used cardboard for the bottom layer, complete with a little hatch to access the Pro Micro’s reset button.

Now satisfied with the 36-key layout, it was time to go wireless with a Feather nRF52 Bluefruit LE. This is where things get serious and final, with a laser-cut layered oak case and thick, blank, PBT keycaps.

Under all that plastic lies a range of actuation force levels on the key caps that (in our opinion) range from heavy to really heavy — 62 gram switches on the pinkies and ring fingers, 65 g on the middle, 67 g on the index fingers, and a whopping 78 g for the thumb clusters.

We just love the way this ended up looking, and are pretty jealous of that neoprene layer on the bottom. Beauty aside, there is some real utility here to be shared. In designing the layout, [mrzealot] created a keyboard generator called ergogen that will get you closer to your endgame without the need for CAD skills, just YAML.

Those of you who read Hackaday closely may recognize the term ‘ergogen’ from [Matthew Carlson]’s coverage of [Ben Vallack]’s guide to creating a low-profile keyboard. This is something else in the same vein.

Thanks for the tip, [HBBisenieks].

Script Makes Custom Pinout Labels For Your Chips

cusom-pinout-labels

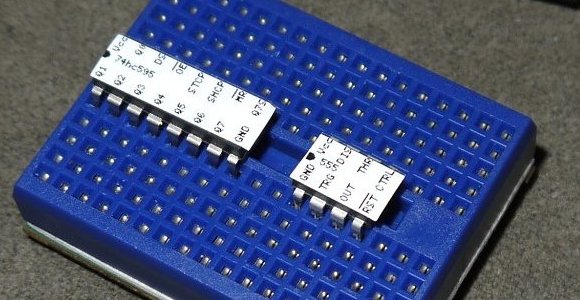
After years of prototyping hobby electronics we’ve learned (several times actually) that when something’s not working it’s a problem with the hardware. Usually the jumper wires aren’t hooked up correctly, or we needed to throw a pull-up resistor in and forgot to. One thing that can really help sort these problems out quickly is a pinout label for each chip like the ones seen above. This is a project which [John Meacham] came up with. It uses a script to generate chip pinouts on a label maker.

The label maker he started with is a Brother PT-1230PC. It connects to a computer via USB and can use a few different widths of self adhesive label tape. [John] found that the 1/4″ wide tape is nearly a perfect fit for PDIP components.

His script takes a YAML file as the input. This formatting standard makes is quick an easy to whip up a label for a new chip using just your text editor. From there his Pearl script turns the data into a Portable Network Graphics (.png) file with the labels spaced for the 0.1″ pitch of the chip. Send this graphic to your label maker and you’ve got an adhesive reminder that will help reduce the time you spend pawing through datasheets just for the pinouts.