Reading The Unreadable SROM: Inside The PSoC4

Wow. [Dmitry Grinberg] just broke into the SROM on Cypress’ PSoC 4 chips. The supervisory read-only memory (SROM) in question is a region of proprietary code that runs when the chip starts up, and in privileged mode. It’s exactly the kind of black box that’s a little bit creepy and a horribly useful target for hackers if the black box can be broken open. What’s inside? In the manual it says “The user has no access to read or modify the SROM code.” Nobody outside of Cypress knows. Until now.

This matters because the PSoC 4000 chips are among the cheapest ARM Cortex-M0 parts out there. Consequently they’re inside countless consumer devices. Among [Dmitry]’s other tricks, he’s figured out how to write into the SROM, which opens the door for creating an undetectable rootkit on the chip that runs out of each reset. That’s the scary part.

The cool parts are scattered throughout [Dmitry]’s long and detailed writeup. He also found that the chips that have 8 K of flash actually have 16 K, and access to the rest of the memory is enabled by setting a single bit. This works because flash is written using routines that live in SROM, rather than the usual hardware-level write-to-register-and-wait procedure that we’re accustomed to with other micros. Of course, because it’s all done in software, you can brick the flash too by writing the wrong checksums. [Dmitry] did that twice. Good thing the chips are inexpensive.

The nitty-gritty on the ROP (return oriented programming) tricks that [Dmitry] had to pull, and a good look into the design of the system itself, are all up on [Dmitry]’s blog. We can’t wait to see what other buried treasure he’s going to find as he continues to play around with these chips. And in case you’re wondering what type of mad genius it takes to pull this off, consider that [Dmitry] runs Linux on AVRs, fools nRF24 chips into transmitting Bluetooth LE beacons, and re-writes his own airplane’s GPS.

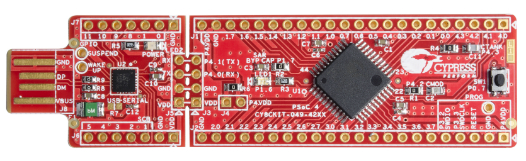
[Main image is a PSoC4200 dev kit, and [Dmitry] has only been working with the 4000 and 4100 series. Just so you know.]

Fast ADC Uses Old School Scope Hack For 48 MSPS

[Carlos] needed an ADC with a 50 nanosecond sample period for his laser lab, that’s 20Msps! (20 million samples a second). While in recent years, commodity ADCs reaching into the low GSPS have become available, integrated acquisition systems are still somewhat expensive. So [Carlos] decided to do what every good hacker does, and built his own solution. His project post pretty much just links to a whitepaper he wrote (PDF) so we’ll try and boil it down for you:

In order to simplify development [Carlos] borrowed a technique commonly used in the first era of digital oscilloscopes, Equivalent Sampling Time.

est

The figure to the right is from the TDS460 manual. While it may seem counter intuitive to those only familiar with modern scopes, the TDS460 achieved a 400MHz bandwidth using a 100MSPS ADC. In order to achieve this the scope acquires a single trace in multiple cycles, each time offsetting the acquisitions as shown and combining the result.

In this way, early digital scope developers could sidestep the limitations of the available ADCs to achieve a higher effective bandwidth. However there is of course one catch: the technique only works for periodic signals.

This was fine for [Carlos] who implemented a technique on a Cypress PSoC 4, which provides analog FPGA-like functionality. By offsetting the ADC trigger he has able to achieve an EST of 48MHz using a ADC sampling at 1MHz. If you want a little help getting into PSOC 4 yourself, check out the guide that [Bil Herd] made.

Neat hack [Carlos] and we hope to hear more about your laser lab in the future.

Hackaday Links Column Banner

Hackaday Links: January 25, 2015

Misumi is doing something pretty interesting with their huge catalog of aluminum extrusions, rods, bolts, and nuts. They’re putting up BOMs for 3D printers. If you’ve ever built a printer with instructions you’ve somehow found on the RepRap wiki, you know how much of a pain it is to go through McMaster or Misumi to find the right parts. Right now they have three builds, one with linear guides, one with a linear shaft, and one with V-wheels.

So you’re finally looking at those fancy SLA or powder printers. If you’re printing an objet d’arte like the Stanford bunny or the Utah teapot and don’t want to waste material, you’re obviously going to print a thin shell of material. That thin shell isn’t very strong, so how do you infill it? Spheres, of course. By importing an object into Meshmixer, you can build a 3D honeycomb inside a printed object. Just be sure to put a hole in the bottom to let the extra resin or powder out.

Remember that episode of The Simpsons where Homer invented an automatic hammer? It’s been reinvented using a custom aluminum linkage, a freaking huge battery, and a solenoid. Next up is the makeup shotgun, and a reclining toilet.

[Jan] built a digitally controlled analog synth. We’ve seen a few of his FM synths VA synths built from an LPC-810 ARM chip before, but this is the first one that could reasonably be called an analog synth. He’s using a digital filter based on the Cypress PSoC-4.

The hip thing to do with 3D printers is low-poly Pokemon. I don’t know how it started, it’s just what the kids are doing these days. Those of us who were around for Gen 1 the first time it was released should notice a huge oversight by the entire 3D printing and Pokemon communities when it comes to low-poly Pokemon. I have corrected this oversight. I’ll work on a pure OpenSCAD model (thus ‘made completely out of programming code’) when I’m sufficiently bored.

*cough**bullshit* A camera that can see through walls *cough**bullshit* Seriously, what do you make of this?

CY8CKIT-049-41XX Dev Kit

Cypress Launches $5 ARM Dev Board

We do love new development boards at Hackaday, and it’s always nice to see companies providing cheap tools for their products. For those needing a cheap ARM solution, Cypress has just released a PSoC based board that’ll cost you less than $5.

There’s two main ICs on the development board. The first is the target: an ARM Cortex M0+ based PSoC 4 MCU. The second is a CY7C65211 USB bridge. This device is communicates with the target’s built in bootloader for flashing code.

The bridge can also be configured to talk UART, GPIO, I2C or SPI.  If you need a USB to serial converter, this part of the board could be worth $5 alone.

The PSoC 4 target happens to be similar to the one our own [Bil Herd] used in his Introduction to PSoC video. If you’re looking to get into PSoC, [Bil] provides a good introduction to what makes these chips unique, and how to get started.