Hacker Turns Thermal Clacker Into USB Keyboard

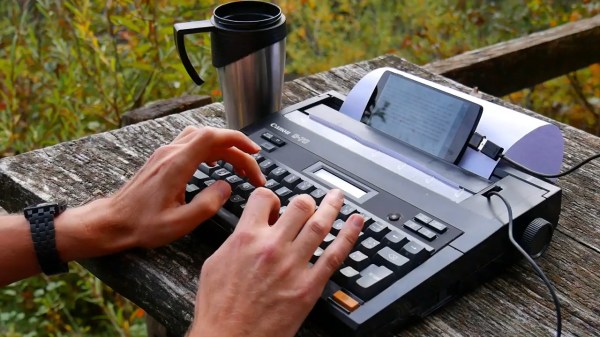
Back before there were laptops and subsequently, netbooks, there were these adorable thermal typewriter/word processors that are lovingly referred to by their fans as baby wedges or wedgies. These fascinating little machines can put words on paper two different ways: you can either use a prohibitively expensive little ribbon cartridge and regular copy paper, or you can go the easy route and get yourself a 96′ roll of thermal fax paper and type until you feel like tearing off the page.

[David] was lucky enough to pick up a Canon S-70 in working condition for next to nothing, thinking it would make an awesome USB keyboard, and we agree. The PSoC 5 that now controls it may be overkill, but it’s pretty affordable, and it was right there on the desk just waiting for a purpose. And bonus — it has enough I/O for all of those loud and lovely keyswitches.

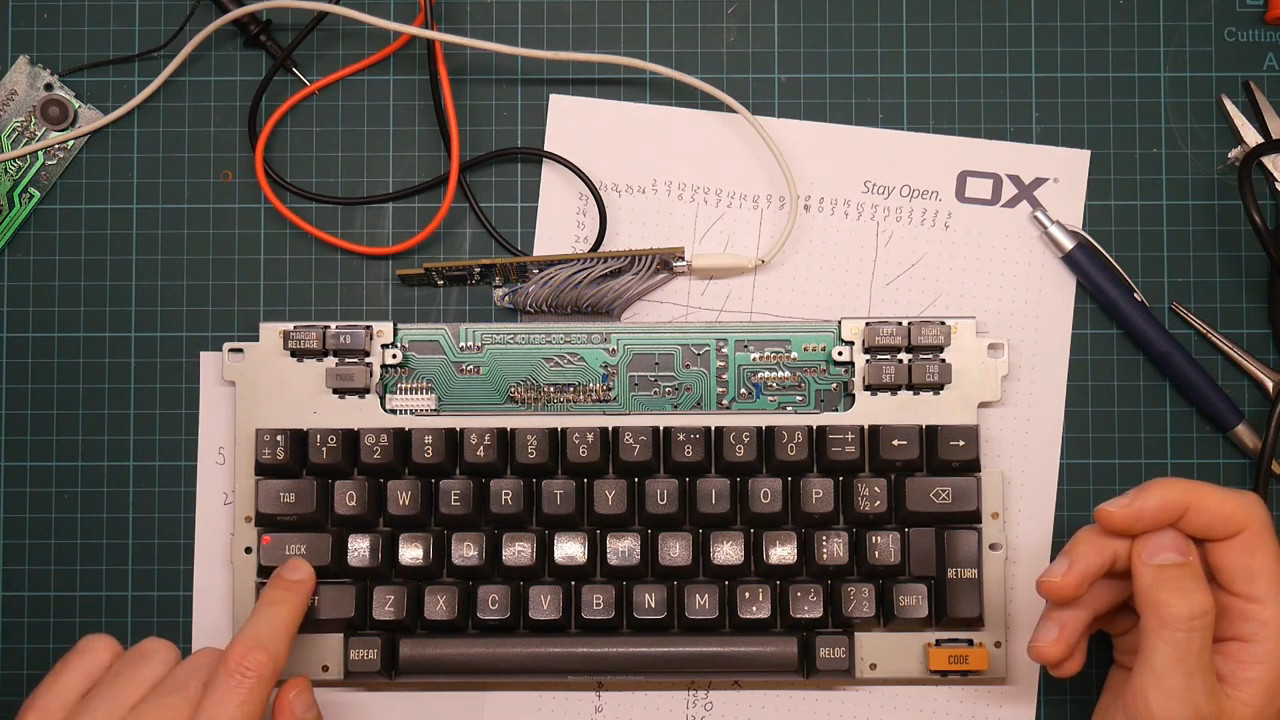
One thing that keeps these baby wedges within the typewriter camp is the Shift Lock function, which can only be disengaged by pressing Shift and had its own discrete logic circuitry on the board before he was forced to remove it.

That little screen is pure word processor and was used to show the typing buffer — all the characters you have a chance to correct before the print head commits them to paper. In a win for word processors everywhere, the screen was repurposed to show the current word count.

He was kind enough to post his firmware as well as real-time footage of the build. Watch him demo it in the wild after the break, and then stick around for part one of the build saga.

Portable word processors were still being made ten years ago, though they were mostly aimed at the primary school market as keyboarding trainers. Our own [Tom Nardi] recently did a teardown of a model called The Writer that relies on IR to send files.

Continue reading “Hacker Turns Thermal Clacker Into USB Keyboard”

New Contest Puts PSoC Boards In The Hands Of 50 Entries

Today marks the beginning of the PSoC IoT design contest. Show us your idea for an interesting Internet-connected thing and we’ll send you a dev kit to actually build it.

With the help of Cypress, Digi-Key, and AWS IoT we’ll be sending out your choice of  PSoC 6 WiFi-BT Pioneer kit or Prototyping Kit to up to 50 entries just for publishing a great idea of something to build with them. As you guessed from the name, these provide WiFi and Bluetooth connectivity, but they’re also bristling with seven programmable analog blocks the PSoC is known for, and a hundred GPIO. They have prototyping add-ons like a 2.4″ screen for user interface, audio, IMU, capacitive touch, and a heap of other goodies.

You have until May 26th to post a project page on Hackaday.io outlining your idea — don’t forget to use that “Submit project to” button to enter it in the contest. Tells us all about the IoT project you want to build and which PSoC 6 board you plan to use. If your idea is picked, we’ll send you the dev board and you’ll have until August to actually build your idea. Grand Prize will receive a $500 prepaid Visa card, two runners up will each receive a $250 card.

Full details are available on the contest page. We know you’ve always wanted to give your fish a Twitter account, to have a dashboard that shows up-to-the minute stats on how much Boo Berry Cereal you have left, a beacon to give you push alerts when the laundry needs to make its way into the dryer, or perhaps you plan to build a new wave of Internet-connect pagers. Whatever it is, from a silly idea to a truly life-improving build, if it’s begging to spread its data far and wide, it’s a perfect idea for this contest.

Get You An E-Textiles Sensor That Can Do Both

[Admar] is a software developer who was introduced to e-textiles in 2011. The bug firmly took hold, and these days he gives e-textile workshops at Eindhoven University of Technology. Here, students learn to build a single e-textile sensor that detects both presence and pressure. The workshop presentations are available on his site, which is itself a window into his e-textile journey.

Over the years, [Admar] has discovered that any e-textile project requiring more than a few connections is ripe for some kind of textile-friendly multi-point connector. Through trial and error, he designed a robust solution for use with an embroidery machine. The wires are made from conductive thread and soldered to a row of male header pins to make the transition out of fiber space. This transition requires solder, which quickly gets interesting when coupled with a fabric substrate and no solder mask. We wonder if spraying on mask beforehand would help, or if it would just soak in and stain and get in the way.

You can see the connector in practice in [Admar]’s capacitive multi-touch demo video after the break. He has stacked two pieces of fabric, each with a wire bus made of conductive threads, with the traces at right angles. Both sensors are wired to a Cypress PSoC5 to create a sensor matrix, and then to a laptop for visualization purposes. As his fingers approaches the fabric, the bar graphs roar upward to show increased capacitance. Once he makes contact, each finger appears as a yellow dot illustrating pressure.

E-textile projects aren’t limited to traces sewn by hand or embroidery machine. Circuit boards can be knitted, too.

Thanks for the tip, [Melissa]!

Hackaday Prize Entry: Fighting Dehydration One Sip At A Time

Humans don’t survive long without water, and most people walk around in a chronic state of mild dehydration even if they have access to plenty of drinking water. It’s hard to stay properly hydrated, and harder still to keep track of your intake, which is the idea behind this water-intake monitoring IoT drinking straw.

Dehydration is a particularly acute problem in the elderly, since the sense of thirst tends to diminish with age. [jflaschberger]’s Hackaday Prize entry seeks to automate the tedious and error-prone job of recording fluid intake, something that caregivers generally have to take care of by eyeballing that half-empty glass and guessing. The HydrObserve uses a tiny turbine flowmeter that can mount to a drinking straw or water bottle cap. A Hall sensor in the turbine sends flow data to a Cypress BLE SoC module, which totalizes the volume sipped and records a patient identifier. A caregiver can then scan the data from the HydrObserve at the end of the day for charting and to find out if anyone is behind on their fluids.

There are problems to solve, not least being the turbine, which doesn’t appear to be food safe. But that’s a small matter that shouldn’t stand in the way of an idea as good as this one. We’ve seen a lot of good entries in the Assistive Technology phase of the 2017 Hackaday Prize, like a walker that works on stairs or sonic glasses for the blind. There are only a couple of days left in this phase — got any bright ideas?

Reading The Unreadable SROM: Inside The PSoC4

Wow. [Dmitry Grinberg] just broke into the SROM on Cypress’ PSoC 4 chips. The supervisory read-only memory (SROM) in question is a region of proprietary code that runs when the chip starts up, and in privileged mode. It’s exactly the kind of black box that’s a little bit creepy and a horribly useful target for hackers if the black box can be broken open. What’s inside? In the manual it says “The user has no access to read or modify the SROM code.” Nobody outside of Cypress knows. Until now.

This matters because the PSoC 4000 chips are among the cheapest ARM Cortex-M0 parts out there. Consequently they’re inside countless consumer devices. Among [Dmitry]’s other tricks, he’s figured out how to write into the SROM, which opens the door for creating an undetectable rootkit on the chip that runs out of each reset. That’s the scary part.

The cool parts are scattered throughout [Dmitry]’s long and detailed writeup. He also found that the chips that have 8 K of flash actually have 16 K, and access to the rest of the memory is enabled by setting a single bit. This works because flash is written using routines that live in SROM, rather than the usual hardware-level write-to-register-and-wait procedure that we’re accustomed to with other micros. Of course, because it’s all done in software, you can brick the flash too by writing the wrong checksums. [Dmitry] did that twice. Good thing the chips are inexpensive.

The nitty-gritty on the ROP (return oriented programming) tricks that [Dmitry] had to pull, and a good look into the design of the system itself, are all up on [Dmitry]’s blog. We can’t wait to see what other buried treasure he’s going to find as he continues to play around with these chips. And in case you’re wondering what type of mad genius it takes to pull this off, consider that [Dmitry] runs Linux on AVRs, fools nRF24 chips into transmitting Bluetooth LE beacons, and re-writes his own airplane’s GPS.

[Main image is a PSoC4200 dev kit, and [Dmitry] has only been working with the 4000 and 4100 series. Just so you know.]

Build An AM Radio Transmitter From A CPLD

[Alex Lao] has been playing around with the CPLD-like parts of a PSoC. Which is to say, he’s been implementing simple logic functions “in hardware” in software. And after getting started with the chip by getting accustomed to the different clock sources, he built a simple AM radio that transmits at 24 MHz.

The device that [Alex] is learning on is a Cypress PSoC 5LP, or more specifically their (cheap) prototyping kit for the part. The chip itself is an ARM microprocessor core with a CPLD and some analog tidbits onboard to make interfacing the micro with the outside world a lot easier. [Alex] doesn’t even mess around with the microprocessor, he’s interested in learning the CPLD side of things.

PRS-CircuitHe starts off with a 24 MHz carrier and a 1 kHz tone signal, and combines them with a logical AND function. When the tone is on, the carrier plays through; that’s AM radio at its most elemental. Everything is logic (square waves) so it’s a messy radio signal, but it’ll get the job done.

Adding a multiplexer up front allows [Alex] to play two tones over his “radio” station. Not bad for some simple logic, and a fantastic Hello World project for a CPLD. We can’t wait to see what [Alex] is up to next!

If you’re interested in getting your feet wet with either CPLDs in general or a CPLD + micro system like Cypress’s, the development kit that [Alex] is using looks like a cheap and painless way to start. (Relatively speaking — PSoCs are a step or two up a steep learning curve from the simpler 8-bit micros or an Arduino.) Hackaday’s own [Bil Herd] has a video on getting started with another member of the Cypres PSoC family, so you should also check that out.

Video: Getting Your Feet Wet With Programmable System On Chip

Ever since I received my PSOC 4 Pioneer kit from Cypress I have wanted to play with this little mixed-signal Programmable System-on-Chip (PSOC) developer board. I love developer boards, providing that they are priced in a way to entice me to not only open my wallet but also make time in a busy schedule. I think my kit was free after winning a swag bag from Adafruit that they themselves obtained at the Open Hardware Summit and gave away on their weekly streamcast. Ultimately it was the invitation to beta test datasheet.net which also was included in that pile of swag that led to my getting involved with Hackaday.

What is Programmable System On Chip?

So what is a PSOC 4? A quick summary is that it’s based on an ARM Cortex reduced instruction set processor (RISC) and is somewhat capable of supporting shields based on the Arduino footprint, and it also uses a bright red PCB that I have come to associate with a Sparkfun PCB. What doesn’t show is the fact that this programmable system on chip has programmable analog function blocks in addition to programmable digital logic blocks. There is also some supporting input/output circuitry such as a multicolored LED and a capacitive touch sensor directly on the PCB.

Pioneer 4 Development Kit
PSCO4 Development Board on Hackaday

This is an intriguing amount of programmability, so much so that Newark/Element 14 highlighted a “100 projects in 100 days” event on it.

Enter the IDE

Over the years I have had to create or install many Integrated Development Environments (IDE) that linked hardware to software. Knowing that you had to, and how to, implement an IDE was part of being an engineer. Nowadays with the Arduino type environment the user has an IDE pretty much as soon as they click on the executable which I find to be one of the best aspects of the genre. It was so quick in fact that I was able to get my teenaged son into writing his first program even before he remembered to do massive eye-rolls and make sounds of utter disdain. He did give up however, just shy of learning how to have the Arduino make sounds of disdain on his behalf.

PSCo4 Cypress Development Kit on Hackaday
Closeup of a Programmable System on Chip Development System

Continue reading “Video: Getting Your Feet Wet With Programmable System On Chip”