Miniscule Intervalometer

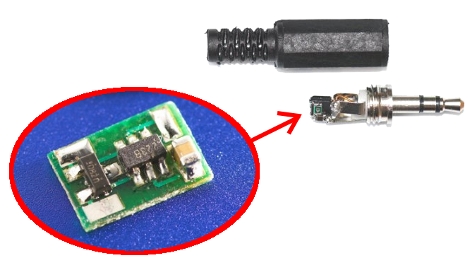
Calling this intervalomemter small would be a glaring understatement. It’s tiny enough to fit inside the plastic cover for a 2.5mm jack for use with a Canon DSLR camera. We should point out that the image we put together is a bit misleading. The picture of the jack is version 1 of this circuit and uses an 8-pin SOIC chip. The board in the oval is version 2, with a PIC 10f222 SOT23-6 package making it even smaller than the original version.

This is used for time-lapse photography. When plugged in the chip draws power from the camera. Get this: it learns the timing interval by listening for the first two images. Once you’ve snapped the first two pictures the PIC will continue to take images based on that initial delay. Amazing.

[Thanks AW via DIY Photography]

Dummy Loads And Heat Sinks

In [Dave’s] latest episode of the EEVblog he takes a look at constant current dummy loads. These are used to test power supply designs and instead of just chaining resistive loads together every time he’s decided to look into building a tool for the job. What he ends up with is a reliable constant current load that can be dialed anywhere from 1.5 mA up to just over 1A. There’s even an onboard meter so you don’t have to probe the setting before use.

It may look like he sent his design off to the board house for production but that’s actually a re-purposed PCB. In walking though his junk-box assembled dummy load [Dave] shares some great tips, like using multiple 1% resistors instead of shelling our for one large and accurate power resistor. But our favorite part comes at about 12:00 when he takes us through some rough math in calculating heat sinks. We’ve always just guessed, but like any good teacher, [Dave] explains the theory and then measures the actual performance taking the guesswork out of the design. See for yourself after the break. Continue reading “Dummy Loads And Heat Sinks”

Make Your Own Mindstorm Sensors

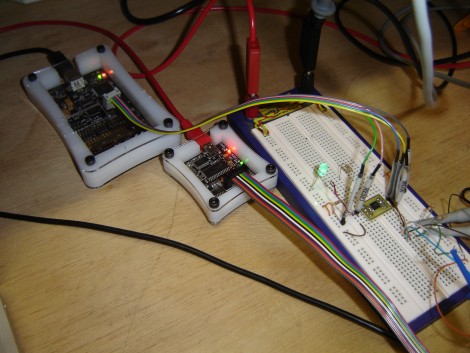
[Stewart Allen] acquired a Mindstorm kit about a month ago and he’s already building his own sensors for it. He wanted a more accurate range finder with a narrower measurement field than the stock sensor. Mindstorm has the option to communicate with sensors via an I2C bus. [Stewart] set up an ATtiny45 to act as a the slave on the bus, facilitating the analog measurement of the distance voltage by using and lookup table, and handling the data transfer with the NXT brick. His testing setup is pictured above, with an AVR Dragon for programming the tiny45 and a Bus Pirate for sniffing the I2C data during the development process. The sensor, looking great on a professionally made PCB he ordered, requires a simple driver that [Stewart] hammered out for use with leJOS, the alternative Mindstorm firmware we’ve seen before.

Bluetooth Multimedia Remote

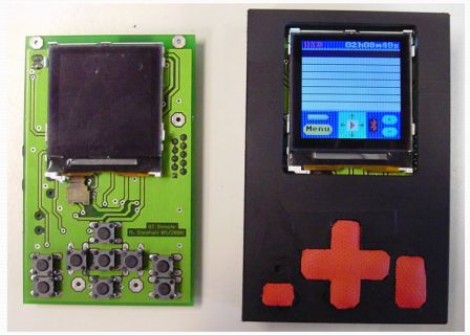
[Mathieu] spent three months developing this multimedia remote control. It connects to a PC via USB or Bluetooth and communicates with Winamp to pull down track information for display on a Nokia LCD screen. It can also be used as a wireless headset via the two on-board jacks. [Mettieu] thinks it’s just a small hop away from working as a Skype client if you take the time to write a plugin for that API.

RGB VU Meter

[Simon Inns] turned out this VU meter with a 16 RGB LEDs. He’s using three 16-bit TLC5940NTG LED drivers for the project. They’re not cheap chips but they do a great job. If you were looking to save on parts [Simon] found there’s more than enough brightness and any loss due to multiplexing would not be a problem. The device connects to a computer via USB thanks to the PIC 18F2550 which he’s used in his past VU meter projects. One of the design choices he made was to use a switching power supply. The LM2576 (datasheet) has no problem sourcing 3A at 5V and in addition to two electrolytic capacitors which are commonly used with linear regulators, you just need to add a diode and an inductor.

The meter offers several different configurations which are set on the PC side of things. These include the colors that are used and if the entire bars is used as one meter or split into sections to display both audio channels. Check it out after the break.

Continue reading “RGB VU Meter”

TxtBomber

The txtBomber is a high-tech graffiti printer developed by [Felix Vorreiter]. Details are a bit scarce but the video clip after the break proves that this works quite well. [Felix] admits this is Arduino powered but we’re going to have to guess at the rest of the setup from the pictures. He says there are built-in-pens so we’d bet there’s a felt-tip type of thing going on and those look like seven solenoids that actuate them. He posted a picture of the handle side of the device and we can make out two wheels that are connected to LEGO gears. This tracks movement of the txtBomber across a surface in order to synchronize the printing process. There’s no sign of an LCD so it looks like you have to pre-program the messages before you go out into the field.

This is akin to the Chalkbot, but the messages that leaves wash away with the rain. This one seems like it might get you into some trouble if you get caught leaving permanent tags around the neighborhood.

Continue reading “TxtBomber”

Using Makerbot For Dishwasher Repair

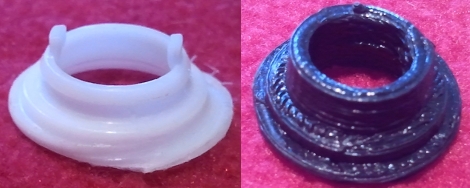
[Daryll Strauss’] dishwasher had some problems that he traced to a worn out part on the upper spinning arm. The hackerspace he belongs to has a Makerbot and he though this would be the perfect opportunity to print his own replacement part. He picked up some inexpensive digital calipers and set to work mapping out the dimensions of the broken piece. He took his hand-drawn cross section and built a replica part in Blender. Once he had it just right he generated the g-code and printed the part. His replacement works very well, and it’s a bit thicker (by design) than the original so hopefully that means it will hold up longer.