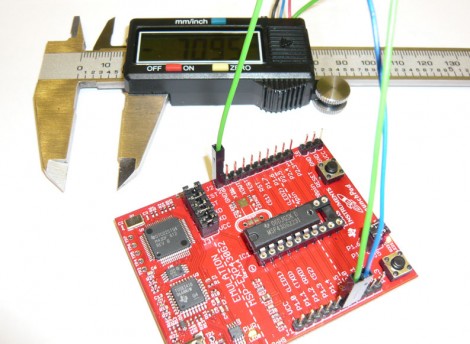
Reading A Digital Caliper With A Microcontroller

[Maris] wanted a way to read measurements from a digital caliper electronically. He ended up using the TI Launchpad to accomplish this, but not all of the necessary hardware is seen above. The calipers cost him about $7 on eBay, and they have four interface pins which made this hack quite a bit easier. After a bit of probing he established their purpose; voltage, ground, clock and data. A bit of scoping proved that data was being sent in 24-bit burst in packets that are quite easy to decode.

From there it’s just a matter of interfacing with a microcontroller. The chip he’s using is an MSP430G2231 that runs at 3.3V, but the caliper’s logic high is only 1.5v. By constructing an adapter using a pair of transistors, the data and clock from the calipers are able to pull pins on the MSP430 low. This is collected and analyzed by [Maris’] firmware and can be read on a PC using a terminal program.

[Thanks Chris]

Falling Sand Game On An FPGA

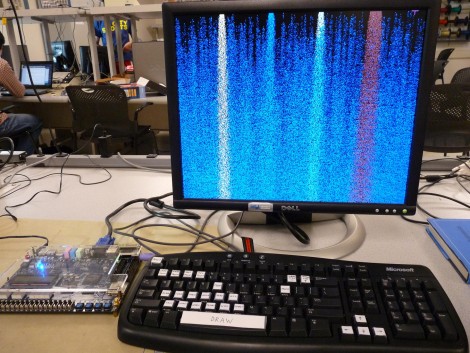
This falling sand game runs on a field-programmable gate array. The Altera Cyclone II resides at the heart of that development board, running the game which was written in Verilog. [Skyler Schneider] modeled his project after a Java version of the game called Pyro Sand Game. He treats each pixel of the 640×480 VGA screen as its own cell, following a set of rules to change the cells around it. This is very similar to Conway’s Game of Life, except that there are different categories of cells that behave uniquely (oil, water, plant, fire, etc.) and gravity is a key factor. Of particular interest to us were the rules for each cell, and the method [Skyler] used to feed and sync the VGA output. After the break you can see his demonstration videos, which walk through all of the features including the Troll button.

Continue reading “Falling Sand Game On An FPGA”

Developing A Sega Game Gear Flash Cartridge

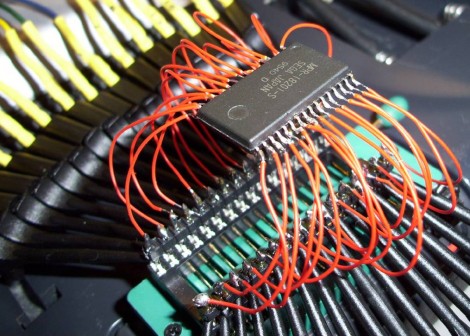
[Gerry O’Brien] tackled his most recent project, designing a flash ROM cartridge for the Sega Game Gear, with great success. Above you can see the test rig he used to reverse engineer the communications between an original ROM chip and the circuit board that it came on. He removed the chip, soldered a ZIF socket to the pads, then used a DIP socket as an adapter for that chip. Connected to each pin is a test lead for a logic analyzer. That’s a heck of a lot of channels to decipher!

It turns out that the cartridges use Integrated Mapping (does anyone have a link explaining this?) so dropping in a flash memory chip is not an option; you need a memory bank controller. [Gerry’s] solution to this issue is twofold: you can etch your own board with a controller chip and ZIF socket for the flash chip, or you can modify a Sega Master System cartridge to use as an adapter board. We’ve got pictures of both methods after the break, as well as his five instructional videos walking us through the fabrication process.

This isn’t [Gerry’s] first time working with flash cartridges. We looked at his work with Game Boy ROMS earlier in the year.

Continue reading “Developing A Sega Game Gear Flash Cartridge”

RepRapped Transistors

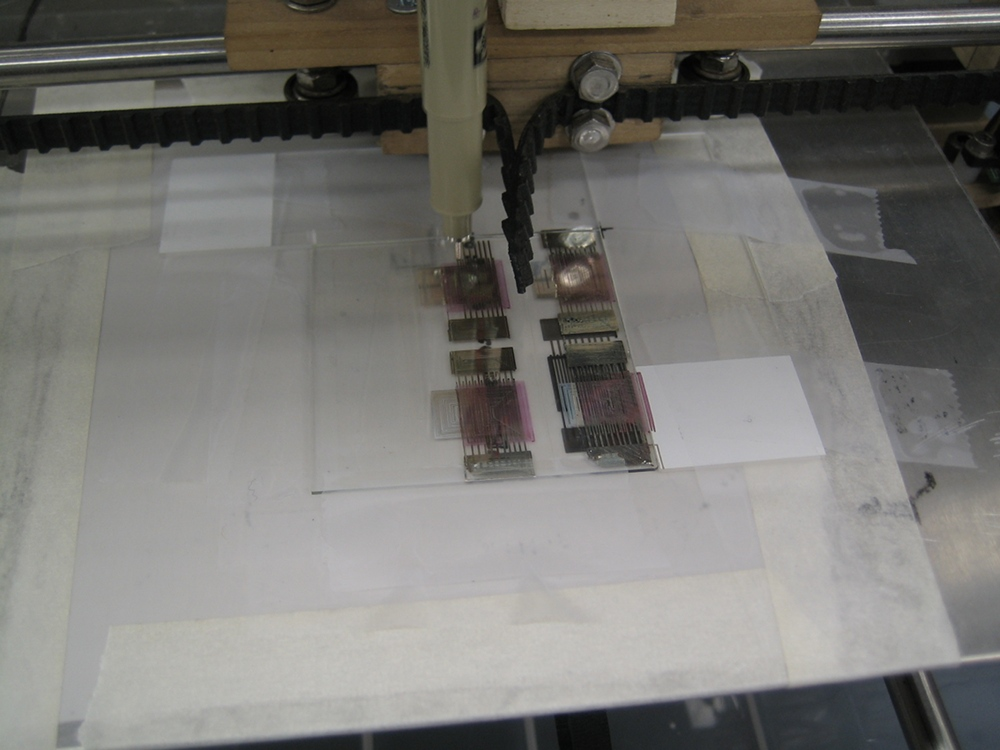
[Mr. Kim] and [John Sarik] made a presentation(pdf) at last weekend’s Botacon conference on how they made organic field-effect transistors (OFETs). A wooden RepRap, the fancifully named Unicorn from Makerbot (or printed from Thingiverse), hacked felt pen, a handful of chemicals, and a couple of pieces of lab equipment were needed to print (plot) out transistors. We were unable to attend the conference, so this is what we inferred from the slides. Silver ink is printed onto a glass slide to form the gate regions, cured and partially masked-off. A layer of CP1 Resin is spin-coated onto the slide to form the dielectric barrier between the gate and the semiconductor, the drain, and source regions. Silver ink is once again used, this time to print out the drain and source regions. The last thing printed is P3HT dissolved in toluene to form the semiconductor region. It would be interesting to see this process modified so that all coatings and curing can be done without removing the slide from the printer.

Update: 6809 Computing

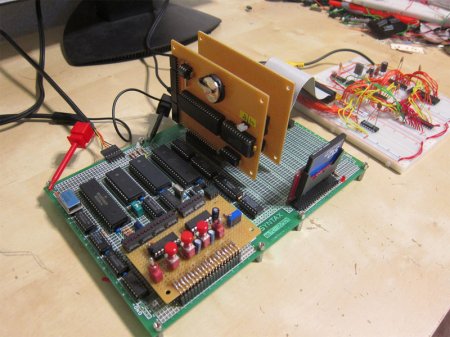
[Matt Sarnoff] is designing his own 8-bit computer from scratch. This means not only designing the hardware but also writing his own kernel and custom libraries. Since we last saw this 8-bit machine hes added both video and sound output which has allowed him to start developing some software for his computer (see it play Conways game of life after the break).

Sticking with the retro theme of his computer he uses a TMS9918 chip to output the video and a YM2149 for audio. The YM2149 was the audio chip used in the Atari ST allowing him to play songs generated for that system with a little bit of hacking to account for the fact that the Atari ST ran at 8MHz where his Motorola 6809 only runs at 2MHz.

Via [Retro Thing]

Continue reading “Update: 6809 Computing”