It’s A Sega It’s A Nintendo! It’s… Unique!

Before the days of the RetroPie project, video game clones were all the rage. Early video game systems were relatively easy to duplicate and, as a result, many third-party consoles that could play official games were fairly common. [19RSN007] was recently handed one of these clones, and he took some pretty great strides to get this device working again.

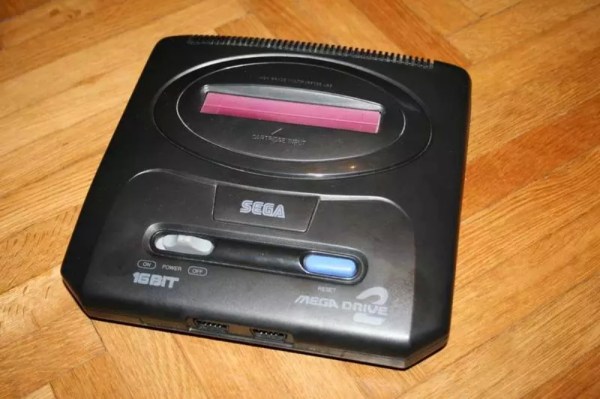
The device in question looks like a Sega Genesis, at least until you look closely. The cartridge slot isn’t quite right and the buttons are also a little bit amiss. It turns out this is a Famicom (NES) clone that just looks like a Sega… and it’s in a terrible state. After a little bit of cleaning, the device still wasn’t producing any good video, and a closer inspection revealed that the NOAC (NES-on-a-Chip) wasn’t working.

Luckily, [19RSN007] had a spare chip and was able to swap it out. The fun didn’t stop there though, as he had to go about reverse-engineering this chip pin-by-pin until he got everything sorted out. His work has paid off though, and now he has a video game system that will thoroughly confuse anyone who happens to glance at it. He’s done a few other clone repairs as well which are worth checking out, and if you need to make your own NES cartridges as well, we’ve got you covered there, too.

Using Classic Game Controllers With A Wii

[Bruno]’s Wii RetroPad Adapter was sent into the tip line, and we’re loving the possibility of using Playstation 2, Genesis, NES and SNES controllers with our Wii.

While there are commercial solutions that connect an NES or SNES controller to a Wii, everything connects to the GameCube port and there is no adapter for Sega or Playstation controllers. For his build, [Bruno] used an ATmega168 to read data from the classic controllers and translate that to the Wiimote I2C bus. Think of it as a new classic controller with the same form factor your 8-year-old self knew and loved.

The schematic for the build is very simple and [Bruno] has all the software out in the open. Even the PCB is single sided and looks like it would be a great candidate for a homebrew PCB. There’s no indication [Bruno] is trying to monetize his creation, so he’s either doing right, or so very wrong. Check out the Dualshock 2/Mario 3 demo of this board after the break.

Continue reading “Using Classic Game Controllers With A Wii”

Developing A Sega Game Gear Flash Cartridge

[Gerry O’Brien] tackled his most recent project, designing a flash ROM cartridge for the Sega Game Gear, with great success. Above you can see the test rig he used to reverse engineer the communications between an original ROM chip and the circuit board that it came on. He removed the chip, soldered a ZIF socket to the pads, then used a DIP socket as an adapter for that chip. Connected to each pin is a test lead for a logic analyzer. That’s a heck of a lot of channels to decipher!

It turns out that the cartridges use Integrated Mapping (does anyone have a link explaining this?) so dropping in a flash memory chip is not an option; you need a memory bank controller. [Gerry’s] solution to this issue is twofold: you can etch your own board with a controller chip and ZIF socket for the flash chip, or you can modify a Sega Master System cartridge to use as an adapter board. We’ve got pictures of both methods after the break, as well as his five instructional videos walking us through the fabrication process.

This isn’t [Gerry’s] first time working with flash cartridges. We looked at his work with Game Boy ROMS earlier in the year.

Continue reading “Developing A Sega Game Gear Flash Cartridge”