Radio-controlled LED Light Show

HL1606_radio_controlled_light_show

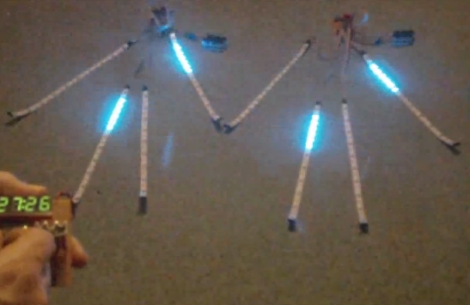
[Alan] was commissioned to make some wearable, radio-controlled LED strips for the Travelling Light Circus. It has taken some time, but he has recently finished some prototypes, and thought it was a good time to do a writeup on the project. The system is managed by a single controller unit, which communicates with any number of LED driver units, each controlling 4 HL1606 LED strips. The light displays are synchronized across all of the LED driver units via a 2.4 GHz radio, with each driver falling into synch almost immediately after being powered on. While some might be turned off to the fact that he uses Arduino Pro Minis to control the LEDs, this is far from a simple project.

[Alan’s] blog contains several posts about this project, with everything documented in detail. He spends quite a bit of time talking about the project’s software, as well as hardware issues he ran into along the way.

His blog is a must read, but even more so, it is a must see. The lighting effects are mesmerizing, as there are a ton of different light patterns these units can generate, so be sure to check out the following video of the lights in action.

Continue reading “Radio-controlled LED Light Show”

Recordable SNES Belt Buckle

recordable_snes_controller

[Andrew] recently offered to help out a friend who was looking to get her husband a SNES controller belt buckle. Rather than simply slap one together, he decided that it would be far cooler if the belt buckle played audio as well. He gutted a broken SNES controller, removing most everything inside, leaving just the buttons and a few wires.

To allow for the belt buckle to record sounds, he pulled apart a recordable balloon that would play a 10-second audio clip when shaken. He moved around a few wires, allowing for the audio board to be triggered by a button press rather than motion. Once that was done, he went about fitting it into the SNES controller, drilling speaker and microphone holes in the process. With the electronics components all set, he reassembled the controller shell and mounted it to an old belt buckle he had sitting around.

The final product looks extremely fun, and would make any die hard Nintendo fan’s day.

NintendOscope

[Craig] has taken his gameboy hackery to the next step, using an oscilloscope as an external display. Back in November of 2010 [Craig] showed us how to extract the video data from a classic gameboy’s screen, armed with that information, and a pretty powerful XMega128A1 controller it seems straightforward to process that data and output it onto a oscilloscope that is in XY(z) mode, especially since he has done all of the hard work for us.

Scopes that feature XY mode typically have a Z input on the back, X controls where the beam is positioned from left to right, Y controls the beam from top to bottom, and Z controls the intensity of the beam. By sweeping the X and Y to act as lines, and Z to control the shade of the beam, its fairly easy to reuse your typically vector display as a raster display similar to televisions or computer monitors (as long as you have your math and timing right), making scopes very useful as output displays for devices like the gameboy, which do not have “standards” friendly display systems.

Join us after the break for a short video, and also check out the scope terminal, or the VGA-to Sope converter for more examples of how to use your oscilloscope as a raster display.

Continue reading “NintendOscope”

Nixie Tube Thermometer

nixie_therm

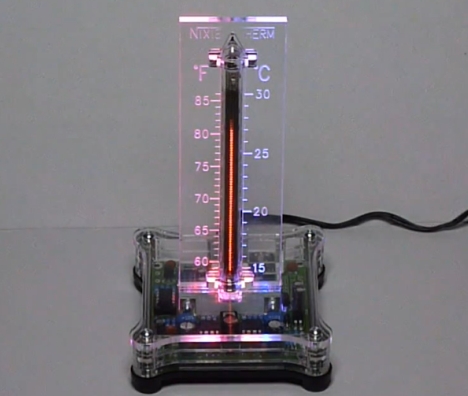
After seeing a picture of a thermometer using a bargraph style nixie tube in place of a mercury column, [Juergen Grau] decided he wanted to build his own. Dubbed the “Nixietherm”, his replica looks even better than the original. He used an IN-9 Nixie tube mounted on top of a custom plastic case, all powered by a 5v USB connection. He points out that his version does not use a PIC or any other sort of processor – it is built entirely from analog circuits. There are some RGB LEDs embedded in the plastic case that make for a cool effect, but they seem to simply cycle through the colors rather than represent how warm or cold the temperature is at any given time.

[Juergen] does not give a lot of details regarding the build as far as PCB layout or a parts list is concernred, but most of that can be extrapolated from the wiring schematic he provided. He also mentions that he will be making kits available in the near future. Be sure to keep reading to see the thermometer in action.

Thanks [Brian]

Continue reading “Nixie Tube Thermometer”

Arduino Based PC Ambient Lighting

[royboy] from the Arduino forum has recently made a post showing off his Arduino / PC ambient light system. The system is simple to wire up and easy to use, as long as your video is being sent from a PC, which for many of us that use “home theater pc” systems is very convenient. Using a sparkfun red/green/blue (non addressable) led strip, an ULN2003A, an Arduino, and a short sketch written for processing the project is easy to toss together and very effective too.

The processing sketch continuously takes screen captures and then takes the resulting pictures and averages all the colors together. That average color is fed down to the Arduino over its stock serial connection, where it is output to 3 of the pwm capable outputs. Those outputs are connected to the 2003 Darlington transistor array to switch the 12 volt led strip.

It may seem like it would be slow, as processing is an interpreted Java based language, plus serial communication, plus Arduino overhead, but its actually very responsive and completes its task with little or no lag. Join us after the break for a quick video to see for yourself.

Continue reading “Arduino Based PC Ambient Lighting”