Adjustable Prank Box Growls And Screams

growling_altoids_tin

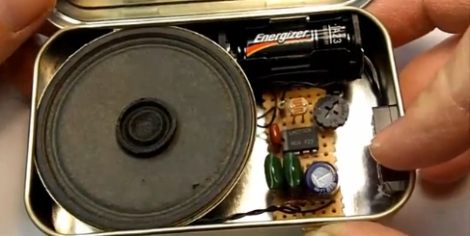
[Brett] over at FightCube was tossing around ideas to build a screaming prank circuit that fits inside an Altoids tin. Sound familiar? We featured a story just a few days back about the construction of a very similar item by [Dino Segovis]. It seems that great minds think alike after all!

[Brett’s] version is a bit more robust than the one we featured the other day. It’s similar to [Dino’s] in that it uses a 555 timer in astable mode, triggered by a normally-closed microswitch when the tin is opened. However, this version also includes a photoresistor which is used to increase the pitch and speed of the output as more light enters the box. This creates a growling effect that builds up into a scream as the box is opened. [Brett] has also included an adjustable pot which allows the sound range to be tweaked to his liking.

Stick around for a video walkthrough of the screamer circuit as well as a demo of the Altoids tin in action.

Continue reading “Adjustable Prank Box Growls And Screams”

Using Your PC As A Simple Signal Generator

dc_offset_circuit

[Debraj] needed a simple signal generator for a project he was working on, but didn’t have one handy. He found that the easiest and cheapest way to get clean, reliable signaling was by using something that was already sitting on his desk – his PC.

He found that the tone generator built into Audacity was quite useful, at least for generating waveforms at less than 20 KHz or so. Upon plugging his scope into his sound card’s audio jack, he observed that the PC had good frequency fidelity, though it required an additional DC offset as most cards are built to remove that offset from the waveform.

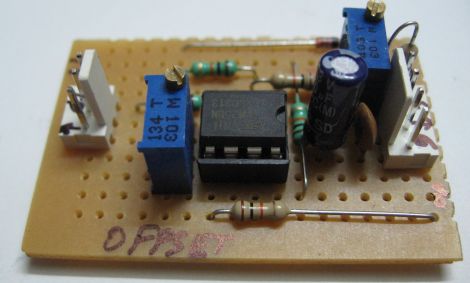
Using a LM358 as a non-inverting summing amplifier, he was able to apply a steady DC offset and generate usable signals for his micro controller projects. A schematic for his offset circuit is available on his site, should you wish to build one of your own.

[Debraj] also notes that though Audacity is a cheap free way to generate simple signals, any number of complex signals can be generated using MATLAB if you happen to own a copy.

Hacking Game Port Peripherals To Work With Modern PCs

gameport_hack

[Atiti] has a bad habit of hanging on to old things. Some people call this sort of behavior “hoarding”, but around here we understand his affliction. It turns out that in his collection of old computer peripherals, he located a Thrustmaster Formula 1 racing wheel he used back in the day. Analog racing wheels can cost a pretty penny nowadays, depending on what you buy, so he decided to see if he could hack this outdated controller to work with his new PC.

You see, the problem with this wheel is that it utilized a “game port” connecter to interface with the computer. If you don’t remember the game port, go dig up an old PCI sound card and take a look on the back. That 15-pin connector? That’s a game port. Microsoft discontinued support for the game port once Vista was released, so [Atti] had to figure out how in the world he would get it to work on his new PC.

His solution was an Arduino, which is used to read the analog signals output by the wheel. Those signals are processed and sent to a parallel port joystick emulator, enabling him to use the wheel with any game supporting a standard joystick.

Obviously he could have just gone out to the store and bought a USB wheel, but where’s the fun in that?

Stay tuned for a video demo of his refreshed wheel in action.

Continue reading “Hacking Game Port Peripherals To Work With Modern PCs”

Macro Lens And Image Stacking

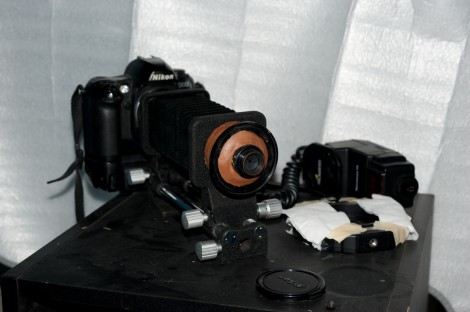
[Samuel Sargent] built his own lens for making stacked macro images.This project, which was completed as part of his senior thesis, utilizes a Zeiss enlarger lens. The aperture ring was broken, making it difficult to tell how much light was being let into the camera. Instead of scrapping the whole thing he turned it around, making it a macro lens when combined with a few other parts. He’s used a Nikon PB-5 belows, a PK-13 extension tube, and a body cap to provide a way to mount the lens to his camera. A hole was added to the body cap using his Dremel, and a liberal dose of epoxy putty seals all of the gaps.

After the break you can see a couple of photos that [Samuel] made of bismuth. He estimates the sharpest focal length by taking a few test shots. Next he captures a series of images, moving the bellows slightly between each shot. Finally, this set is combined using Helicon Focus image stacking software. Maybe for his graduate thesis he can build a mechanized platform to move the subject automatically.

Continue reading “Macro Lens And Image Stacking”

3D Printed Gun Fires Nerf Darts

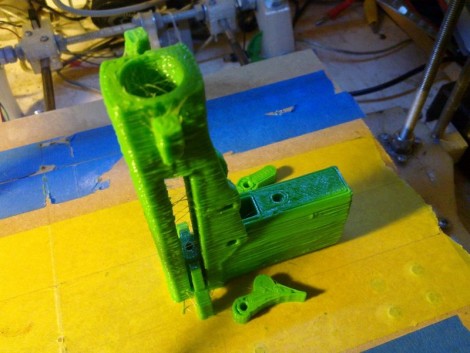
[Vik Olliver] adds a bit more power to what has traditionally been a store-bought toy by designing this printable dart gun. His design prints the follower in the track where it belongs, which means it’s not going to come loose unless the material itself fails. After printing you’ll need to clean up that track just a bit, and ream out the pivot holes for the trigger parts. Two pieces of filament are used as the axles for pivot points and can be melted in place after assembly. A third length of filament acts as a spring, making this a completely plastic gun. Well, not completely; a couple of strong rubber bands deliver the stored energy which sends the Nerf dart on its way. The design is parametric so you can adjust it for the dart dimensions of your choosing before  printing begins.

If you still haven’t managed to boot-strap your own 3D printer don’t fret. You can always give this Nerf dart sniper rifle a try.

Robotic Berimbau Plays Itself

berimbau

If you have ever seen capoeira, you have undoubtedly heard the music of a berimbau. If you are not familiar, Capoeira is a Brazilian art form that melds martial arts, acrobatics, and music. This graceful fighting form is often accompanied by the sounds of a berimbau, a single-stringed musical instrument comprised of a gourd, a wooden bow, and a steel string.

[Ivan Monsão] and [Paulo Libonati] have constructed what is considered to be the first robotic berimbau in existence, capable of playing music without any human interaction. The robot strikes the berimbau’s metal string, mechanically muting the gourd when appropriate, and even shakes the caxixi (a rattle) in time with the music.

The builder claims that the berimbau learns songs by “listening” and repeating rather than having songs pre-programmed into the system. We can’t see any evidence of that functionality from the video, though we’d love to see the learning process in action.

While we try to find our VHS copy of “Only the Strong”, be sure to take a look at the following video of the berimbau playing itself.

[Thanks, Camilo]

Continue reading “Robotic Berimbau Plays Itself”

Manage Your Rechargeables At A Glance

If you enjoy photography, radio controlled vehicles, or any other activity that requires you to keep multiple sets of rechargeable batteries on hand you know how much of a pain it can be if you get a dead battery mixed in with your charged batteries. This easy approach to managing your batteries while on location does not require fancy electronics, meters or anything else that might pop into mind, but rather simple stickers and storage.

The first set of labels get stuck on the battery, offering a green and red color code along with a number so its easy to keep track of which group of batteries go where and to catalog date / life. The second set of labels gets attached to your storage compartment, when a battery is charged, place it in the box so the positive end is facing the green on the storage label, and when its dead just flip it around.

While this mainly focuses on AA batteries (and even shows you how to make a simple but effective holder out of some elastic band and staples) this idea can be used with just about any type of battery for a quick glance to see where you stand on juice.