Gun Turret Built Into A Cake Box

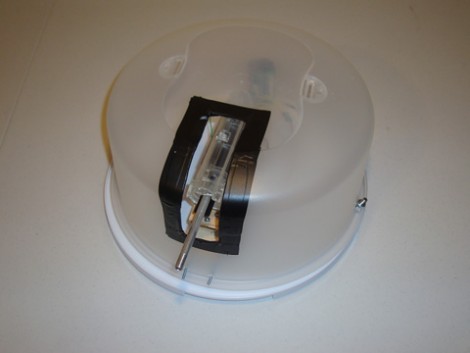
Couch potatoes have a new line of defense thanks to this remote-controlled turret. The gun itself is a hacked down airsoft model. The mount started with a servo motor in the center of a plastic cake box. A thin strip of plywood was added, along with a couple of sliding furniture feet to stabilize the platform as it rotates. A second servo mounts to that platform, which allows the trajectory of the projectile to be adjusted up or down. A PIC 18F4520 controls both of the motors, as well as the firing of the airsoft module, all while listening for commands from an IR receiver. Just adjust the firmware to match an unused device on your universal remote and the power to annoy your roommates will be at the tips of your fingers.

You can see an overview of the build process, as well as a demonstration of the final project in the video after the break. The page linked at the top has a very detailed build log but some of the ‘next’ buttons on that page don’t work for us. Luckily you’ll see a table of contents in the right column which lets you navigate around these bad links.


Continue reading “Gun Turret Built Into A Cake Box”

Kapton Tape Aids In Drag Soldering Surface Mount Parts

Drag soldering works exactly as its name implies, by dragging a bead of solder across fine-pitch pins you can quickly solder an entire row. The method relies on clean joints, so liquid solder flux is often used to make sure there is good flow. But if you’re drag soldering on boards that you’ve etched yourself the solder can sometimes run down the trace, rather than staying where you want it. Professionally manufactured boards don’t have this problem since they have solder mask covering the copper that doesn’t need soldering. [Ahmad Tabbouch] has a method that uses Kapton tape to act as a temporary solder mask on diy boards.

The process involves several steps. First, three strips are place horizontally across the board, leaving just a portion of the upper and lower pads exposed. Those pads are then tinned with solder, and a light touch with an X-acto knife is then used to score the tape covering the vertical rows of pads. Once the waste as been removed, two more strips are added and those rows are tinned. From there the chip is placed and soldered as we’ve seen before; first tacked in place, then fluxed, and finally drag soldered to complete the connections. This achieves a crisp and clean connection, presumably without the need to clean up your solder mess with solder wick.

Kapton tape resists heat, making it perfect for this process. We’ve also seen it used on hot beds for 3D printers, and as a smoothing surface for sliding mechanisms.

[via Dangerous Prototypes]

Aftermarket Visor-mounted GPS Better Than OEM

mini_gps

When [Roberto] bought his Mini Cooper, he opted to forgo the factory GPS system as it was over priced and didn’t have the best of reputations. He decided that he still needed GPS in his car, so he committed himself to install a TomTom unit in a way that would not detract from the car’s interior.

He dismantled the driver’s side sun visor, taking measurements of the original plastic housing that contained the mirror and lighting. He then drew up a 3D model of a replacement housing that would allow him to fit both the GPS unit and the speaker in the same amount of space formerly occupied by the mirror.

He gutted his TomTom unit, removing any extraneous parts he could find. A smaller speaker was sourced due to size constraints, then everything was mounted in his new housing once it arrived.

The end result is amazing. The GPS unit looks like it was installed at the factory – there is no sign that this was any sort of aftermarket modification. We are sure people will be quick to say that would be difficult to keep your eyes on the road while looking at the navigation screen, but as [Roberto] points out, you should be following the spoken directions once the car is in motion anyhow.

Adjustable Prank Box Growls And Screams

growling_altoids_tin

[Brett] over at FightCube was tossing around ideas to build a screaming prank circuit that fits inside an Altoids tin. Sound familiar? We featured a story just a few days back about the construction of a very similar item by [Dino Segovis]. It seems that great minds think alike after all!

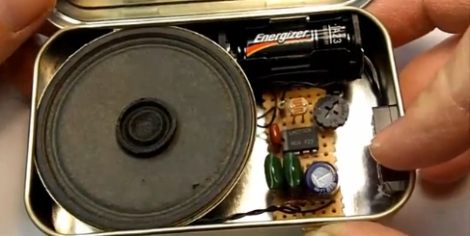
[Brett’s] version is a bit more robust than the one we featured the other day. It’s similar to [Dino’s] in that it uses a 555 timer in astable mode, triggered by a normally-closed microswitch when the tin is opened. However, this version also includes a photoresistor which is used to increase the pitch and speed of the output as more light enters the box. This creates a growling effect that builds up into a scream as the box is opened. [Brett] has also included an adjustable pot which allows the sound range to be tweaked to his liking.

Stick around for a video walkthrough of the screamer circuit as well as a demo of the Altoids tin in action.

Continue reading “Adjustable Prank Box Growls And Screams”

Using Your PC As A Simple Signal Generator

dc_offset_circuit

[Debraj] needed a simple signal generator for a project he was working on, but didn’t have one handy. He found that the easiest and cheapest way to get clean, reliable signaling was by using something that was already sitting on his desk – his PC.

He found that the tone generator built into Audacity was quite useful, at least for generating waveforms at less than 20 KHz or so. Upon plugging his scope into his sound card’s audio jack, he observed that the PC had good frequency fidelity, though it required an additional DC offset as most cards are built to remove that offset from the waveform.

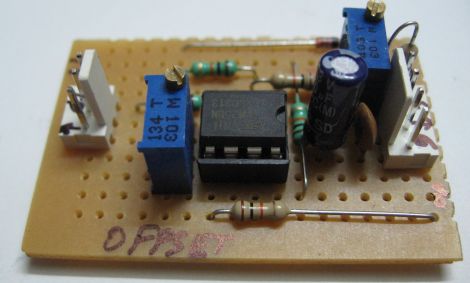
Using a LM358 as a non-inverting summing amplifier, he was able to apply a steady DC offset and generate usable signals for his micro controller projects. A schematic for his offset circuit is available on his site, should you wish to build one of your own.

[Debraj] also notes that though Audacity is a cheap free way to generate simple signals, any number of complex signals can be generated using MATLAB if you happen to own a copy.

Hacking Game Port Peripherals To Work With Modern PCs

gameport_hack

[Atiti] has a bad habit of hanging on to old things. Some people call this sort of behavior “hoarding”, but around here we understand his affliction. It turns out that in his collection of old computer peripherals, he located a Thrustmaster Formula 1 racing wheel he used back in the day. Analog racing wheels can cost a pretty penny nowadays, depending on what you buy, so he decided to see if he could hack this outdated controller to work with his new PC.

You see, the problem with this wheel is that it utilized a “game port” connecter to interface with the computer. If you don’t remember the game port, go dig up an old PCI sound card and take a look on the back. That 15-pin connector? That’s a game port. Microsoft discontinued support for the game port once Vista was released, so [Atti] had to figure out how in the world he would get it to work on his new PC.

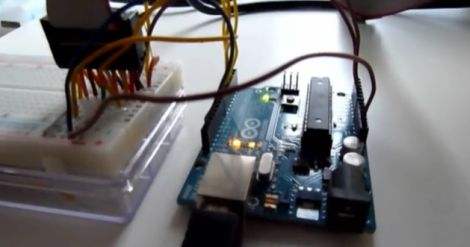
His solution was an Arduino, which is used to read the analog signals output by the wheel. Those signals are processed and sent to a parallel port joystick emulator, enabling him to use the wheel with any game supporting a standard joystick.

Obviously he could have just gone out to the store and bought a USB wheel, but where’s the fun in that?

Stay tuned for a video demo of his refreshed wheel in action.

Continue reading “Hacking Game Port Peripherals To Work With Modern PCs”