MikroLeo, A 4-Bit Retro Learning Platform

MikroLeo is a discrete TTL logic-based microcomputer intended for educational purposes created by [Edson Junior Acordi], an Electronics Professor at the Brazilian Federal Institute of Paraná, Brazil. The 4-bit CPU has a 
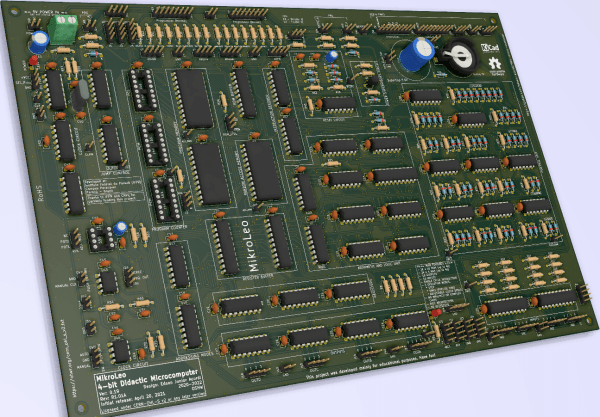
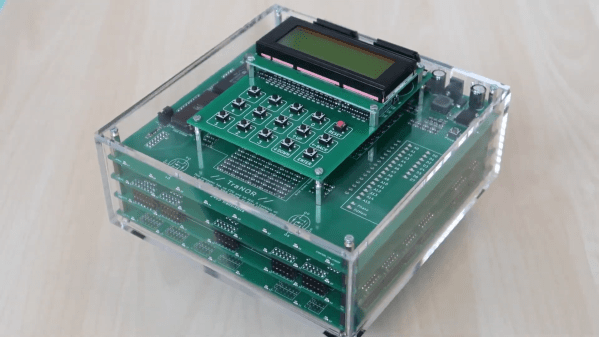
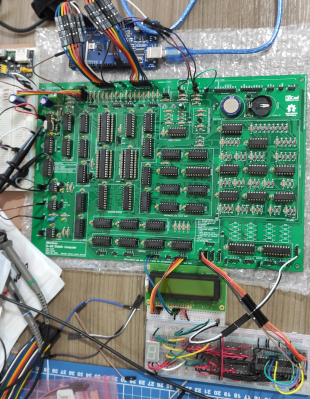
Harvard RISC architecture built entirely from 74HCT series logic mounted on a two-sided PCB using only through-hole parts. With 2K words of instruction RAM and 2K words of addressable RAM, the CPU has a similar resource level to comparable machines of old, giving students a feel for how to work within tight constraints.

Simulation of the circuit is possible with digital, with the dedicated PCB designed with KiCAD, so there should be enough there to get cracking with it. Four 4-bit IO ports make interfacing easy, with dedicated INput and OUTput instructions for the purpose. An assembler, compiler, and emulator are all being worked on (as far as we can tell) so keep an eye out for that, if this project is of interest to you.

We like computers a bit around these parts, the “hackier” and weirder the better. Even just in the 4-bit retro space, we’ve seen so many, from those built around ancient ALU chips to those built from discrete transistors and diodes, but you don’t need to go down that road, an emulation platform can scratch that retro itch, without the same level of pain.

Should’ve Used A 555 — Or 276 Of Them

When asked to whip up a simple egg timer, most of us could probably come up with a quick design based on the ubiquitous 555 timer. Add a couple of passives around the little eight-pin DIP, put an LED on it to show when time runs out, and maybe even add a pot for variable timing intervals if we’re feeling fancy. Heck, many of us could do it from memory.

So why exactly did [Jesse Farrell] manage to do essentially the same thing using a whopping 276 555s? Easy — because why not? Originally started as an entry in the latest iteration of our 555 Contest, [Jesse]’s goal was simple — build a functional timer with a digital display using nothing but 555s and the necessary passives. He ended up needing a few transistors and diodes to pull it off, but that’s a minor concession when you consider how many chips he replaced with 555s, including counters, decoders, multiplexers, and display drivers. All these chips were built up from basic logic gates, a latch, and a flip-flop, all made from one or more 555s, or variants like the 556 or 558.

As one can imagine, 276 chips take a lot of real estate, and it took eleven PCBs to complete the timer. A main board acts as the timer’s control panel as well as serving as a motherboard for ten other cards, each devoted to a different block of functions. It’s all neat and tidy, and very well-executed, which is in keeping with the excellent documentation [Jesse] produced. The whole thing is wonderfully, needlessly complex, and we couldn’t be more tickled to feature it.

Continue reading “Should’ve Used A 555 — Or 276 Of Them”

Thousands Of Discrete MOSFETs Make Up This Compact CPU-Less Computer

How long has it been since a computer could boast about the fact that it contained 2,500 transistors? Probably close to half a century now, at a guess. So in a world with a couple of billion transistors per chip, is a 2,500-transistor computer really something to brag about? Yes. Yes, it is.

The CPU-less computer, called the TraNOR by its creator [Dennis Kuschel], is an elaboration on his previous MyNOR, another CPU-less machine that used a single NOR-gate made of discrete transistors as the core of its arithmetic-logic unit (ALU). Despite its architectural simplicity, MyNOR was capable of some pretty respectable performance, and even managed to play a decent game of Tetris. TraNOR, on the other hand, is much more complicated, mainly due to the fact that instead of relying on 74HC-series chips, [Dennis] built every single gate on the machine from discrete MOSFETs. The only chips on the four stacked PCBs are a trio of memory chips; we don’t fault him at all for the decision not to build the memory — he may be dedicated, but even art has its limits. And TraNOR is indeed a work of art — the video below shows the beautiful board layouts, with seemingly endless arrays of SMD transistors all neatly arranged and carefully soldered. And extra points for using Wintergatan’s marble machine melody as the soundtrack, too.

As much as we loved the original, TraNOR is really something special. Not only is it beautiful, but it’s functional — it’s even backward-compatible with MyNOR’s custom software. Hats off to [Dennis] for pulling off another wonderful build, and for sharing it with us.

Continue reading “Thousands Of Discrete MOSFETs Make Up This Compact CPU-Less Computer”

A Superheterodyne Receiver With A 74xx Twist

In a world with software-defined radios and single-chip receivers, a superheterodyne shortwave radio might not exactly score high on the pizzazz scale. After all, people have been mixing, filtering, and demodulating RF signals for more than a century now, and the circuits that do the job best are pretty well characterized. But building the same receiver using none of the traditional superhet trappings? Now that’s something new.

In what [Micha] half-jokingly calls a “74xx-Defined Radio”, easily obtained discrete logic chips, along with some op-amps and a handful of simple components, take the place of the tuned LC circuits and ganged variable capacitors that grace a typical superhet receiver. [Micha] started by building an RF mixer out of a 74HC4051 analog multiplexer, which with the help of a 2N3904 phase splitter forms a switching mixer. The local oscillator relies on the voltage-controlled oscillator (VCO) in a 74HC4046 PLL, a chip that we’ve seen before in [Elliot Williams]’ excellent “Logic Noise” series. The IF filter is a simple op-amp bandpass filter; the demodulator features an op-amp too, set up as an active half-wave rectifier. No coils to wind, no capacitors to tune, no diodes with mysterious properties — and judging by the video below, it works pretty well.

It may not be the most conventional way to tune in the shortwave bands, but we always love the results of projects that are artificially constrained like this one. Hats off to [Micha] for the interesting trip down the design road less travelled.

Continue reading “A Superheterodyne Receiver With A 74xx Twist”

A CPU-Less Computer With A Single NOR-Gate ALU

We see a lot of discrete-logic computer builds these days, and we love them all. But after a while, they kind of all blend in with each other. So what’s the discrete logic aficionado to do if they want to stand out from the pack? Perhaps this CPU-less computer with a single NOR-gate instead of an arithmetic-logic unit is enough of a hacker flex? We certainly think so.

We must admit that when we first saw [Dennis Kuschel]’s “MyNor” we thought all the logic would be emulated by discrete NOR gates, which of course can be wired up in various combinations to produce every other logic gate. And while that would be really cool, [Dennis] chose another path. Sitting in the middle of the very nicely designed PCB is a small outcropping, a pair of discrete transistors and a single resistor. These form the NOR gate that is used, along with MyNor’s microcode, to perform all the operations normally done by the ALU.

While making the MyNor very slow, this has the advantage of not needing 74-series chips that are no longer manufactured, like the 74LS181 ALU. It may be slow, but as seen in the video below, with the help of a couple of add-on cards of similar architecture, it still manages to play Minesweeper and Tetris and acts as a decent calculator.

We really like the look of this build, and we congratulate [Dennis] on pulling it off. He has open-sourced everything, so feel free to build your own. Or, check out some of the other CPU-less computers we’ve featured: there’s the Gigatron, the Dis-Integrated 6502, or the jumper-wire jungle of this 8-bit CPU-less machine.

Continue reading “A CPU-Less Computer With A Single NOR-Gate ALU”

Discrete-Logic UART Keeps 8-Bit TTL Computer Connected

Pity the poor TTL computer aficionado. It’s an obsession, really — using discrete logic chips to scratch-build a computer that would probably compare unfavorably to an 80s era 8-bit machine in terms of performance. And yet they still forge ahead with their breadboards full of chips and tangles of wire. It’s really quite beautiful when you think about it.

[Duncan] at Shepherding Electrons has caught the TTL bug, and while building his 8-bit machine outfitted it with this discrete logic UART. The universal asynchronous receiver-transmitter is such a useful thing that single-chip versions of the device have been available since the early 1970s. [Duncan]’s version makes the magic of serial communications happen in just 12 chips, all from the 74LS logic family.

As if the feat of building a discrete logic UART weren’t enough, [Duncan] pulled this off without the aid of an oscilloscope. Debugging was a matter of substituting the 2.4576 MHz crystal oscillator clock with a simple 1 Hz 555 timer circuit; the reduced clock speed made it easier to check voltages and monitor the status of lines with LEDs. Once the circuit was working, the full-speed clock was substituted back in, allowing him to talk to his 8-bit computer at up to 38,400 bps. Color us impressed.

For more TTL computer goodness, and to see where [Duncan] got his inspiration, check out [Ben Eater]’s many discrete logic projects — his scratch-built 6502, a low-end video card, or even his take on serial communications.

Homebrew 16-Bit Computer Is A Wire-Wrapped Work Of Art

Breadboard 8-bit computer builds seem all the rage these days, and with good reason: building your own CPU from the board up using discrete logic chips is a great way to really learn how microprocessors work. Not to mention that it’s an incredible flex. But once you’ve conquered the eight-bit, what do you do? Easy: build a 16-bit computer from 74HC logic chips.

Attentive readers will likely remember this computer’s builder, [Paulo Constantino], from his previous work on 8-bit breadboard computers. As gloriously entropic as that tangled mass of wires was, it must have been a nightmare for [Paulo] to maintain. And so when the time came to upgrade, he wisely chose a more integrated construction method. The construction method is wire-wrapping, with multiple cards plugged into backplane and connected by ribbon cables. The whole card cage is far neater than the previous build, and seems to lend itself to rapid modifications. The top card in the cage acts as a control panel for now; eventually, [Paulo] planes to put a real front panel on the cage to support all the switches and blinkenlights such builds demand. Stretch goals include supporting audio and video and getting the machine online so anyone can log in.

The video below is an overview of the current state of the machine; earlier videos in the playlist cover the design and build in more detail. We hope to see schematics soon, and we’d love to know where to get some of those wire-wrap PCBs for projects of our own.

Continue reading “Homebrew 16-Bit Computer Is A Wire-Wrapped Work Of Art”