Electronic Diaper Bag Reminds You To Pack Everything But The Baby

lilypad_diaperbag

[jnorby] knows what it’s like to leave the house with her baby in tow, only to realize that she has left something she needs at home. Instead of relying on a paper checklist, she decided to craft her own diaper bag that alerted her if she had forgotten to pack a particular item.

She built her bag from scratch, wiring small circuits into each of the pockets she created on the inside of the bag. Wires were run to each half of a snap fastener, so that they would complete the circuit when the snaps touch. The LEDs and snaps were then connected to a LilyPad Arduino, which checks the status of the snap circuits, lighting the appropriate LED once the proper item has been packed.

While we like the idea of a bag that uses functional indicators that remind you to pack items, we do think that the use of the Arduino, or any microprocessor for that matter, is massive overkill. We would ditch the LilyPad and snap fasteners for reed switches or perhaps normally closed micro leaf switches that turn the LEDs off once the proper item has been packed, rather than the other way around.

PICAXE Using LEDs To Communicate

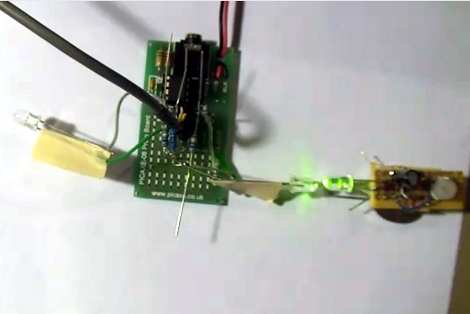
[Relwin] has being working on using LEDs as bi-directional devices. The setup above allows him to use each LED as an input, looking for a bright light source and then syncing up with the activity it receives. It is the most basic of communications using the components. The hardware at the heart of the system is a PICAXE development board on the left. The blinking light to the right causes the LED on the left of the picture to blink, but moving the blinking source over to that side will reverse the effect. The chip is programmed to play a tune on a piezo buzzer whenever a connection is lost. What is interesting to us is that these green LEDs will not detect a red LED flashing because the voltage threshold is different on the detector side of things.

He’s got some code available, but we’re really looking for the ideas of what to do with this concept. Maybe something along the lines of LED matrix video puzzles, or a variation on this laser-pointer LED game. Watch the demo video after the break and then let us know what you would use it for by leaving a comment.

Continue reading “PICAXE Using LEDs To Communicate”

Tilt And Pivot Camera Base Uses Just Two Servos

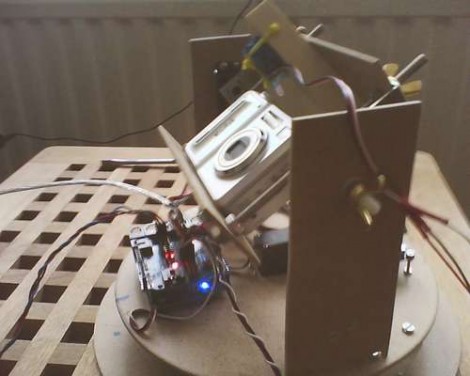
[Caled] shows us how to build a tilt and pivot camera base. One of these can be quite handy for taking precisely aligned images that can later be stitched together into panoramic, or even spherical images. We have grand visions of being able to produce something along the lines of these stunning interactive images with hardware that is cheaper and easier to build than this other motorized rig.

The design utilizes just two servo motors. In the image above you can just make out a pair of discs that serve as the base for the rig. In the center of the upper disc is the first servo, pointing downward, which rotates the camera. Two upright supports on either side of the point-and-shoot provide the framework for the tilt feature. The camera is mounted in a frame whose center is a threaded rod on the near side, and the second servo motor on the far side. An Arduino with a servo shield controls the movements along with a button pad and LCD screen as a user interface. The last step in the project log points to software options for combining the captured photos.

PIC Based Frequency Counter

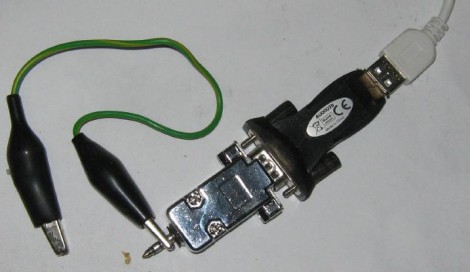
Here’s a PIC based frequency counter that outputs the count via an RS232 serial connection. [Oakkar7] tipped us off about it after seeing the AVR based counter we featured yesterday. This project is a bit older and a bit dirtier.

Inside the metal DB9 housing you’ll find just seven parts. The most important is a PIC 16F628 which handles both the counting and the serial communications. We’re not quite sure how it’s managing to talk to that USB-to-Serial converter without some type of level conversion. Since this microcontroller is not a dedicated counter chip a little bit of trimming must be done to bring the accuracy into spec. There’s also some physical trimming involved. In order to get everything to fit into the small enclosure the circuit was free-formed without a PCB or protoboard and the case of the DIP chip had to be ground down just a bit. As for the readout, a simple script can grab the data and display it in a terminal.

[via Piclist]

CO2 Powered Pinewood Derby Car Is Definitely Cheating

The Pinewood Derby is a classic Cub Scout competition where dads and sons come together to build a small-scale race car. You start with a kit that includes a block of wood for the body, as well as four plastic wheels and four nails to act as axles. Most innovations in the ‘sport’ center around reducing friction between the wheels and the axles, and making the body as aerodynamic as possible.

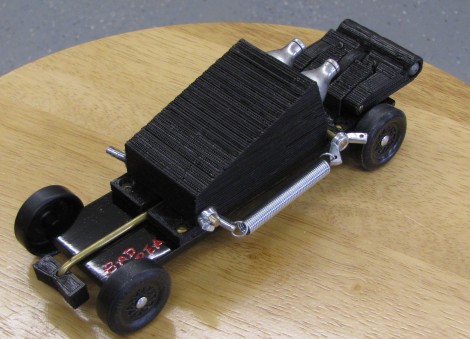
This year [Sliptronic] grabbed an extra kit and threw the rules out the window by powering the car with compressed carbon dioxide. He used a 3D printer to make a housing for two CO2 cartridges that mounts on the center of the chassis. An official Pinewood Derby race track is on an incline and has a wooden gate that keeps each car in place until it is dropped to start the race. [Sliptronic] is using this gate as the triggering mechanism. Springs on either side of the car pull against an arm at the back of the vehicle. This arm is held in place by a rod protruding out the front of the vehicle. When the start gate is dropped that rod releases the trigger, which is pulled up by the springs to pierce the CO2 cartridges. You can see an overview of how that mechanism works in the video after the break.

Continue reading “CO2 Powered Pinewood Derby Car Is Definitely Cheating”

Animated Paper

What if you could make paper react on physical input. Maybe you want it to shy away and close up if someone reaches for it too fast, or maybe you want some realistic paper flowers? Moving on to that great first step is Animated Paper, which is simply nitinol memory wire bonded to paper via our favorite tool, duct tape.

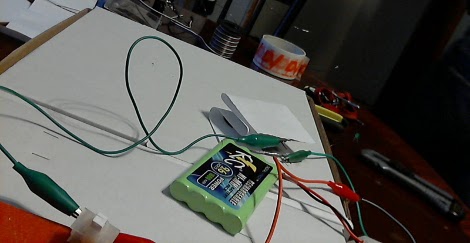
Memory wire is first bent to its desired shape, and in order for it to hold that shape it needs to be heated to about 540 degrees Celsius, which is a easy task for a propane torch. Once it has its memory shape the wire can be bent into any shape desired, and when heated to about 70 degrees Celsius will return to its original set shape.

Taped down to a sheet of paper and letting some current from a battery run though it the wire quickly warms up and animates the paper, which could be exactly what one needs in a more artsy robot or electronic display. Join us after the break for a short video.

Continue reading “Animated Paper”

No PCIE Slot? Just Add One

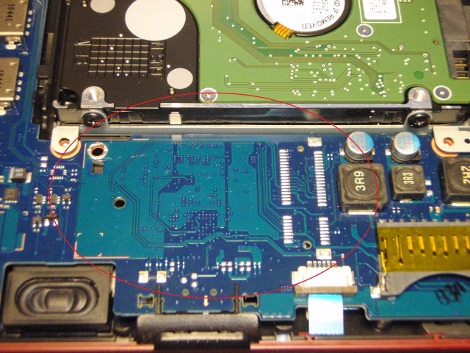
[Leslie] likes his little Samsung N150 Plus netbook. While it packs enough punch for almost everything, it lacks in High Definition video power. That is where a Broadcom Crystal HD mini PCI express card comes in, as these little video decoders are made just for netbooks needing some HD love, but the problem is, his netbook only has one PCI express slot in it, and its occupied by the 802.11N card.

Not being bummed out by this, and not wanting to use a USB dongle device he just ripped open his netbook and added a second pci express connector to the pads on the motherboard. Sourcing the header from mouser, the install seems quick n easy, especially since Samsung was nice enough to have the pad’s tinned already, so just a little flux and a steady hand you’re good to go.

Unfortunately, there are some hidden gotcha’s as the newly installed slot is not “full featured” that both the Broadcom card and the stock wireless N card require, but he had a wireless G card that ran just fine in the newly added slot, so now its time to rock some full screen HD Hulu.