Sexy Six Axis Robotic Arm Is A Work Of Art

We don’t know if it’s a mid-life crisis or just the result of way too many solder fumes, but [sparten11] on Instructables is building one of the coolest robotic arm we’ve ever seen, and we thank him for that.

The build began with a set of brushed DC motors running capable of running on 60 volts at up to 8 amps. These motors were attached rotary encoders that, with the gearing [sparten11] is using, provide 400,000 steps per revolution.Combined with a heavy duty motor controller, [sparten]’s arm has more than enough power and control for just about any industrial process.

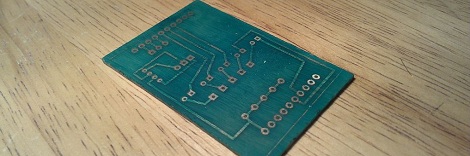
Of course muscles are useless without a skeleton or brain, so [sparten] milled the structural and mechanical members of his arm in his home machine shop. It’s an impressive bit of kit; the base of his robot tested the capacity of his lathe, and the waterjet-cut arms form a graceful skeleton of an absurdly powerful robotic arm. The electronics for the build consist of a Pico PC running Windows XP with servo control board etched from a copper clad board.

The build isn’t quite done yet, but judging from the videos after the break, [sparten] will have a fabulous robotic arm shuffling around his workshop in short order.

Continue reading “Sexy Six Axis Robotic Arm Is A Work Of Art”

Galago, The Latest In A Series Of Awesome ARM Boards

Long time Hackaday reader [Kuy] sent in a project he’s been working on for the last year and a half. It’s called Galago, and it wraps up all the features we’d like to see in the current crop of ARM microcontroller dev boards into one neat package.

The Galago features an AMR Cortex-M3 microcontroller running at72 MHz. Included on its pinout are 25 digital IO pins, 6 analog input pins, 10 PWM pins, and an I2C and SPI port.

The Galago isn’t simply an exercise in hardware development, though. [Kuy] spent a great deal of time writing proper libraries for his board, allowing you to get started with the Galago very quickly without having to rely on crippled tools.

A proper library isn’t Galago’s only significant developer feature: [Kuy] went as far as to create a browser-based IDE (no Internet connection required, thankfully) that has the ability to upload code directly to the board via a USB cable. Add in a hardware debugger, and the Galago might just be the perfect ARM board for tinkerers weaning themselves off the Arduino.

[Kuy] has released the Galago on a Kickstarter, with a single board costing $25. It’s a cool device, and something we’d really like to come to market.

Put A Solder Mask On Those Homebrew PCBs

While making your own PCBs at home is one of the best marks of a competent builder, if you want to give your project a more professional vibe, you’re going to need to do better than bare copper traces on a piece of fiberglass. To help out his fellow makers, [Chris] sent in his Instructable on creating a solder mask for homemade circuit boards using a minimal amount of tools and materials easily sourced from the Internet.

[Chris]’ soldermasks are made from UV curing paints he found on eBay. Of course the traditional green paint is available, along with paints very similar to the Sparkfun red or Arduino blue soldermasks.

After brushing the soldermask paint onto his home-etched circuit board, [Chris] printed out the solder mask onto a piece of transparency film using a laser printer. This mask is vitally important if you ever plan to solder your board; by covering the pads you wish to solder, the paint won’t cure and can later be removed.

[Chris] cured his soldermask by leaving it in the sun for a half hour. After the paint was dry, he removed the excess paint covering the pads with a little bit of turpentine and some elbow grease.

While [Chris]’ paint had somewhat of an ugly matte finish, the soldermask does its job, protecting the PCB traces while leaving the pads uncovered and ready to solder.

Remote Control Does Everything

After a year of development, the OSRC is ready to hit a manufacturing plant. This transmitter (and receiver) for remote control cars, airplanes, quadcopters, and semi-autonomous drones features modular everything and allows you to transmit video from the cockpit and display it on a screen in the palm of your hands.

This isn’t the first time we’ve posted something on the OSRC, but since then [Demetris], the team lead has released a ton of information on the capabilities of the OSRC main unit, the clip-on FPV display, and the receiver and transmitter modules made to operate with the OSRC.

Unfortunately, [Demetris] spent a good deal of money developing the OSRC and is now doing a pseudo-kickstarter, ostensibly to gauge interest and allay a bank’s fears when applying for a small business loan. If all goes as planned, the OSRC base unit should cost somewhere around €300, a significant sum, but really not that bad considering the OSRC simply does more than other high-end RC transmitters.

We’re hoping enough people will step up and promise to buy the OSRC after it goes into manufacturing, otherwise we’ll be waiting a few more years before the big names in the RC transmitter game manage to come out with a similar product.

Eventorbot 3D Printer

Tired of 3D printers that use t-slot construction? The Eventorbot is yet another open source 3D printer,  but it’s built out of steel and 3D printable parts. The design also aims to minimize the effect of vibrations by using a single solid frame. All of the wiring runs through the steel frame, which gives the printer a professional look.

The Eventorbot page on the RepRap wiki provides details on how to build your own, along with STL files for all the printable parts. If you want to see renders of the parts, they’re all available on Thingiverse. The material cost is $300-$500, and the assembled cost is quoted at $799.

Like many of the open source printers we’ve seen, this one uses the RepRap Mega Pololu Shield (RAMPS) to control the actuators. This is attached to a Sanguinololu motherboard, which runs the RepRap firmware.

The Eventorbot Youtube channel has a collection of videos detailing the assembly of the robot. Check out a video of a test print after the break.

Via Make

Continue reading “Eventorbot 3D Printer”

A Watch For Curiosity’s Drivers

Eight long years ago, when the Martian rovers Spirit and Opportunity were steaming towards our dusty neighbor, JPL systems engineers [Julie Townsend] and [Scott Doudrick] were stuck trying to solve a very strange problem. After the twin rovers landed, the rover drivers would have to live on Mars time. Because a Martian day lasts 24 hours, 39 minutes, rover team members would have to report to work 39 minutes later than the previous day. After much cajoling, a watchmaker by the name of [Garo Anserlian] was convinced to create a mechanical watch that lost 39 minutes per day, giving the team responsible for driving Spirit and Opportunity across the Martian desert these last eight years a temporal connection to the task at hand.

Of course, a lot happens in eight years. Now we have incredibly inexpensive, fully programmable TI Chronos watch, used by [Arko] to make a wristwatch set to Martian solar time. Instead of a master watchmaker selling the slowest wristwatch ever for hundreds of dollars, staying on Curiosity time is a simple matter of reprogramming a $50 wrist-mounted computer.

The build began by taking the default firmware for the Texas Instruments EZ430 Chronos wristwatch. In its stock configuration, the Chronos takes a 32.768khz clock signal, counts out clock pulses, and increments the number of seconds every time a counter reaches 32,768.

Because a Martian Sol is 24 hours, 39 minutes and 35 seconds of Earth time, [Arko] needed to program the seconds display to change every 1.027 Earth seconds. This meant changing the seconds every 33,668.833 clock cycles, instead of the Earth-oriented 32,768 clock cycles.

There’s one small glitch with that plan: the timer in the Chronos wristwatch can’t deal with floating point numbers, meaning [Arko] had to settle for incrementing the number of seconds ever 33,668 or 33,669 clock cycles. After a bit of math, [Arko] found using a value of 33,669 would mean his Martian time watch would only lose about 2 seconds a day, a minute after 78 Martian Sols, or 8.57 Martian minutes after one Martian year.

The build only took [Arko] five hours in front of his computer, and he doesn’t consider this to be a finished product. He plans on adding a few bells and whistles such as being able to display both Earth and Mars time. Still, an awesome build if your job description includes driving a rover across the Martian plains.

Genetic Research On The Cheap

When you think of DIY hardware, genetic research tools are not something that typically comes to mind. But [Stacey] and [Matt]’s OpenPCR project aims to enable anyone to do polymerase chain reaction (PCR) research on the cheap.

PCR is a process that multiplies a specific piece of DNA a few million times. It can be used for many purposes, including DNA cloning and DNA fingerprinting for forensics. PCR is also used for paternity testing.

The process involves baking the DNA at specific temperatures for the right amount of time. The DNA is first denatured, to split the helix into individual strands. Next, the temperature is lowered and primers are bound to the strands. Finally, another temperature is used to allow the polymerase to duplicate the DNA. This process is repeated to multiply the DNA.

The OpenPCR uses an Arduino to control a solid state relay. This relay provides power to two large resistors that act as heaters. A MAX31855 is used to read a thermocouple over SPI and provide feedback for the system. A computer fan is used to cool the device down.

A milled aluminium sample holder houses and heats the samples during cycling. The laser cut, t-slot construction case features some helix art, and houses all of the components. It will be interesting to see what applications this $85 PCR device can perform.

Via Adafruit