Blinky Headgear

This hat has a chasing LED feature thanks to our old friend the 555 timer. [BananaSlug] even built in the option to change the speed at the push of a button.

His design starts out with a costume hat. Each of the 25 LEDs is soldered to a 2×4 hole chunk of protoboard. The LED package is pushed through a slit in the hat, but the protoboard remains on the inside where it can be sewn in place. From there [BananaSlug] soldered one negative bus around the circumference, and an individual positive lead from each module back to the control board. They’re addressed by a set of CD4017 decade counters which are clocked by the 555 timer circuit.

This is a great little analog/logic project and the style is perfect if you’ve got the coat to go along with it.

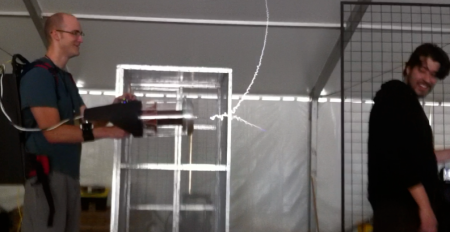
MakerFaire K.C. Sneak Peak At ArcAttack’s New Toy

I’ve been seeing videos of ArcAttack all over the web for several years now and hoped one day I’d be able to cross paths with them. When I heard they were going to be at MakerFaire K. C., I was determined to grab them and ask a few questions. As it turns out, they’re fans of Hackaday and were happy to talk. Not only that, but when I was asking what fun things they were building, their eyes lit up. “You’re going to love this” one of them said as he ran off behind the stage.  He returned with a device which was strapped to his body and spitting 5 foot long lightning bolts. He was right, I did love it!  They demonstrated this proton pack looking portable tesla coil for a while, shocking each other and random bits of metal, all the wile grinning like the fools we all are.

I know we’ve covered a portable tesla coil or two before, but seeing this thing in person,heading right for you,strapped to someone who might actually even be able to run faster than you, is pretty cool.

There is video (sorry, shaky) and a ton of pictures after the break. Enjoy.

Continue reading “MakerFaire K.C. Sneak Peak At ArcAttack’s New Toy”

Building A Boombox Where Tools Are Meant To Go

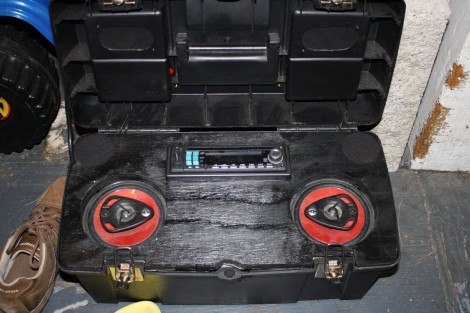
[Danman1453] is ready to face the rest of his summer thanks to this toolbox boombox he built for outside use. It’s always nice to have some tunes when laboring at those not-so-fun jobs (we’ve got some windows that need re-glazing and you can bet we’re not doing that in silence). But if you can’t really hear it what’s the point? The highest volume [Danman1453] could get out of the consumer options he tried just wasn’t cutting it, and that led him to this project.

The only thing he bought to complete the boombox was some black spray paint. He already had an old toolbox for the enclosure, a head unit and the larger speakers from an old car, and the small speakers came from a set of computer speakers. Those are cleverly mounted in the compartments on the lid of the toolbox, pointed down so that they’re oriented correctly when the lid is propped open. The faceplate was even recycled by using wood an old shipping pallet.

He would like a little bit of advice though. When he’s playing a CD and the bass really gets bumping the head unit tends to skip. Does anyone have an easy method of isolating it from the speakers while still keeping it safe and sound in the portable enclosure?

Melting Beer Cans And Building Engines

What do you do if you’ve got a fully equipped machine shop and you’re tired of taking old beer cans to the recycler? If you’re like [Brock], you’ll probably end up melting those cans down to build an engine.

After gathering 50 pounds of beer cans and melting them down into ingots of various sizes, [Brock] and company had a lot of aluminum and nothing to build. Eventually, someone got the idea to build an internal combustion engine out of these beer can ingots.

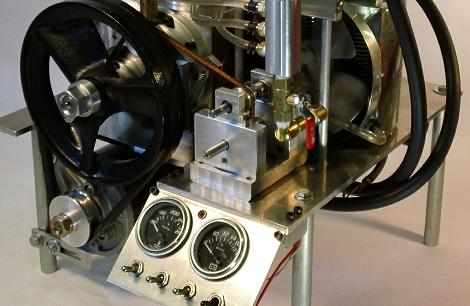
So far, the beer can engine crew has built two engines from these beer can ingots. The four-stroke engine started off as a 5-inch aluminum cube, bored and milled into something resembling an engine block. When [Brock] and the beer can engine team completed their four-stroke masterpiece, they had a water-cooled engine displacing 150cc with a single 2″ bore piston. The two-stroke engine is a much simpler affair with a 1 inch bore displacing 19cc.

Even though there’s no information at all covering the pottery kiln foundry used to melt the beer cans into ingots, it’s an amazing piece of work building and engine from the ground up.

You can check out a few videos of both engines after the break.

Continue reading “Melting Beer Cans And Building Engines”

Better Driving With A Bullduino

Despite what you may have heard from the kids hanging out in the parking lot of Taco Bell, there’s a lot to be said about driving conservatively. Not peeling out after ever red light and stop sign does wonders for the life of your engine, and not slamming on the brakes 50 feet away from an intersection will keep your brake pads going a long time. [aromaoftacoma] wanted a dashboard gauge telling him how good of a driver he is, so when he got a bullduino he knew what he had to do.

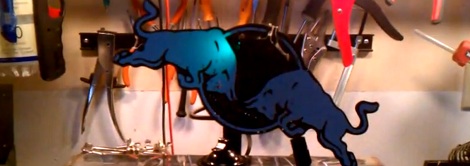
[aromaoftacoma]’s project for the Redbull creation contest uses the very cool Arduino shield/Redbull logo known as a bullduino with an accelerometer to track how conservatively he’s driving. Quick stops and starts are murder on an automobile – it’s the same reason your grandmother has had the same car for 20 years – so [aromaoftacoma] made a wonderful display using red and blue LEDs behind each charging bull.

Because simply blinking a LED in response to data pulled from an accelerometer is a little boring, [aromaoftacoma] added a servo to change the orientation of the charging bulls. When he’s driving well, the blue bull is tilted up, and when he stops short the red bull becomes the focus of attention. Not a bad build at all.

You can check out [aromaoftacoma]’s build video after the break.

Continue reading “Better Driving With A Bullduino”

Don’t Bring Your 3d Printer To MakerFaire

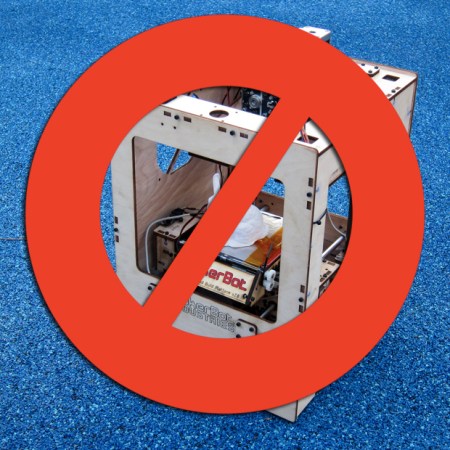
This could easily be called “the year of the 3d printer”. They are in the news, in every hackerspace, and at every event. This last one is the one I’m going to focus on here. All the coverage we’ve seen as well as our personal experience shows that MakerFaires are filled with 3d printers. At MakerFaire K. C., there were so many that I lost count. I didn’t even bother taking pictures or stopping to look after a while. Many were makerbots, though a few repraps were present too.

If you want to be noticed at MakerFaire, DON’T BRING A 3D PRINTER AS YOUR SOLE DISPLAY.

Continue reading “Don’t Bring Your 3d Printer To MakerFaire”

Playing Video On An 8-bit Microcontroller

The LCD displays for Nokia phones have seen a ton of use as easily interfaced displays for Arduino or other microcontroller projects. Usually, these LCDs are only used for displaying a few lines of text, or if someone is feeling really fancy, a small graph. Shame, then that we don’t see more complicated and computationally difficult tasks like playing video very often. [Vinod] sent us his way of playing video on these small color screens, surprisingly using only an ATMega32 microprocessor.

The build started off by saving uncompressed image data on an SD card using code from a previous project. [Vinod] was able to write a slideshow program to go through the SD card one file at a time and displaying each image. From there, it was simply a matter of using a Python script to convert frames of an .AVI video file to an uncompressed image and display them at 15 frames/second.

Turning these videos into talkies was a bit of a problem, but after taking an uncompressed .WAV file and sending that to a PWM pin on the ATMega, [Vinod] managed to play sound alongside his video.

The result is the ability to play a video with sound at 15 frames a second and a 132 x 65 resolution. You can check out the demo video after the break.

Continue reading “Playing Video On An 8-bit Microcontroller”