MakerFaire K.C. First Impressions

I arrived at the Kansas City MakerFaire bright eyed and bushy tailed, excited to meet up with like minded people and see awesome projects. I was not disappointed in that respect. The building itself is quite beautiful with giant main rooms and decorated 40 foot tall ceilings. If you haven’t ever seen the Union Station in Kansas City, I suggest you check it out. It is really quite fantastic on its own.

The event seemed rather well organized. There were talks on different subjects as well as clearly outlined areas for each event. The place was absolutely packed, but walking around still managed to be tolerable. Volunteers in bright red shirts were wandering around offering assistance to anyone looking lost or confused. I didn’t run into a single person complaining about the event. I’ve been to a ton of large events and there are usually a few people who were upset. I didn’t find any here.

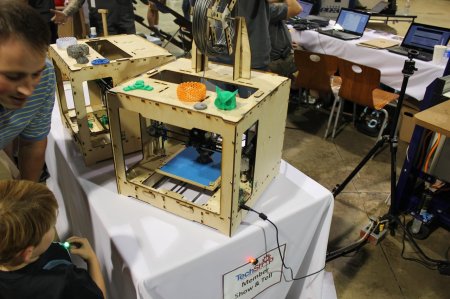
The booths covered subjects from all over the place. There was knitting, model rocketry, robotics, lego construction, random hacks, cast making, and of course, 3d printing.  I’ll be posting projects separately, as there were only a selected few that I think our readers would enjoy.

There were only 3 things I found frustrating.

1. Some of the coolest stuff I found, we have already covered.

2. I didn’t have time or ability to get as much detail on any one project as I would have liked. I’m used to seeing full write-ups with schematics and pictures. I only had a couple minutes with anyone. There were constant distractions as well as an amazing amount of noise (tesla coils especially!). I walked away felling almost like there was no point in doing interviews, but I guess this is how “on location” stuff works.

3. My footage is shaky. I apologize in advance. I didn’t end up bringing a rig with me to stabilize the camera and I spent the whole time wishing I had. I know how frustrating shaky footage is. I’m truly truly sorry. I will flog myself appropriately at my soonest opportunity.

after the break is a small gallery of random pics from the event with pretty much no accompanying info. Actual posts will be coming soon with details.

Continue reading “MakerFaire K.C. First Impressions”

[Sprite_tm] Connects An LCD To A Tiny Linux Board

One of [Sprite_tm]’s colleagues recently challenged him to connect a small LCD touch screen to a Raspberry Pi. Sadly, [Sprite_tm] has yet to take delivery of a Raspberry Pi, but he did manage to connect an LCD to a Linux board without video capabilities.

Because [Sprite_tm]’s display has a 16-bit parallel interface, and 16 GPIO pins are hard to come by on the Carambola Linux board, a few shift registers had to be brought into the build to make the LCD work. These shift registers are connected to the Carambola board via an SPI interface; a very simple way to connect all the LCD pins to the Linux board.

Of course, there’s no way for Linux to speak to the LCD without a kernel driver; [Sprite_tm] wrote a framebuffer driver so the LCD can be used as a console, an X session, or used by any other program that can write to a framebuffer device.

Like all good driver authors, [Sprite_tm] is giving away the patch to enable SPI-ified LCD panels on the Carambola along with the shift register schematic. With any luck we’ll also see the Raspi drivers when [Sprite_tm] takes delivery of his Raspberry Pi.

Logging Temperatures With An Etch-a-Sketch

What do you do if you’re given a gigantic ancient printer? If you’re [IronJungle], you throw that printer on your workbench and salvage all the parts you can. After coming across a few stepper motors in an old Oki printer, [IronJungle] decided to automate an Etch-a-Sketch with the help of a PIC microcontroller and H-bridge chip to log the ambient temperature on an Etch-a-Sketch display.

After [IronJungle] was finished figuring out his stepper motor circuit, the only thing left to do was to add a thermometer. For this task, he chose a very cool one-wire digital thermometer that carries power and data over the same wire.

In the video after the break, you can check out [IronJungle] playing with his new Etch-a-Sketch temperature logger with a shot glass of hot water and a cold can of holy water. There’s no scale or graph lines drawn on this Etch-a-Sketch temperature logger, but [IronJungle] has a few more things planned for this rig. We can’t wait to see those plans come to fruition.

Continue reading “Logging Temperatures With An Etch-a-Sketch”

Knut Logs Data, Sends It To Your Email

[Richard] and [Jay] needed a WiFi connected data logger for remotely monitored aquariums. After working diligently for three years, they’re finally finished. While the Knut was originally designed to keep tabs on a few huge aquariums, it’s more than capable to log all sorts of data and send those sensor readings to your email address.

Knut is a small WiFi enabled device replete with a few plugs for temperature, humidity, accelerometer, and other sensors. All this data goes directly into the memory of Knut, and when the memory is full the data is sent to an email address. As a bonus, there’s also an iDevice app (Android and Windows coming soon) to parse the generated .CSV file and display the results on an iPhone

The Knut may be a touch expensive for our tastes, but if you’re looking for an off-the-shelf solution for sending alerts, logging data, or just reading a few sensors via WiFi, Knut may be just the ticket.

[Richard] and [Jay] put together a demo video showing off the capabilities and operation of the Knut app; check that out after the break.

Continue reading “Knut Logs Data, Sends It To Your Email”

Crayolascope Turns Flat Displays Into Volumetric Coolness

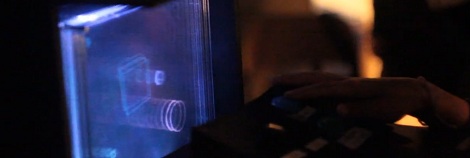
[Blair] sent in a project he’s been working on for a while. It’s called the Crayolascope, and it allows for the creation of an extremely low-fi volumetric display using a Crayola Glow book.

The Crayola Glow Book is a pretty neat toy composed of four clear plastic panels. Each of these four panels are illuminated from the side to reveal the image drawn with fluorescent ‘glow pens’. [Blair] had the idea to take several of these Glow Books and draw a rudimentary 3D animation by sequentially lighting one of the 12 plastic panels.

After tracing single frames from a rotating cube animation, the Crayolascope pages through the plastic panel-based 3D display with the help of an Arduino Mega. For each frame of animation, the Arduino illuminates a single display with edge-mount LEDs. Of course there’s a control panel to regulate how fast the frames are shown, along with the ability to scrub a frame and apply a fade effect.

[Blair] admits there are a few problems; there’s a lot of internal reflections in the array of clear plastic sheets, and frames near the end of an animation are really only observable in a very dark room. [Blair] hopes the next version of the Crayolascope will use thinner plastic panels to increase the depth of the animations – a solution that may just solve the decreasing brightness of ‘deeper’ panels.


Using The Raspi As An Ethernet Shield

[Alexandre] wanted to set up a web-based temperature logger with his Arduino, but found the Arduino Ethernet shield a little finicky. Since his Raspberry pi was just delivered, he figured he could use the Raspi as an Ethernet shield with just a little bit of coding.

After [Alexandre] set up his Arduino to send a thermocouple through the USB, the only thing left to do was to add node.js to the Raspi’s Debian installation. Every five minutes, the Arduino wakes up, takes a temperature reading, and sends it over to the Raspberry pi. From there, it’s easy parse the Arduino’s JSON output and serve it up on the web.

In the end, [Alexandre] successfully set up his Raspberry pi as an Ethernet shield to serve a web page displaying the current temperature (don’t F5 that link, btw). One interesting thing we have to point out is the cost of setting up this online temperature logger: the Arduino Ethernet shield sells for $45 USD, while the Raspberry pi is available for $35. Yes, it’s actually less expensive to use a Raspberry pi as an Ethernet shield than the current Arduino offerings. There you have it, just in case you were still on the fence about this whole Raspi thing.

NC Maker Faire 2012: Machine Tools And 3D Printers

NC Maker Faire 2012 3D printer

There were quite a few 3D printers at the NC Maker Faire this year (like the [Fablicator], several [RepRap]s, and [MakerBot]s) as well as a few subtractive machining devices including a wood lathe, a [ShopBot] display (one of the sponsors), and my little CNC router. There was even a little [Eggbot] on display, which combines several CNC concepts into a really unique device for printing a picture on an egg.

Check out the video below for lots of examples of what was at the Faire. There’s always room for one more 3D printing or CNC machining enthusiast, so hopefully it inspired some makers to expand their capabilities! Continue reading “NC Maker Faire 2012: Machine Tools And 3D Printers”