Make A Cardboard Bookshelf In Less Than A Day

Lucas came up with a real winner when upcycling cardboard to use as a bookshelf. It’s visually pleasing, can be built basically for the cost of glue and a mounting brackets, and you don’t have to feel bad if you decide to get rid of it later on.

What he saved in raw material cost he spent in labor. There are 23 different layers of cardboard that went into the project, not including the spacer squares between each piece. The vast majority of the time spent in the clip after the break shows a fast-time video of him cutting out the layers. It apparently took about eight hours of cutting, and we’d image he’s got a claw of a hand after all of that work.

This is hanging from a single L bracket positioned in the square opening with two nails to keep it level. We’d suggest including a better mounting technique in your design. If you have some ideas about this please let us know in the comments.

Continue reading “Make A Cardboard Bookshelf In Less Than A Day”

Designing A Quadcopter Brain PCB

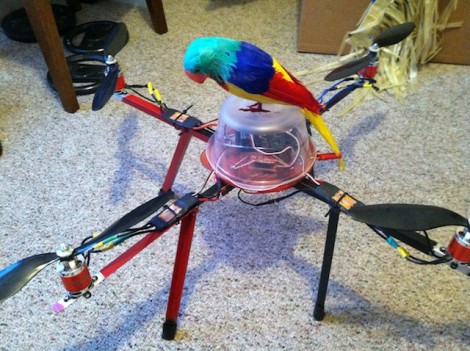
When working on his quadcopter project [Matt] decided it would be best to build a robust controller for the device. He had never sent off a PCB design for fabrication, but took the plunge and ended up with a compact and reliable PCB on the first try.

One of the first things that comes to mind when we hear about quadcopter controllers are the feedback sensors. The accelerometers which are used for these projects generally come in a DFN or QFN package. This means there are no legs. Instead the chip has pads on the bottom of the package making it a lot more difficult to solder. [Matt] side-stepped this issue by using an IMU board which already has the sensors in place and offered a 0.1″ SIL pin header to use as an interface. This is simple to roll into the design, along with all of the other connectors for motor control, power, etc. He grabbed a copy of Eagle Lite to do the layout, and used OSH Park to get the boards fabricated. He was surprised that everything worked on the first try. Thanks to his planning it fits inside of a plastic food container where it should be able to ride out most minor crashes with ease.

Adding Payload To An RC Cessna

For just a few bucks you can add a payload to your flying toys. In this case it’s a Cessna RC plane which now has an added surprise. The first thing to be dropped was a parachute with a weight on it (for testing purposes). But there are hints of future projects that will use the same system for different purposes.

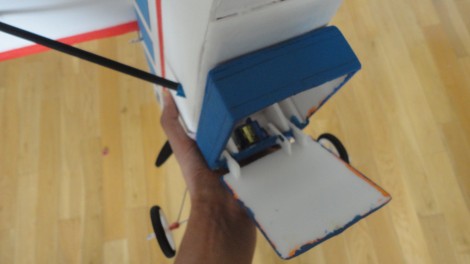
As you can see in the image above, the system depends on an additional compartment attached to the bottom of the plane. It was built from foam board to keep the weight down and connects using rare earth magnets. The bottom of the enclosure acts as the door, hinging on a servo motor with a bamboo skewer as the axle. So far the test drops have gone pretty well, but some more work needs to be done with the parachute design. It only opens about 60% of the time. We can sympathize, having had to work out some of our own parachute issues.

Don’t miss video from the plane as well as the ground after the break.

Continue reading “Adding Payload To An RC Cessna”

Bamboo Bike

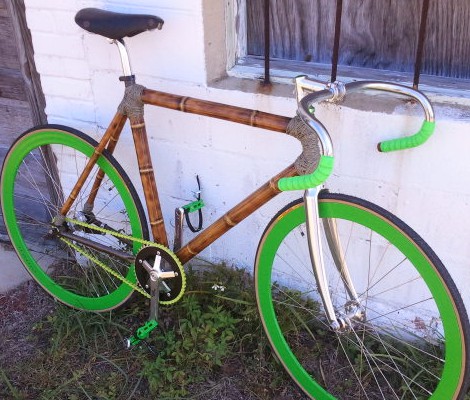
Reddit user [tkgarrett101] recently did away with expensive exotic materials for his bike frame and opted for a somewhat less processed form of natural building material, bamboo! The bike consists of a regular metal bike frame with a majority of the structural beams cut and replaced with bamboo poles. The bamboo is fit snug first with some expanding gorilla glue then tied in place with  hemp string and fiberglass resin. Instead of running cables along the frame the bike has coaster breaks brakes and a two speed hub, this also preserves the simplistic look of the whole ensemble. [tkgarrett101] says his bike is not so cheap, the overall parts cost was around 800 bucks (USD)! Plus it weighs a whole lot for a fixed gear. Plus the alignment is a bit off on the seat post. Either way this thing would surely turn some heads!

Too rich for your blood? Check out this cardboard bike, or if that green isn’t bright enough for you how about some glowbars for night visibility.

via Reddit

Box Maker Extension For Inkscape

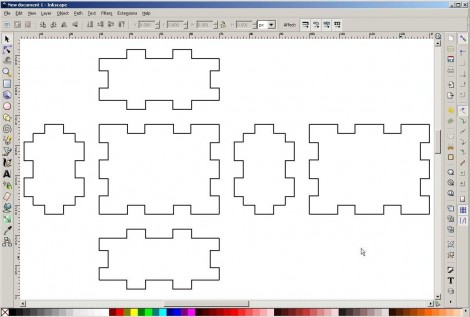
If you use Inkscape to lay out your laser cutter designs you might want to look into this box maker extension. Inscape is [Elliot’s] drawing software of choice since it’s easy to use, and it’s open source. After having to lay out the tabs for a box he decided it was worth his effort to develop a tool to do this automatically. The extension works inside of Inkscape, letting you start your projects with a set of automatically generated box sides.

The input window for the extension leaves you plenty of options for the joint design. In addition to the size of the box (inside or outside measurements can be selected), you need to enter the thickness of the material, the kerf size (how wide the cut will be), and how much clearance you want between the teeth. The width of the teeth is also configurable.

Our feature of a laser cut replacement case is what prompted [Elliot] to tip us off about his extension. That project used a web-based parts generator to do the joint design.

Don’t Ignore The Middle Of The Country!

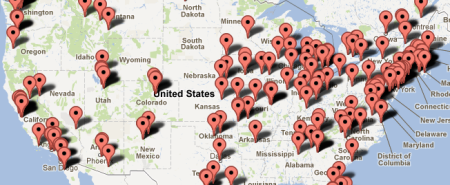
“Nothing happens in the midwest”. I won’t say who said it, but it absolutely makes my blood boil. I’ve heard this several times during my time at Hackaday. Aside from being so insanely arrogant and dismissive, it is also completely inaccurate.

Some people believe you absolutely have to be on a coast to be part of anything interesting. In the modern age of the internet, geographical location is becoming less and less of an issue. People are collaborating on projects that span the world. Here at hackaday we see projects quite daily that are spawned from a forum linking hackers to a common theme with virtually no central geographical point.  Robots, video games, open source software, tools, and art installations have all sprung from the diaspora that is the hacker culture without any necessity for being located on a coast.

With tools like 3d printers becoming common in hackerspaces collaboration on physical design is even being spread geographically. You could be in your garage in Arkansas, assembling a machine that was designed by someone in Minnesota, and inserting code that was uploaded by someone in Kansas!

Sure, we all know the coasts are great. High concentrations of like minded people as well as the culture you can find anywhere near the ocean. But please, don’t ignore the middle, it makes you sound like antiquated ass.

Make Your Own Custom IPhone Back Glass

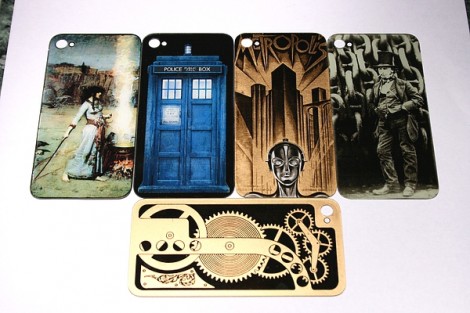
[Jake von Slatt] is at it again; putting his own artistic spin on ordinary items. This time around it’s the glass on the back of an iPhone. It kept breaking and after a few replacements he wanted to try to replace the glass with a piece of etched brass. But part way through that experiment, he figured out how to use toner transfer to develop these stunning custom iPhone glass back plates.

The first step is to source the correct replacement back for your phone. These are made of two parts, the glass and a plastic backer. By carefully heating and wedging the two parts with some popsicle sticks he was able to separate the pieces. Next, he cleans and buffs the glass, preparing it for the artwork he is about to apply. Toner transfer paper, just like that used for PCB resist, is used to print and adhere a design to the underside of the glass. From there he hand paints over the black outline to achieve the results seen above.

It takes time and patience, but shouldn’t be any harder than etching a circuit board.