Kayak To Sailboat Conversion Shows How To Weld Plastics

This kayak to sailboat conversion is well done and makes for an interesting project. But even if you’re not going to be hitting the water on one of your own, the construction techniques are a useful resource to keep in mind. Many of the alterations were done with a plastic welding iron.

[RLZerr] shows off the materials that went into the build right at the beginning of the video which you’ll find after the break. His kayak is made of High Density Polyethylene and he uses other HDPE scraps, PCV parts, and even some aluminum to make everything. To weld HDPE together he uses a plastic welding iron that is like a cross between a soldering iron and a hot glue gun. It has a pad tip that gets hot enough to melt the plastic, but also includes a channel through which additional HDPE filament can be fed to bulk up the connections.

Additions to the kayak include a centerboard, rudder, and mast. The sail is a plastic tarp attached to the PVC mast which has been stiffened with a wooden shovel handle in its core. The rudder and centerboard are aluminum attached to PVC pipes using JB weld. The boat catches the wind easily, but without outriggers [RLZerr] must be careful not to let a big gust swamp him.

Continue reading “Kayak To Sailboat Conversion Shows How To Weld Plastics”

Building An Electric-powered Longboard For Under $100

[Alan] doesn’t have to kick to get around town because he added a removable electric motor to his longboard. It looks great, and works just as well because he didn’t reinvent the wheel. The idea is a mashup of an electric Razor scooter and his long board.

The majority of the project revolved around mounting everything he needed to the board. When it comes to the drive wheel he designed a tension system. When a rider is not on the board the back wheels of the long board are off the ground by about an inch. The springs in the suspension system make it so when you do mount the board all wheels are touching, with the main drive wheel held tight to the pavement even while turning.

Unlike some electric skateboard builds [Alan] didn’t need to raise the board off the ground as the battery compartment is mounted on top of the deck. He added cooling fans for the hot summer days, and even used velcro to attach the charger so that he can juice it up when away from home. Check out his three minute show and tell embedded after the break.

Continue reading “Building An Electric-powered Longboard For Under $100”

Repairing A VFD Driver On A Car Stereo

We love seeing repairs and always marvel at the ability to track down the problem. [Todd] seems to have a knack for this. He was met with a lot of adversity when trying to get the Vacuum Fluorescent Display working on his car stereo. A lot of persistence, and a little bit of taking the easier way out let him accomplish his goal.

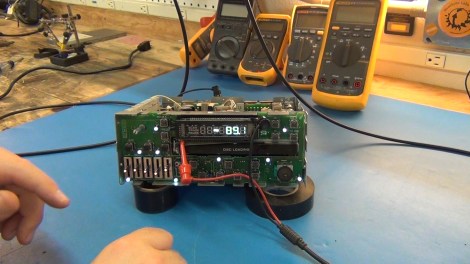
The head unit is out of his 1994 Jeep. He knew the radio functionality still worked, but the display was completely dark. After getting it out of the dashboard he connected it to a bench supply and started probing around. He established that the data lines were still working by setting the radio to auto scan mode and testing with a multimeter. When he went to measure the cathode pins he didn’t get any reading. It seems the driver which supplies that signal is burnt out.

One easy fix would be to replace the parts from a scavenged unit. [Todd] hit the junkyard and picked up one from a Jeep that was just one model year apart from his. Alas, they weren’t exactly the same, and although he swapped out a chip (using a neat heated solder sucker) it didn’t work. In the end he simply dropped in a power resistor to use the 12V rail as a 1V at 0.1A source for the filament.

You can see his repair extravaganza in the video after the break. If you’re looking for tips on scavenging these types of displays check out this post.

Continue reading “Repairing A VFD Driver On A Car Stereo”

An Actively Cooled Cloud Chamber

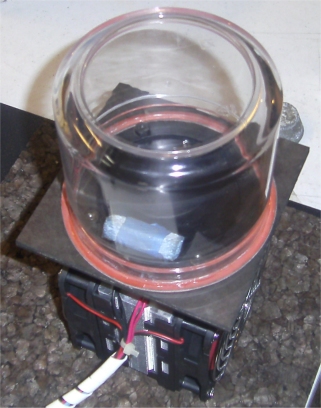
This cloud chamber is designed to keep the environment friendly for observing ionizing radiation. The group over at the LVL1 Hackerspace put it together and posted everything you need to know to try it out for yourself.

A cloud chamber uses a layer of alcohol vapor as a visual indicator of ionizing particles. As the name suggests, this vapor looks much like a cloud and the particles rip though it like tiny bullets. You can’t see the particles, but the turbulence they cause in the vapor is quite visible. Check out the .GIF example linked at the very bottom of their writeup.

The chamber itself uses a Peltier cooler and a CPU heat sink. The mounting and insulation system is brilliant and we think it’s the most reliable way we’ve seen of putting one of these together. Just remember that you need a radioactive source inside the chamber or you’ll be waiting a long time to see any particles. They’re using a test source here, but we saw a cloud chamber at our own local Hackerspace that used thoriated tungsten welding rods which are slightly radioactive.

[Thanks JAC_101]

Garage Door Opener Used To Automatically Lower A Game Table Top

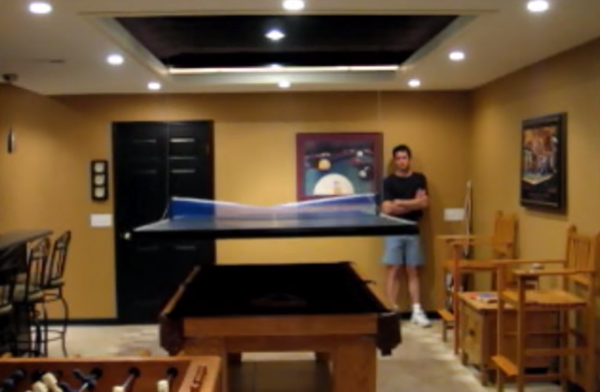
[Lou] is at it again, and this time he wrote in to let us know about his automated ping pong table topper. With no good spot to stash an entire extra table [Lou] decided to take a two in one game table approach and fit the top of the ping pong table to his pool table. A ping pong table top is no small thing though and it turns out the best (or maybe coolest) place to store it is above the ceiling! At the flip of a switch a garage door opener pulls away a section of ceiling tiles and a winch motor lowers the table top into place with two cables.

The system works very smoothly using some pretty easy to find parts. [Lou’s] instructional video (embedded after the break) shows the system in action and explains the concepts behind the automation. We aren’t sure how the winch stops lowering the table, but the ceiling section uses a light switch and spring combo as its limit switch. The only thing really missing is the flashing red light, industrial klaxon, and fog machine needed to compliment the screeching nightmare-howl of that winch motor.

Continue reading “Garage Door Opener Used To Automatically Lower A Game Table Top”

Wiper Motor Motion Simulator

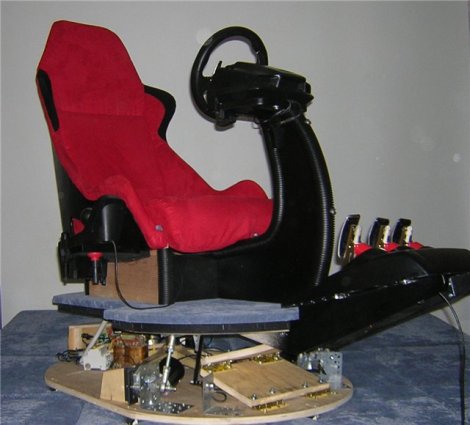
[DERIY] set out to create a two degrees of freedom motion simulator for driving simulation. After four months, he’s completed this impressive simulator for about $400. The simulator receives driving data from the game and actuates the seat to provide tactile feedback to the driver.

To keep the costs low, he decided to use wiper motors for actuating the seat. The system is controlled by the Thanos AMC Motion Controller. This AVR based system connects over USB and controls the motor drivers. There’s also a collection of software for calibrating the system, including tuning the PID control and setting up the feedback potentiometers. An LCD display provides some information on the system status during operation.

If you’ve ever wanted to build a motion simulator, this is a good example of how to get started. The open source hardware for this makes controlling the system easier, and using readily available components can lower the build cost.

Check out a video of the simulator in action after the break.

Continue reading “Wiper Motor Motion Simulator”

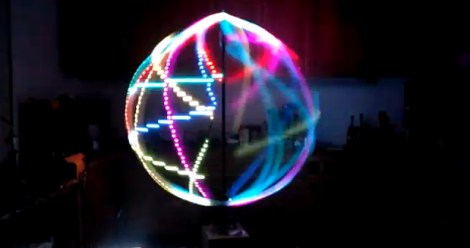
StarGate Eggbeater

[Jason] used a strip of 142 Adafruit LPD8806 Addressable RGB LEDs to create the StarGate Eggbeater persistence of vision display. The LED strips are controlled by an Arduino Mega, which is used to control the strip and provides 21 bit color control for each LED. The strip is housed into a ring-shaped tube which is mounted onto a rod and bearing to allow it to spin. A 1/4 HP motor is used to spin the ring at 250 RPM creating the POV effect.

One issue when controlling a spinning object is making electrical connections to a spinning object. The LPD8806 requires four connections: power, ground, clock, and data. To make the connections, [Jason] used a MOOG Slip Ring. This allows for the four connections to be made while the ring spins at 250 RPM.

Of course POV demos need videos, so check one out the “boss program” video after the break.

Via Adafruit

Continue reading “StarGate Eggbeater”