Homebrew 68k Extravaganza

Introduced in 1979, the Motorola 68000 CPU was first used in very expensive and very high-end workstations from the likes of Sun and SGI. As the processor matured it became well-known for its use in the original Macintosh, early Amigas, and even the TI-89 graphing calculator and a few video game consoles such as the Sega Genesis and Atari Jaguar.

A few days ago when I posted a homebrew computer build based on the 65816 CPU, I lamented the lack of builds using the venerable Motorola 68k. Hackaday readers were quick to point out the many homebrew computers making use of this classic CPU, and I’m glad to post them here.

First up is an amazing 68008 build featuring an IDE disk interface, a floppy disk interface, 10base-T Ethernet connectivity, a real-time clock, and two SID synthesizer chips. As far as features go, this build takes the cake. Pity I can’t find a writeup.

Here’s a 68000-based computer built around the S-100 bus. Like the first computer to use the S-100 bus, the Altair 8800, this computer is plugged into a backplane that breaks out the data, address, and interrupt lines to every device on the bus.

Of course, no mention of backplane computers would be complete without a Eurocard version. [N8VEM] built a 68000 computer able to be plugged in to a backplane along with an IDE controller card and a display controller.

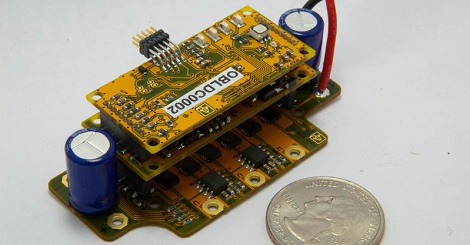
Finally, in true ‘giant mess of wires’ spirit, [Dajgoro] sent in his 68k single board computer featuring 512 kB of RAM and a 16k ROM. [Dajgoro] also took the time to wire in a PIC microcontroller, allowing him to expand his computer far beyond what vintage components would allow.

The 68k was – and still is – a very powerful CPU that far surpasses the capabilities of the 6502 and Z80 homebrew computers we see from time to time. Short of building a 486 or Pentium-based computer from scratch, building a 68k machine is one of the crowning achievements of hardware hackery, and something we hope to see more of in the future.

Problems Powering Raspberry Pi From GPIO Header

[Zaion] grabbed an ATX power supply to source the 5V the Raspberry Pi needs to run. The common problem when it comes to RPi supplies is a shortfall in how much current a USB wall adapter can source. The ATX shouldn’t have this problem, but none-the-less he found that the USB ports were only reading about 5V. Strange. He grabbed the soldering iron and fixed the issue with a piece of jumper wire (English translation found in the second half of his post).

The problem was discovered when trying to get a WiFi dongle to work on one of the RPi’s USB ports. It simply wouldn’t show up, and after going down the blind alley of assuming it was a driver problem he started to investigate the hardware. After discovering the below-nominal voltage [Zaion] measured the resistance between the 5V pin on the GPIO header and the one on the USB port. It reads 3-4 Ohms and he concluded that the trace is too thin. We took a quick look at the schematic for the board and see no reason for the voltage drop. His jumper wire fixed the issue but it leaves us wondering, is this an isolated case, or a design flaw? Tell us what you think in the comments section.

Open Source Brushless Motor Controller

It’s been a long time coming, but efforts to create Open Source brushless motor controller are finally paying off.

The Open-BLDC project aims to create an open source motor controller for the brushless motors usually found in remote control airplanes, helicopters, and quadcopters. Normally, these motor controllers – usually called electronic speed controllers – can’t supply more than a few dozen amps, and are usually only controllable via a servo signal.

The Open-BLDC goes far beyond the capabilities of off-the-shelf ESCs with up to 200 amps of output, TTL level serial input, and the ability to use regenerative breaking.

While the Open-BLDC project is far from complete, the team working on the hardware hopes to add I2C, CAN, and PPM interfaces, along with speed and torque control.

There is no word on when, or even if, the Open-BLDC will ever be available for sale, but with the features it has it would be welcomed by just about any builder constructing a gigantic RC vehicle.

Zeppelin On The Fisher Price Record Player Now Thanks To A 3D Printer

[Fred Murphy] went ahead and revised his method of making custom records for a Fisher Price toy record player. He’s now able to 3D print the discs. The toy works much like a music box, with a comb in the “cartridge” of the record player and notches in the record that pluck the fingers of the comb as it turns. He had previously developed a subtractive method that let him mill records out of a solid piece of plastic. But this additive method means less waste.

The music creation portion of the project is the same as the previous version. That’s because it’s pretty hard to outdo the C# software he wrote which serves as a composition studio. The difficulty comes in getting a clean print for the disk. The ridges on the discs are 0.7mm so you’re going to need a well-aligned printer with fine resolution. [Fred] printed in both ABS and what he calls “Vero clear” plastic. The former works but he got better results with the latter.

Hands On With The Electric Imp

A while ago we caught wind of the Electric Imp, a very cool little device that packs an ARM microcontroller and a WiFi adapter into an SD card. We got our hands on an Imp last week, and now it’s time to show off what this little device can do. You can check out the rest of this hands on tutorial with the Electric Imp after the break.

Continue reading “Hands On With The Electric Imp”

Playing Around With Kerf Bending

With laser cutters popping up in hackerspaces and maker’s tool sheds like weeds, it’s no surprise we’re seeing an explosion in manufacturing techniques that would be nearly impossible without a laser cutter. One of these techniques is kerf bending, a method of bending plywood simply by burning patterns along the desired bend. [Martin] just put up a great tutorial on kerf bending with a laser cutter, and even came up with a few very interesting patterns that can be used to build your own case with rounded corners.

[Martin]’s adventures into kerf bending began with a small radio transmitter case he built. This case used the very common ‘vertical slit’ method, but in the first version of the case, the slits were placed too far apart. By moving the slits closer together, [Martin] was left with a very easy to bend and very strong wooden case.

There are also a few other patterns [Martin] tried out. A herringbone pattern made for a wooden case nearly as bendable (and a little stronger) as the traditional vertical slit method. From there, [Martin] branched out into more esoteric patterns such as a medieval cross and Space Invader pattern, both ideal for your next highly stylized enclosure.

In the end, [Martin] says just about any pattern will work for kerf bending, so long as the design isn’t diagonal to the bend. We’d love to see some proper engineering analysis for kerf bending, so if you can figure out the optimal pattern for high strength, low machine time bends, send it in on the tip line.

Tindie Is Growing Up

Tindie, the etsy for electronics and DIY projects is growing up. After growing 300% in August, the creator of Tindie,  [emile], is now working full-time as the head of Tindie, LLC.

Intended to be a place to connect makers with homebrew project connoisseurs, Tindie is seeing new projects and builds added every day. [emile] figures since some Tindie contributors are using the platform as the source of their livelihood, the least he could do would be to focus his energies into turning Tindie into a profitable and sustainable enterprise.

From the humble beginnings of an empty storefront, Tindie has grown large enough to feature some very cool projects such as a GoPro time lapse control board, a CNC router control board, a LiPo charger the size of a USB plug, a Raspi case milled out of a billet of aluminum, and a gag gift we wouldn’t want to take through airport security. Not bad for a web site that only launched a few months ago.