Apple System 7… On Solaris?

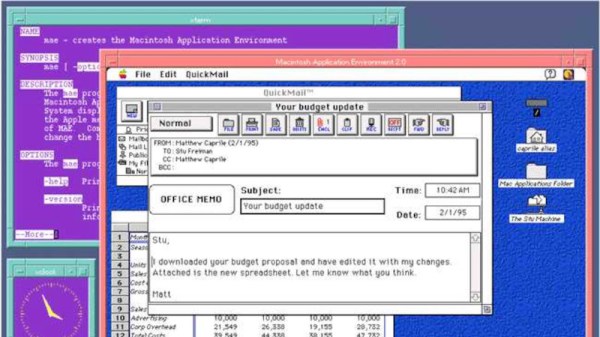
While the Unix operating systems Solaris and HP-UX are still in active development, they’re not particularly popular anymore and are mostly relegated to some enterprise and data center environments They did enjoy a peak of popularity in the 90s during the “wild west” era of windowed operating systems, though. This was a time when there were more than two mass-market operating systems commercially available, with many companies fighting for market share. This led to a number of efforts to get software written for one operating system to run on others, whether that was simply porting software directly or using some compatibility layer. Surprisingly enough it was possible in this era to run an entire instance of Mac System 7 within either of these two Unix operating systems, and this was an officially supported piece of Apple software.

The software was called the Macintosh Application Environment (MAE), and was an effort by Apple to bring Macintosh System 7 applications to various Unix-based operating systems, including Solaris and HP-UX. This was a time before Apple’s OS was Unix-compliant, and MAE provided a compatibility layer that translated Macintosh system calls and application programming interfaces (APIs) into the equivalent Unix calls, allowing Mac software to function within the Unix environments. [Lunduke] outlines a lot of the features of this in his post, including some of the details the “scaffolding” allowing the 68k processor to be emulated efficiently on the hardware of the time, the contents of the user manual, and even the memory management and layout.

What’s really jarring to anyone only familiar with Apple’s modern “walled garden” approach is that this is an Apple-supported compatibility layer for another system. At the time, though, they weren’t the technology giant they are today and had to play by a different set of rules to stay viable. Quite the opposite, in fact: they almost went out of business in the mid-90s, so having their software run on as many machines as possible would have been a perk at the time. While this era did have major issues with cross-platform compatibility, there was some software that attempted to solve these problems that are still in active development today.

Thanks to [Stephen] for the tip!

Teensy Stands In For The Motorola 68k

While it might not seem like it today, there was a time in the not-too-distant past where Motorola was the processor manufacturer. They made chips for everything, but the most popular was arguably the 68000 or 68k. It’s still has a considerable following today, largely among retrocomputing enthusiasts or those maintaining legacy hardware. For those wanting to dip their toes into this world, this Motorola 68000 emulator created by [Ted Fried] may be the thing needed to discover the magic of these once-ubiquitous chips.

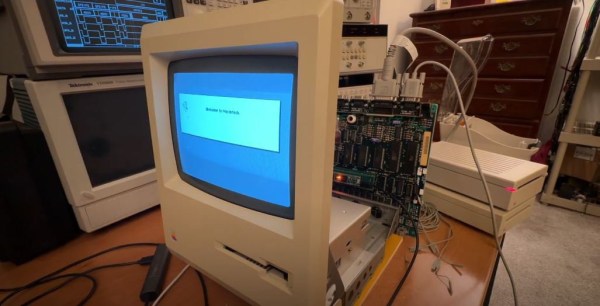
The emulator itself runs on a Teensy 4.1, a 32-bit ARM microcontroller running at 600 MHz — giving it enough computing power to act as a cycle-accurate emulator not only for the 68000 CPU but also the local bus interface, in this case for a Mac 512K. This capability also makes it a drop-in replacement for the 68000 in these older Macs and the original hardware in these computers won’t notice much of a difference. A few tricks are needed to get it fully operational though, notably using a set of latches to make up for the fact that the Teensy doesn’t have the required number of output pins to interface one-to-one with the original hardware.

While the emulator may currently be able to replace the hardware and boot the computer, there is still ongoing development to get every part of the operating system up and working. The source code is available on the project’s GitHub page though so any updates made in the future can be found there. And if you have a Mac 128k and still haven’t upgraded to the 512k yet, grab one of these memory switching modules for the upgrade too.

Continue reading “Teensy Stands In For The Motorola 68k”

See The ATARI GEM Desktop Running On A Portable Word Processor… Thing

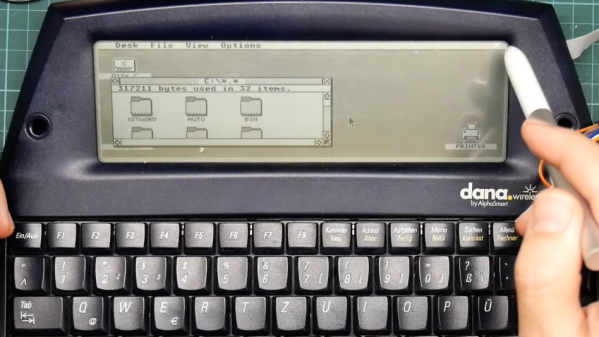
Get ready for vintage computing aplenty in [David Given]’s project to port EmuTOS to the AlphaSmart Dana. He’s got it all on video, too. All 38 hours of it over 13 episodes!

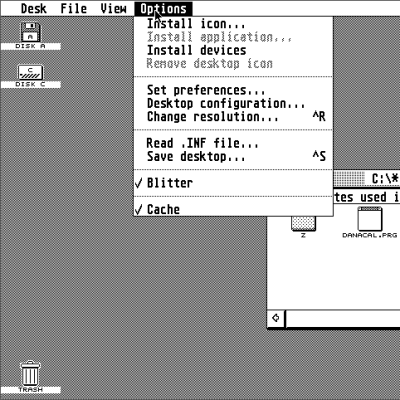
The GEM desktop, as seen on the Atari ST line of computers.

[David]’s fork of EmuTOS is an open source version of the Atari TOS, which is itself the 68000-based OS for the Atari ST line of computers.

As for the AlphaSmart Dana, it is a roughly twenty-year-old portable word processor thing with pen input which runs a version of PalmOS. It’s a slightly oddball piece of hardware, but quite capable in its own way. A match obviously made in heaven? It is if you have [David]’s skill and drive!

To get EmuTOS working on the Dana, the first step was figuring out how to find and work with the Dana’s debug port, using it to get direct access to the CPU while bypassing the boot ROM. Turns out that the Dana’s 68000-compatible processor has a handy feature: by manipulating the right pin, one can remote-control the CPU (to a certain extent) via the UARTs. That’s the entry point for a whole lot of hacking that ultimately results in firing up the GEM desktop on the Dana, and being able to run (some) original Atari ST software. Probably the biggest issue is that the screen size isn’t a great match for what the OS expects, but it works.

Continue reading “See The ATARI GEM Desktop Running On A Portable Word Processor… Thing”

Reverse Engineering The SEGA Mega Drive

With the widespread adoption of emulators, almost anyone can start playing video games from bygone eras. Some systems are even capable of supporting homebrew games, with several having active communities that are still creating new games even decades later. This ease of programming for non-PC platforms wasn’t always so easy, though. If you wanted to develop games on a now-antique console when it was still relatively new, you had to jump through a lot of hoops. [Tore] shows us how it would have been done with his Sega Mega Drive development kit that he built from scratch.

While [Tore] had an Atari ST, he wanted to do something a little more cutting edge and at the time there was nothing better than the Mega Drive (or the Genesis as it was known in North America). It had a number of features that lent the platform to development, namely the Motorola 68000 chip that was very common for the time and as a result had plenty of documentation available. He still needed to do quite a bit of reverse engineering of the system to get a proper dev board running, though, starting with figuring out how the cartridge system worked. He was able to build a memory bank that functioned as a re-writable game cartridge.

With the hard parts out of the way [Tore] set about building the glue logic, the startup firmware which interfaced with his Atari ST, and then of course wiring it all together. He was eventually able to get far enough along to send programs to the Mega Drive that would allow him to control sprites on a screen with the controller, but unfortunately he was interrupted before he could develop any complete games. The amount of research and work to get this far is incredible, though, and there may be some helpful nuggets for anyone in the homebrew Mega Drive community today. If you don’t want to get this deep into the Mega Drive hardware, though, you can build a cartridge that allows for development on native Sega hardware instead.

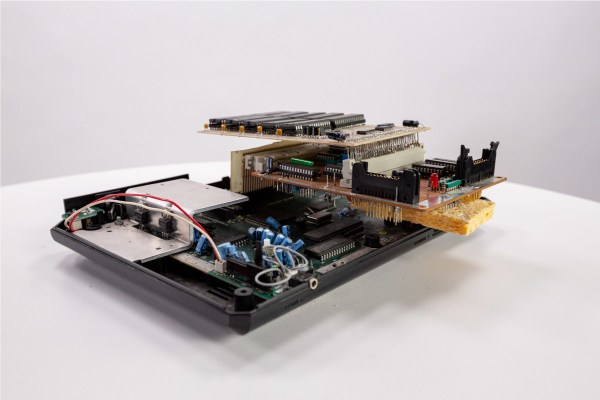
Build A Barebones 68000

The 68000 chip was ubiquitous in the computing world well past its heyday in the 1980s. It was used as the basis for many PCs and video game consoles, and even in embedded microcontrollers. Now, one of its niche applications is learning about the internal functions of computers. 68000 builds are fairly common when building homebrew computers from scratch, but projects like these can be complicated and quickly get out of hand. This 68000 project, on the other hand, gets the job done with the absolute minimum of parts and really dives into the assembly language programming on these chips. (Google Translate from Spanish)

[osbox68] built this computer by first simulating its operation. Once he was satisfied with that, the next step was to actually build the device. Along with the MC68008 it only uses two other TTL chips, a respectable 32 kilobytes of ram, and additionally supports a serial port and an expansion bus. A few 74-series chips round out the build including a 74HC574 used for debugging support. With a custom PCB to tie everything together, it’s one of the most minimal 68000 builds we’ve seen that still includes everything needed to be completely functional.

After all, including the TTL and 74XX chips the entire circuit board only uses 10 integrated circuits and a few other passive elements for a completely functional retro computer. [osbox68] also includes complete schematics for building a PCB based on these chips to make construction that much easier. Of course, emulating an old microcontroller instead of using TTL components can save a lot of real estate on a PCB especially if you’re using something like an FPGA.

The Amiga 2000 You Always Wanted

Back in the late 1980s, Commodore pulled the masterstroke of selling several models and generations of Amiga that were all powered by essentially the same speed 68000 and associated chipset. Sure, there were differences in the RAM and other options you could fit and later models had a few extra graphics modes. Still, the entry-level A500 did substantially the same as the high-end A2000. No matter, we the fans all wanted a 2000 anyway, though we typically found ourselves unable to afford one. It’s 2021 now though, so if you never achieved the dream of owning your own A2000, now you can build one of your own! It’s the task [Drygol] has taken on, with an A2000 made entirely from new components, save for a few salvaged Commodore-specific chips and connectors.

At its heart is a beautiful recreation of the original PCB that we’re guessing will be of great interest to owners whose NiCd batteries have leaked and corroded their originals. It’s all through-hole, but the sheer size of a motherboard still makes it a daunting prospect to solder by hand. There are a huge quantity of decoupling and ESD components that all have to be held with tape before the board is flipped over for soldering, and then all the chips are socketed. A Fat Agnes address generator was fitted on a RAM expansion daughterboard, leading to some significant problems as it proved not to be compatible and had to be removed.

The whole is put in a very low-profile PC case with appropriate risers for the Zorro slots, and then in goes a set of upgrades probably not seen in the same place since about 1993. We don’t recognize them all, but we can see accelerators, a floppy emulator, an HDD emulator using a CF card, and is that a network card we spy? This machine is still a work in progress, but we can guarantee it would have been an extreme object of desire thirty years ago. See it in action in the video below the break.

If rebuilding an Amiga interests you, we took a look at the state of the remanufactured parts scene for the platform last year.

Continue reading “The Amiga 2000 You Always Wanted”

This 68k Board Is About As Simple As It Gets

For those of us who remember the Motorola 68000 microprocessor, it’s likely that a sizeable quantity of those memories will come in the form of a cream or grey box with a Commodore, Atari, or Apple logo on it These machines were the affordable creative workstations of their day, and under the hood were a tour de force of custom silicon and clever hardware design. We might, therefore, be excused for an association between 68000 based computers and complexity, but in reality, they are as straightforward to interface as the rest of the crop of late-1970s silicon. We can see it in [Matt Sarnoff]’s 68k-nano, about as simple a 68000-based single-board computer as it’s possible to get.

But for all its simplicity, this board is no slouch. It packs a megabyte of RAM, 64k of ROM, a 16550 UART, and an IDE interface for a CompactFlash card. There is also provision for a real-time clock module, through an interesting bit-banged SPI interface from the 16550’s control lines. There appears also to be a 50-pin expansion header.

Software-wise there is a ROM monitor that provides test and housekeeping functions, and which loads an executable from the card plugged into the IDE interface if there is one. This feature makes the board especially interesting, as it opens up the possibility of running a μClinux or similar kernel for a more fully-featured operating system.

The 68k doesn’t receive the attention here that some of its 8-bit contemporaries do, but it still appears from time to time. We’ve certainly featured at least one other 68000-based SBC in the past.

Thanks [Anton] for the tip.