A Better Template For Your STM32 F3 Dev Board

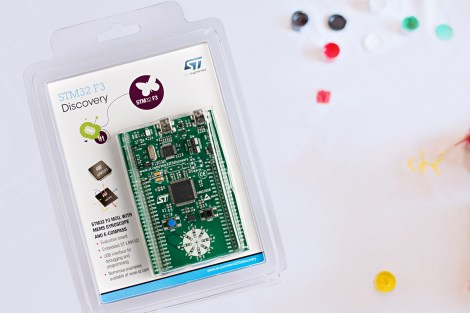
If you’ve picked up one of those really cool STM32 ARM dev boards, you’ve probably poked around looking for a good toolchain. No fear, then, because [Matt] has your back. He put together a template for the ARM Cortex-M4 powered STM32 board.

[Matt] had been using a template for the STM32 F4 we’d covered before, but found the implementation a bit lacking. Wanting to exploit the functionality of his fancy STM32 F3 board, [Matt] took the F0 template whipped up by our very own [Mike S] and got it to work with the newer, fancier dev board.

There are a few bonuses to using [Matt]’s template; the ARM chip in the F3 Discovery board has a hardware floating-point unit that is inaccessible using the Code Sourcery G++: Lite Edition toolchain. [Matt]’s use of gcc-arm-embedded allows access to the hardware FPU, a great benefit for a great board.

Write Code, Fix The Space Station, Win $10,000

ISS

If you want something great to add to your astronaut application, this is your chance. If you can figure out a way to optimize the position of the solar panels for the International Space Station, you’ll win $10,000 from this TopCoder competition.

Positioning the solar arrays on the ISS is an incredibly complex task; if parts of the arrays are in the shadow of other parts, they’ll bend due to the temperature difference and eventually break. NASA would like more power to run science experiments and other cool stuff, so they’re turning to hackers so they can optimize the amount of power generated on the ISS.

Your goal, as a contestant in this completion, is to define the angular position and velocity for each of the joints that connect the solar panels to the station for every point in a 92-minute orbit. Limitations on any solution  include making sure the masts for each panel aren’t in a shadow more than they need to be, making sure the cycle can be repeated each orbit, and making sure the most power is generated on board.

The completion is open, so if you haven’t done enough matrix algebra this weekend feel free to sign up. In any event, you’ll get a cool CAD model of the ISS.


An Arduino Hydrogen Blimp… Oh The Humanity!

arduino-hydrogen-balloon

This sort of flying contraption seems more suited for indoor use. Well, except for the fire hazard presented by building an Android controlled hydrogen blimp. The problems we often see with quadcopters come into play when a motor wire comes loose and the thing goes flying off in a random direction. Loosing a motor on this airship will be no big deal by comparison.

Because the build relies on the buoyancy of the gas, light-weight components are the name of the game. The frame of the chassis is built from balsa wood. It supports two tiny DC motors which are almost indistinguishable in the image above. An Arduino nano and wireless receiver monitor commands from the transmitter and drive the propellers accordingly.

You may have noticed that we categorized this one as a chemistry hack. That’s because [Btimar] generated the hydrogen himself. He used an Erlenmeyer flask with a spout for the chemical reaction. After placing several heat sinks and other scraps of solid aluminum in the flask he poured on the lye solution. This generates the H2 but you need to keep things cool using ice to keep the reaction from getting out of control. We’re going to stick with helium filled blimps for the time being!

See this beast flying around [Btimar’s] living room in the clip after the break.

Continue reading “An Arduino Hydrogen Blimp… Oh The Humanity!”

Custom Gauges With A Stepper Motor Breakout Board

Throw some blinking LEDs on a project and it’s bound to make the front page of Hackaday. We do love builds of a more analog character, though, and this analog gauge stepper motor breakout board seems like just the ticket to make those projects a reality.

The idea behind the project is simple: take a stepper motor, put a needle on it, and connect it to an Arduino. Instant analog gauge, measuring anything an Arduino can calculate.

The motor used in the build is a Switec X27.168, the same motor used in the dashboard of tens of thousands of automobiles from dozens of different makes and models. Controlling the motors is done through [Guy Carpenter]’s Switec X25 library for the Arduino, allowing an Arduino Uno to control up to three stepper motor gauges simultaneously.

The movement of the needle is amazingly smooth and quite fast, as seen in the video after the break. A pretty cool piece of kit if you want a more analog display than LEDs and LCDs can provide.

Continue reading “Custom Gauges With A Stepper Motor Breakout Board”

Breaking The Minteye Captcha Again

cap

A few days ago we saw a post from [samuirai] at the Shackspace hackerspace in Stuttgart on breaking the minteye captcha system. Like most other captcha cracks, [samuirai] used the voice accessibility option that provides an audio captcha for blind users. Using the accessibility option is a wonderful piece of work, but [Jack] came up with an even more elegant way to defeat the minteye captcha.

For those unfamiliar, the minteye captcha provides a picture tossed through a swirl filter with a slider underneath. Move the slider left or right to eliminate the swirl and you’ve passed the, “are you human” test. Instead of looking for straight lines, [Jack] came up with a solution that easily defeats the minteye captcha in 23 lines of Python: just minimize the length of all the edges found in the pic.

The idea behind the crack is simply the more you swirl an image, the longer the edges in the image become. Edge detection is a well-studied problem, so the only thing the minteye cracking script needed to do was to move the slider for the captcha from the left to the right and measure the lengths of all the edges.

[Jack] included the code for  image processing part of his crack, fortunately leaving out the part where he returns an answer to the minteye captcha. For that, and a very elegant way to crack a captcha, we thank him.

Ask Hackaday: What To Do With A Home Intercom System?

[Kyle] just moved into a new home, a 1970s abode that was very modern for its time. When the house was built, a home intercom system was installed. Of course this intercom system was eventually disconnected, but now [Kyle] would like to find a use for it.

The intercom system is a wonderful piece of engineering from the late 60s and early 70s. The base station has an FM radio, a mono input (for plugging in a turntable, we suppose), and a huge speaker. The satellite units – one for each room in the house – are much simpler with just a push to talk switch and a volume control. Yes, in classic minimalist style, the engineers for this intercom system used the speaker as a microphone.

[Kyle] would like to keep the wonderful plastic fantastic aesthetic of the intercom system, but he’s looking for something cool to do with this hardware.  This could be the beginnings of a very cool, very strange house-wide artificial intelligence build, kind of like a consumer version of HAL 9000. We’re interested in hearing what you’d do with [Kyle]’s hardware, so leave your ideas in the comments.

Renaming Parts In Eagle CAD By Editing The XML Directly

eagle-xml-find-and-replace-script

There’s a lot of ways to burn up your time when designing PCBs, but renaming components can be one of the most frustrating. [Joe Pinzone] wrote in with his solution to the problem. Instead of hunting for each part on the schematic to change them one at a time, he makes a list of the substitutions and then uses a script to make all the changes in the XML files. He didn’t publish a post about his work, but you’ll find the source code he wrote embedded after the break.

The straw that finally broke the camel’s back was a project that included about two hundred components which didn’t seem to have a naming order that made any sense with the actual values of the components. The script is written in C++ (for Windows but [Joe] says this should be easily ported to other systems as well). To use it he creates a CSV file with the current component names in the first column. He then goes through and types what he wants for the new name in the second column. This CSV, along with the BRD and SCH files are then given as inputs for the script (through selecting them all and dragging to the script or as CLI arguments) and it automatically makes the changes.

Of course this is only possible because Cadsoft transitioned to using XML files in Eagle 6.

Continue reading “Renaming Parts In Eagle CAD By Editing The XML Directly”