Yet Another DIY Camera Slider

Professional camera gear is expensive, which is probably why there is such a huge DIY field for camera equipment. Here’s another great DIY camera slider that you can build for cheap.

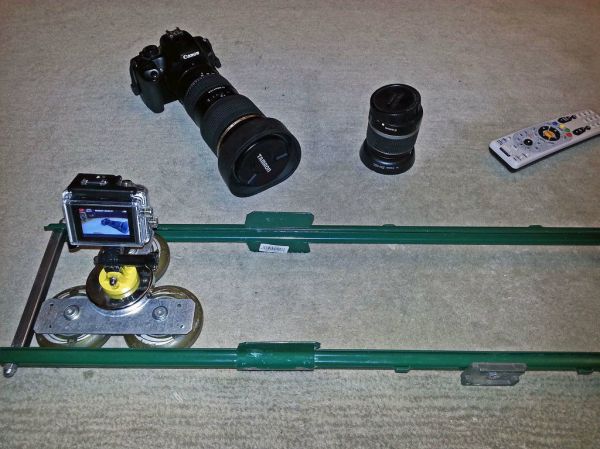
Similar to other rigs we’ve seen, the heart of this design makes use of skateboard wheels — they’re cheap, have good bearings, and are easy to mount. He’s created a dolly for them using a T-strap bracket, which is used for wood framing — the wheels mount directly to it without any modification.

What we think is unique about this build are the rails [Shootr] decided to use. They’re U-Post fence posts — strong, rigid, and probably one of the cheapest forms of processed metal you can buy. To hold them together, he’s using a threaded rod with two pieces of 1/2″ square steel tubing, bracing the fence posts. This wedges the dolly in between them with just enough slack to slide smoothly back and forth.

The other method of making a camera slider like this is using tubular rails, which also allows you to add a curve in your camera track. And if you’re looking for a precise, 2-axis camera dolly… you should check out this one!

Low-Power SMD Fireflies

lowpowerledfireflies

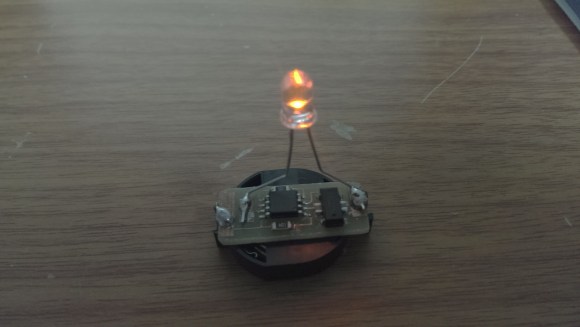
[Tyson’s] family went with creating rather than buying Christmas presents last month, which gave him the opportunity to build some electronic fireflies for gifts. He drew inspiration from a similar firefly project we featured last year, but expanded on the original model by designing dedicated PCBs and housings for each of his firefly pieces.

Although he’d settled on using ATTiny85’s for this project, [Tyson] was fresh out of through-hole versions. He decided to skip the prototyping phase and go right for fabrication, cranking up the laser-jet printer for some toner-transfer, which successfully produced 4 functioning boards (and 3 failures). The fireflies were [Tyson’s] first attempt at SMD soldering, and we’d have to say it’s a job well done; he reflowed each board with a cheap-o heatgun from Harbor Freight.

After some hiccups with fuse programming, [Tyson] got the code uploaded and the fireflies illuminated.  Swing by his site for the nuts and bolts on construction, then snag the project files here. (Direct .zip download)

Measuring 185 µΩ In Circuit

meter

To measure resistance, you usually have to take the resistor to be tested out of the circuit, and sometimes that’s impossible. If you’re using a multimeter, measuring very small resistances is difficult to say the least. Combine both these problems – measuring microOhms in-circuit – and you have a problem that’s perfectly suited for the Mooshimeter.

Announced just a few weeks ago, the Mooshimeter is a two-channel multimeter that communicates with your cell phone over Bluetooth. It’s perfect for measuring current and voltage simultaneously, all while being tucked away in some place that’s either dangerous, inaccessible, or mobile.

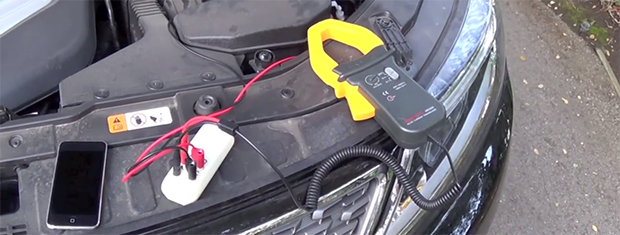
The Mooshimeter team put together a great example of what can be done with their meter by measuring the resistance of a car battery grounding strap while behind the steering wheel. To do this, they put alligator clips across the grounding cable and clamped on a current meter.

Inside the car, they whipped out their cell phone and looked at the Mooshimeter’s output for the voltage and current measurement. The Mooshi app has an IV curve (with linear regression in the works), so simply dividing the current and voltage gives them the resistance of the battery’s grounding cable.

It’s a very cool and extremely simple demonstration of how cool the Mooshimeter actually is. Video of the demo below.

Continue reading “Measuring 185 µΩ In Circuit”

Toner Transfer PCBs, Double Sided, With Color Silkscreen

Silk

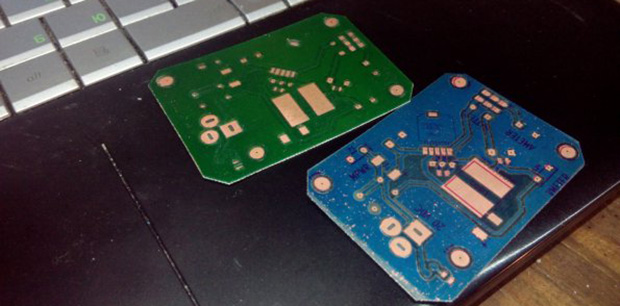
Making a few PCBs with the toner transfer method is a well-known technique in the hacker and maker circles. Double-sided PCBs are a little rarer, but still use the same process as their single-sided cousins. [Necromancer] is taking things up a notch and doing something we’ve never seen before – double-sided PCBs made at home, with color silkscreens, all make with a laser printer.

For laying down an etch mask, [Necro] is using a Samsung ML-2167 laser printer and the usual toner transfer process; print out the board art and laminate it to some copper board.

The soldermasks use a similar process that’s head-slappingly similar and produces great results: once the board is etched, he prints out the solder mask layer of his board, laminates it, and peels off the paper. It’s so simple the only thing we’re left wondering is why no one thought of it before.

Apart from the potential alignment issues for multiple layers, the only thing missing from this fabrication technique is the ability to do plated through holes. Still, with a laser printer, a laminator, and a little bit of ferric or copper chloride you too can make some very nice boards at home.

Recap: Hackaday’s First Live Event

Packed house

Last Tuesday was the first time I know of that Hackaday hosted our own live event. There were some less official get-togethers associated with conferences and things like that. But we threw The Gathering to see if readers would rise from their lairs for a chance to interact with one another. We called, you answered, and I had an amazing time. Hackaday packed the place with over four hundred readers, and every conversation I had ended up being a fascinating interaction. Thank you!

[Brian], [Eliot], and [Mike] via [Mike's] phone an color corrected by [Hefto
[Brian], [Eliot], and [Mike] via [Mike’s] phone an color corrected by [Hefto
[Brian Benchoff] and I returned to our snowy homelands the next morning. Surprisingly this was the first time we had met each other despite working closely on Hackaday for the past several years. I also had the pleasure of meeting [Eliot Phillips] and [Jack Buffington] for the first time. I’m sorry I didn’t have more time to hang out with them, but when you’re trying to say hello to several hundred people you’ve just got to keep moving.

Before I get too wordy I better throw the more tag in here. Join me after the jump for a blow-by-blow of what we did, what sticks out in my mind, and where we’re going next.

Continue reading “Recap: Hackaday’s First Live Event”

Flash Game Cartridge For The VIC-20

cart

[Petri]’s first computer was the venerable Commodore VIC-20, predecessor to the Commodore 64. With only 5kB of RAM, a very simple graphics chip, and BASIC, it’s a bare-bones system that’s perfect for a 7-year-old future programmer. [Petri] was trying to figure out something to do with this old computer, and realized the simple schematic would allow him to recreate those classic VIC-20 cartridges using modern hardware.

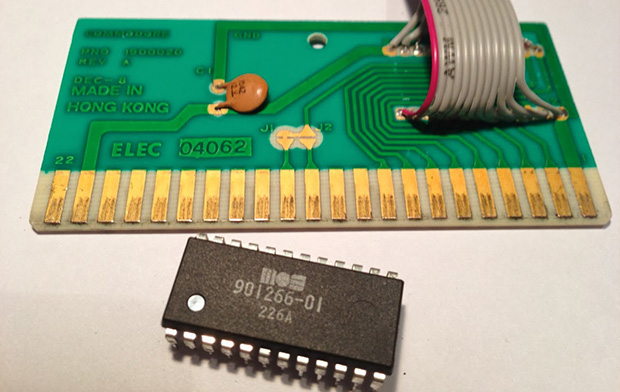
This project began by cracking open a few game cartridges to see what was inside. They’re very simple devices, consisting of a decoupling cap and a ROM chip wired directly to the data and address busses. [Petri] desoldered the ROM and replaced it with a ribbon cable that would give him a clean breadboard to VIC-20 expansion port interface.

Instead of finding a contemporary EEPROM chip to program, [Petri] decided on using a Flash chip. The original cartridge had a 16kB ROM chip, but the smallest parallel Flash chip he could find was 256k. No problem, then; just ignore a few address lines and everything worked out great.

After getting the VIC-20 reading the breadboarded Flash chip, [Petri] started work on a circuit that would program his Flash chip while still attached to the expansion port. With a few buffer chips and an ATMega32a loaded up with Arduino, he’s able to program the Flash chip and turn it over to the VIC-20.

A simple test that toggled the color of the screen as quickly as possible was all that was needed to test the new circuit. Now, [Petri] can finally start on programming some games for his first love.

Continue reading “Flash Game Cartridge For The VIC-20”

Stop Traffic In This 7-Mode LED Running Jacket

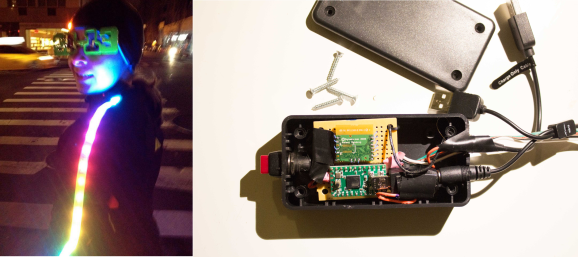
[Miria] was tired of tangling with bicyclists on her nighttime runs. It was obvious to her to illuminate herself, but she thought it would be really cool if the lights responded to her heart rate. The short summary that tipped us off is over at NYC Resistor, and [Miria] gives the gory details on her blog. The LEDs operate in seven different light modes that increase in speed proportionate to her heart rate.

She started the build around an Arduino but found that the compatible heart rate sensors were mostly optical and gave inaccurate readings. Since she was already using a Garmin GPS watch and heart rate monitor band, she decided to hack into the conversation between the two. Garmin uses the ANT protocol for this. While [Miria] found the documentation to be an effective sleeping pill, she also found that SparkFun has an ANT transceiver breakout board. Unfortunately, it’s been discontinued.

[Miria] continued undeterred, using the SparkFun board for prototyping. Her final version uses a Teensy 2.0 and this ANT transceiver in place of the ill-fated SparkFun board. She found an Energizer power pack that plugs directly into the Teensy and can power both Adafruit weatherproof LED strips for about an hour. Look both ways, and check out her demo after the break.

Continue reading “Stop Traffic In This 7-Mode LED Running Jacket”