Reverse Engineering Teaches An Old Scope New Tricks

[PMercier] clearly loves his old Tektronix TDS3014 scope, which did however lack essentially modern connectivity such as an Ethernet port for control and a USB port for a convenient way to capture screenshots. So he decided to do some in-depth reverse engineering and design his own expansion card for it. The scope already has an expansion port and an expansion card, but given this model was first released in 1998, purchasing an OEM part was not going to be an option.

They don’t make ’em like they used to. Test equipment is today is built to last a decade — but usually lives on much longer. This is certainly true for the previous generations of kit. It’s no surprise that for most of us, hand-me-downs from universities, shrewd eBay purchasing, and even fruitful dumpster dives are a very viable way to attain useful and relevant test equipment. Now, while these acquisitions are more than adequate for the needs of a hobbyist lab, they are admittedly outdated and more to the point, inaccessible from a connectivity and communication standpoint. A modern lab has a very high degree of automated data acquisition and control over ethernet. Capturing screen dumps on a USB is a standard feature. These modern luxuries don’t exist on aging equipment conceived in the age of floppy disks and GPIB.

Continue reading “Reverse Engineering Teaches An Old Scope New Tricks”

Supercon Badge Hardware Hacking: Here’s What To Bring

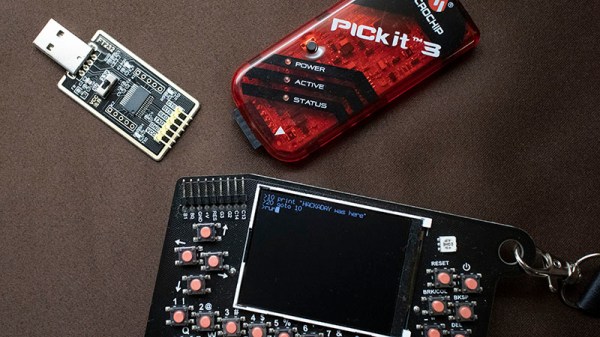
Hackaday Superconference is just a week away (precious few tickets remain), a celebration of all things Hackaday, which naturally includes creative projects making the most of their hardware. Every attendee gets a platform for hacking in the form of the conference badge.

To make the most of your badge hacking fun, plan ahead so you will have the extra components and the tools you need. At the most basic, bring along a serial to USB cable and a PIC programmer. These are common and if you don’t own them, ask around and you will likely be able to borrow them. Now is also the time to put in a parts order for any components you want to use but don’t have on hand!

The badge is hackable without any extras, but it’s designed for adding hardware and hacking the firmware. We’re excited to see what you can do with it. We gave an overview of this retro themed pocket computer a few days ago, today we’re inviting you to exploit its potential for your hardware hacks.

Continue reading “Supercon Badge Hardware Hacking: Here’s What To Bring”

Adding Character To The C64

The venerable Commodore 64, is there anything it can’t do? Like many 1980s computer platforms, direct access to memory and peripherals makes hacking easy and fun. In particular, you’ll find serial & parallel ports are ripe for experimentation, but the Commodore has its expansion/cartridge port, too, and [Frank Buss] decided to hook it up to a two-line character LCD.

Using the expansion port for this duty is a little unconventional. Unlike the parallel port, the expansion port doesn’t have a stable output, as such. The port contains the data lines of the 6510 CPU and thus updates whenever RAM is read or written to, rather then updating in a controlled fashion like a parallel port does. However, [Frank] found a way around this – the IO1 and IO2 lines go low when certain areas of memory are written to. By combining these with latch circuitry, it’s possible to gain up to 16 parallel output lines – more than enough to drive a simple HD44780 display! It’s a testament to the flexibility of 74-series logic.
It’s all built on a C64 cartridge proto-board of [Frank]’s own design, and effort was made to ensure the LCD works with BASIC for easy experimentation. It’s a tidy mod that could easily be built into a nice enclosure and perhaps used as the basis for an 8-bit automation project. Someone’s gotta top that Amiga 2000 running the school district HVAC, after all!

Flash Game Cartridge For The VIC-20

cart

[Petri]’s first computer was the venerable Commodore VIC-20, predecessor to the Commodore 64. With only 5kB of RAM, a very simple graphics chip, and BASIC, it’s a bare-bones system that’s perfect for a 7-year-old future programmer. [Petri] was trying to figure out something to do with this old computer, and realized the simple schematic would allow him to recreate those classic VIC-20 cartridges using modern hardware.

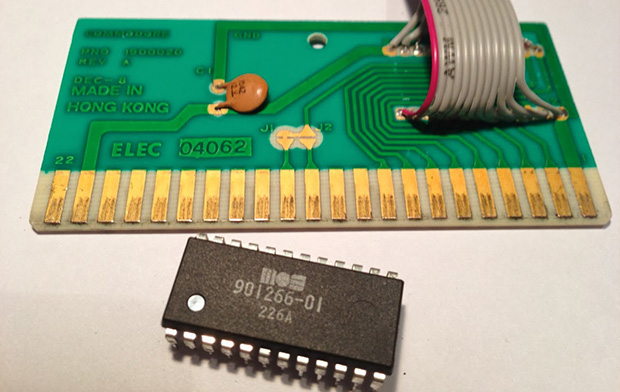
This project began by cracking open a few game cartridges to see what was inside. They’re very simple devices, consisting of a decoupling cap and a ROM chip wired directly to the data and address busses. [Petri] desoldered the ROM and replaced it with a ribbon cable that would give him a clean breadboard to VIC-20 expansion port interface.

Instead of finding a contemporary EEPROM chip to program, [Petri] decided on using a Flash chip. The original cartridge had a 16kB ROM chip, but the smallest parallel Flash chip he could find was 256k. No problem, then; just ignore a few address lines and everything worked out great.

After getting the VIC-20 reading the breadboarded Flash chip, [Petri] started work on a circuit that would program his Flash chip while still attached to the expansion port. With a few buffer chips and an ATMega32a loaded up with Arduino, he’s able to program the Flash chip and turn it over to the VIC-20.

A simple test that toggled the color of the screen as quickly as possible was all that was needed to test the new circuit. Now, [Petri] can finally start on programming some games for his first love.

Continue reading “Flash Game Cartridge For The VIC-20”