I Am The Midnight Message Board What Messages At Midnight

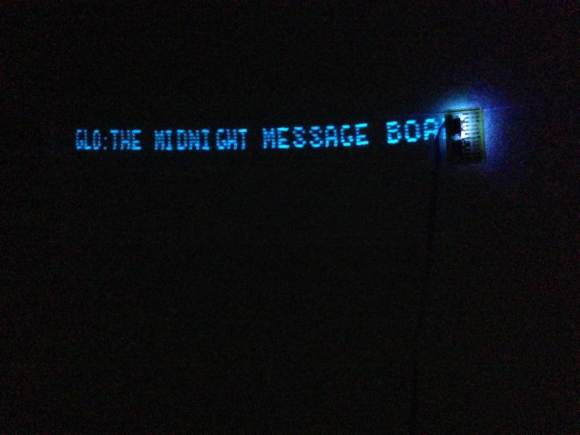
Photoluminescent stars on your bedroom wall or ceiling are pretty cool, though the stationary shapes can become boring. [Adi] felt this way, too. While doodling with a bright white light on some glow in the dark vinyl, it occurred to him that this could make for an interesting display. He set about making GLO, the midnight message board and RSS display.

[Adi]’s light writer uses 12 UV LEDs on a linear axis powered by a stepper motor to write RSS headlines, Twitter trends, or custom text on his wall. He finds the slow fade of the text very soothing to fall asleep by, and it’s easy to see why. The LED array imprints a section of a character consisting of a 6×5 bit pattern. The 12 LEDs are split into two groups, so it can write two lines at 45-50 characters each. [Adi] designed his own pixel font for this project, and advises that only upper case letter forms be used.

[Adi]’s write-up is quite admirable and comprehensive. In the circuit build section, he advises that the LEDs must be very close to the vinyl for optimum results, but that they should protrude farther than the shift registers so the chips don’t rub the vinyl. Of course you could opt for more intense light sources, like laser. See it in action after the break.

Continue reading “I Am The Midnight Message Board What Messages At Midnight”

Extremely Slick Game Of Life Based Clock

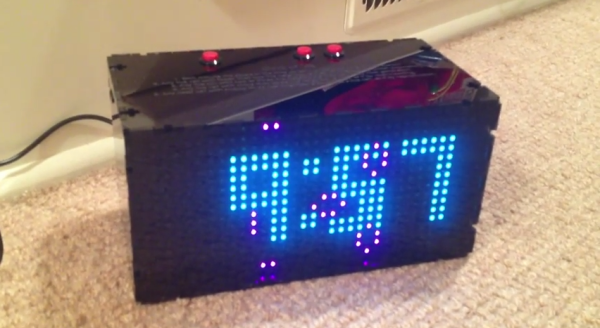
[Matthews] needed a good present to give to his brother-in-law, who just so happens to be a mathematician and programmer. He wanted something functional but equally geeky at the same time, so he decided to try his hand at making a Game of Life style clock.

He was originally inspired by a Game of Life Clock we shared a few months ago, but with a few improvements. First, he wanted a much bigger playing field, so he found a 16×32 RGB LED matrix. Second, he wanted the time to always be visible so it actually works as a functional clock.

At the heart of the device is an Arduino UNO which utilizes a Chronodot RTC module for accurate time keeping. The entire clock is encased in acrylic sheets and it looks extremely good for a home-made project. He designed the case using a site called MakerCase, which is a super handy application for designing boxes.

At the beginning of every minute starts a new Game of Life which plays over top of the time displayed. Three buttons on the top allow for many adjustments including brightness, timezone, speed, colors, and even edge behavior! To see it in action, stick around after the break.

Continue reading “Extremely Slick Game Of Life Based Clock”

Rex, The ARM-Powered Robot Board

REX

There are a million tutorials out there for building a robot with an Arduino or Raspberry Pi, but they all suffer from the same problem: neither the ‘duino nor the Raspi are fully integrated solutions that put all the hardware – battery connectors, I/O ports, and everything else on the same board. That’s the problem Rex, an ARM-powered robot controller, solves.

The specs for Rex include a 1GHz ARM Cortex-A8 with a Video SoC and DSP core, 512 MB of RAM, USB host port, support for a camera module, and 3.5mm jacks for stereo in and out. On top of that, there’s I2C expansion ports for a servo adapter and an input and output for a 6-12 V battery. Basically, the Rex is something akin to the Beaglebone Black with the hardware optimized for a robotic control system.

Because shipping an ARM board without any software would be rather dull, the guys behind Rex came up with Alphalem OS, a Linux distro that includes scripts, sample programs, and an API for interaction with I2C devices. Of course Rex will also run other robotics operating systems and the usual Debian/Ubuntu/Whathaveu distros.

It’s an impressive bit of hardware, capable of speech recognition, and machine vision tasks with OpenCV. Combine this with a whole bunch of servos, and Rex can easily become the brains of a nightmarish hexapod robot that responds to your voice and follows you around the room.

You can pick up a Rex over on the Kickstarter with delivery due sometime this summer.

Printer Up-cycled CNC Machine Uses More Than Just The Stepper Motors

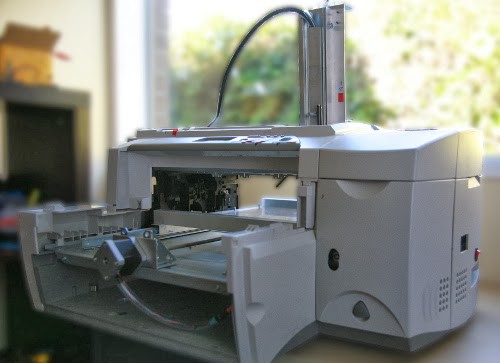
Sometimes you just know from the photo that this is going to be a really cool project. When most people salvage parts from an old printer, they usually chuck the rest. In this case [Shane] made use of the entire printer to build his CNC machine.

He started with an old HP 2500C A3 printer, which he had planned to salvage for parts only. While he was taking it apart he realized the chassis would make a great frame for his actual CNC machine! With that in mind he quickly changed his game plan to making each axis inside of the printer.

He’s using regular ball bearing drawer runners for both the X and Z axes, covered with a clever design of aluminum angle to keep any possible chips from jamming them. The Y axis on the other hand makes use of the original shaft runners from the print head carriage. Each axis is driven by threaded rod using recycled stepper motors from the printer.

An Arduino UNO sits at the heart of the project with a Protoneer CNC shield to control the stepper drivers. He’s also included an emergency stop, hold, resume, and cancel buttons for manual control.

It’s a great project, and an amazing example of using what is on hand for a project. Stick around after the break to see a demonstration of it printing!

Continue reading “Printer Up-cycled CNC Machine Uses More Than Just The Stepper Motors”

Raspberry Pi Tablet — The PiPad

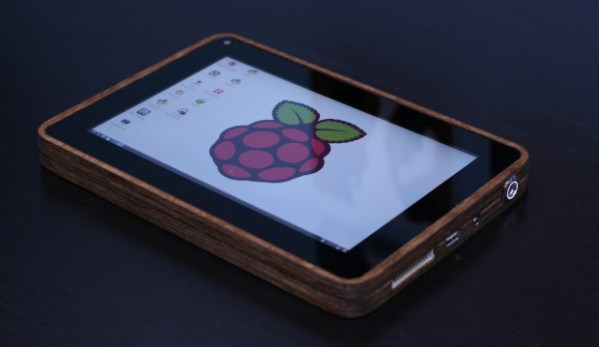
[Michael Castor] wanted a tablet, but not just any tablet. He wanted an all-in-one system running Linux, and he wanted it to look good. So he made himself a wooden PiPad.

He started the project at the beginning of 2013, and like many of our projects, it took a little while to get some momentum going. He bought most of the components early on but then it got pushed to the back burner. Two weeks before the Maker Faire Bay Area 2013, [Michael] decided he wanted to show it off, and thus began the mad dash to finish it in time.

The build consists of a very nice piece of 1/2″ Baltic birch plywood which was cut to shape using a CNC router. A scrap piece of carbon fiber makes for a stylish but not too flashy back cover — He even managed to get [Eben Upton] to sign it! Inside is a 10,000mAh lithium ion battery, a Raspberry Pi, a cellphone battery charging system and a capacitive touchscreen LCD. Almost all touchscreens run off 12V, but [Michael] managed to find a 5V HDMI to LVDS converter, which works perfectly. The device gets about 6 hours of battery life, which is more than enough for [Michael]. The device looks great, and he’s even made it through airport security with it!

We love seeing unique projects like this — don’t forget to submit your own projects through our Tip line!

The 2014 Line Of MakerBots

makerbots

With the Consumer Electronics Show over, it’s finally time to take a look at the new line of MakerBot printers (here’s the press release). Unlike MakerBot’s previous offerings with a one size fits all business model, they’re branching out with a product line that can only be described as, ‘regular, small, and large’.

The new MakerBots include an updated Replicator that’s just slightly larger than the previous version. It includes Ethernet, an option for WiFi, an on-board camera, and a control panel with a 3.5″ LCD and rotary encoder. This new Replicator will retail for $2900, $700 more than the current Replicator (single extruder).

The other new MakerBots include the stripped down and small Replicator Mini. It’s a no-frills machine with a build volume of 10 x 10 x 12.5 cm (~4 x 4 x 5 in) with 200 micron resolution. Also in the new lineup is the Replicator Z18, an impressively large printer with a 30.5 x 30.5 x 45.7 cm (12 x 12 x 18 in) build volume, 100 micron resolution, plastic sides for a heated build volume, and all the bells and whistles on the new Replicator. The Mini will sell for $1375 and the Z18 is expected to sell for $6500.

The updated Replicator is available now, and the Mini and Z18 will be available sometime in the next few months.

Lazing With A Ruby

ruby

[Ben Krasnow], builder of amazingly complex and technical devices, is finally starting work on his ruby laser. He’s been collecting parts for this project for the past few years, but only recently has he started recreating the first visible light laser.

While the design and manufacture of the first ruby laser was astonishingly complex, the basic idea behind it is pretty simple. [Ben]’s laser uses a synthetic ruby rhod with the ends ground optically flat. This rod is placed inside a flash tube. When the flash tube lights up, the rod absorbs the light and re-emits it as a coherent beam for several milliseconds. This beam bounces between two mirrors – one fully reflective and another partially reflective – and emits a constant stream of coherent photons. It’s tremendously more complex than simply connecting a laser diode to a power source, but replicating a build that graced the covers of Time and Newsweek only fifty years ago is pretty impressive

Right now, [Ben] has most of the mechanical and optical parts of his ruby laser on his workbench. The next step is constructing a huge capacitor bank to charge the flash tube every millisecond or so. What [Ben] will end up using his laser for remains up in the air, but if we come across some erbium or neodymium rods we’ll be sure to send them his way.

Continue reading “Lazing With A Ruby”