Follow Up Of Hacker Meet Up At Heatsync Labs

[youtube=http://www.youtube.com/watch?v=ZGsmNLdjPUk&w=580]

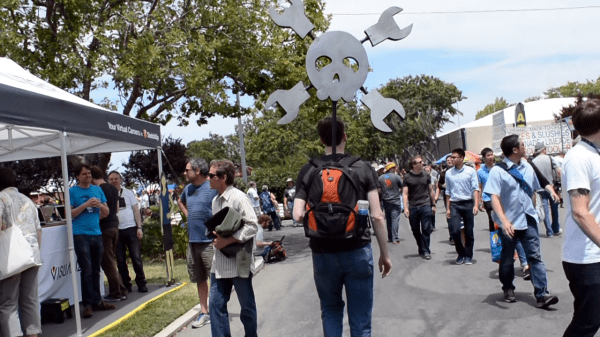
The hacker meet up at Heatsync Labs in Mesa, AZ  on May 15th was an amazing success. I got to meet lots of new people at the gathering but more importantly I was able to interview several hackers who shared a lot of details on their current projects. I put together the short overview video above that has clips of each hacker presenting their project. If you like what you see in the teaser please watch the full 30 minute video with all the presentation footage after the break along with project page links. Also, if you’re not yet up to speed on The Hackaday Prize, the full length video starts with a short overview.

Continue reading “Follow Up Of Hacker Meet Up At Heatsync Labs”

DIY Calligraphy Nibs Get Down To Brass Tacks

diy calligraphy nibs
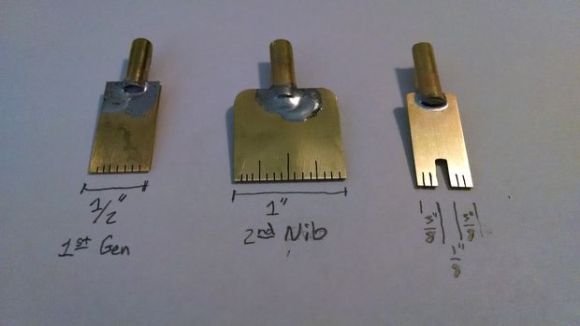
Calligraphy is a rewarding hobby that is fairly inexpensive to get in to. For someone just starting out, poster nibs are a great way to practice making letterforms without worrying about applying the proper pressure required to use nibs that split. With a few tools, you can even make your own poster nibs like [advicevice] does in this Instructable.

Poster nibs are typically made with a single piece of brass that’s folded at the point where the nib touches the paper. The backside forms a reservoir that holds the ink. The other end is formed into a semicircular shank that is inserted into a nib holder. The nibs that [advicevice] made consist of two pieces of flat brass stock plus a section of brass tubing for the shank of the nib. One side of the nib is slightly thinner than the other to act as a reservoir. This keeps ink clinging to the nib through the magic of surface tension.

Nib construction is fairly simple. [advicevice] cut the brass stock to the desired length and width, cut notches with a  jeweler’s saw  to allow the ink to flow, and cut a piece of tubing that holds the nib snugly. He recommends using three grades of sandpaper on the edges of the brass stock and tubing. After soldering the nib to the shank, he beveled the business end by rubbing it on 150-grit sandpaper. He followed this with 350- and 600-grit papers to avoid injury and tearing the paper when writing.

If you simply must spend more money, build a machine that writes calligraphy for you.


Firing Blanks With Laser Tag

glock
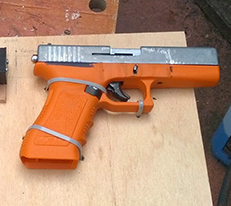
Last year, [Tony] was asked to develop a lasertag system with ultimate realism. This meant a system that used a blank firing replica gun, and a system to detect blank rounds being fired. Very cool, and the way he went about it includes some interesting electronics.

Because the system requires a blank to be fired before shooting a laser at a target, the entire system must be able to detect a blank being fired. [Tony]’s first attempt used a piezo sensor to detect the shock from being fired. This system had a lot of noise and was ditched for a much better solution: a magnet mounted to the slide, and a hall effect sensor mounted to a 3D printed frame that turns this replica into a carbine.

A little bit of tweaking in software was required to inhibit the laser when the operator cocks the gun, but it looks – and sounds – really good. It’s also very, very realistic: the only way to shoot an opponent is to physically reload. Video below.

Continue reading “Firing Blanks With Laser Tag”

Mini Ms. Pacman

Ms
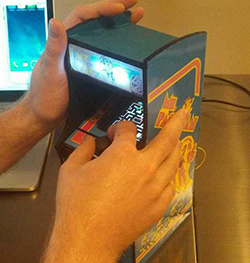
The bragging rights of owning a vintage arcade machine are awesome, but the practicality of it – restoring what is likely a very abused machine, and the sheer physical space one requires – doesn’t appeal to a lot of people. [Jason] has a much better solution to anyone who wants a vintage arcade machine, but doesn’t want the buyer’s remorse that comes with the phrase, “now where do we put it?” It’s a miniaturized Ms. Pacman, mostly scale in every detail.

The cabinet is constructed out of 1/8″ plywood, decorated with printed out graphics properly scaled down from the full-size machine. Inside is a BeagleBone Black with a 4.3″ touchscreen, USB speakers, and a battery-backed power supply.

The control system is rather interesting. Although [Jason] is using an analog joystick, the resistive touch screen monopolizes the ADC on the BeagleBone. The solution to this problem would be to write a driver, or if you’re [Jason], crack the joystick open and scratch away the resistive contact until you have a digital joystick. A nice solution, considering Ms. Pacman doesn’t use an analog joystick anyway.

Pictures over on [Jason]’s G+ page, along with a vertical video that G+ displays properly. Thanks, Google.

Automated Home Manufacturing Combining 3D Printing With Robotics

[Florian] has been hard at work creating this automated setup to queue jobs for his 3D printer in order for it to run while he’s not around. It’s not quite finished but the concept is there and he’s started doing some tests! 

He’s using the uArm, which was a highly successful kickstarter earlier this year — it’s an Arduino-compatible microcontroller driven 4-axis parallel-mechanism robot arm, based off of the industrial ABB PalletPack robot.

As soon as he got all the parts he setup a quick test to replace the build platforms using the uArm.

Continue reading “Automated Home Manufacturing Combining 3D Printing With Robotics”

Building A CNC Milling Machine For Less Than $1300

CNC milling machine

[Mynasru] tipped us about a homemade CNC milling machine that his friend [trochilidesign] recently made. We have to admit it may be one of the best ones we’ve featured so far on Hackaday, mainly due to its elegant design (see picture above) and its all metal structure with linear guide rails. In the very well detailed write-up, we can gather that the CNC machine was designed using SolidWorks.

The main frame is built around 2 Maytec 40x80mm profiles and 2 endplates made from 10mm thick aluminum. 3 Nema 23 stepper motors and their drivers power the build, all of them bought on ebay. Finally, the Mach3 CNC software was chosen to interpret the G code and send the appropriate control signals.

Due to licensing restrictions the original author can only provide us with PDF files detailing each part of the machine, but we’re sure this should already be enough for interested persons out there.

Video Links: Hunting For Hacks At Maker Faire

[youtube=https://www.youtube.com/watch?v=v80VvQLj4Xc&w=580]


Why not round out our two-week Bay Area Maker Faire coverage with a Links post? This time around it’s video links. We mixed together a bunch of interesting clips that didn’t get their own video, as well as a dose of what it feels like to walk around the Faire all weekend. Join us after the break for the links.

Continue reading “Video Links: Hunting For Hacks At Maker Faire”