Arduino Just Introduced An FPGA Board, Announces Debugging And Better Software

Today ahead of the Bay Area Maker Faire, Arduino has announced a bevy of new boards that bring modern features and modern chips to the Arduino ecosystem.

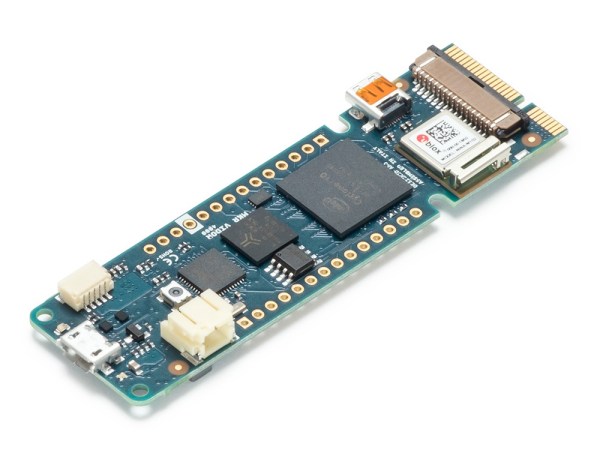
Most ambitious of these new offerings is a board that combines a fast ARM microcontroller, WiFi, Bluetooth, and an FPGA. All this is wrapped in a package that provides Mini HDMI out and pins for a PCIe-Express slot. They’re calling it the Arduino MKR Vidor 4000.

Bringing an FPGA to the Arduino ecosystem is on the list of the most interesting advances in DIY electronics in recent memory, and there’s a lot to unpack here. FPGA development boards aren’t new. You can find crates of them hidden in the storage closet of any University’s electronics lab. If you want to buy an FPGA dev board, the Terasic DE10 is a good starter bundle, the iCEstick has an Open Source toolchain, and this one has pink soldermask. With the release of the MKR Vidor, the goal for Arduino isn’t just to release a board with an FPGA; the goal is to release a tool that allows anyone to use an FPGA.

The key to democratizing FPGA development is Arduino’s work with the Arduino Create ecosystem. Arduino Create is the company’s online IDE that gives everyone the ability to share projects and upload code with Over-the-Air updates. The MKR Vidor will launch with integration to the Arduino Create ecosystem that includes a visual editor to work with the pre-compiled IP for the FPGA. That’s not to say you can’t just plug your own VHDL into this board and get it working; that’s still possible. But Arduino would like to create a system where anyone can move blocks of IP around with a tool that’s easy for beginners.

A Facelift for the Uno WiFi

First up is the brand new Arduino Uno WiFi. While there have been other boards bearing the name ‘Arduino Uno WiFi’ over the years, a lot has changed in the world of tiny radio modules and 8-bit microcontrollers over the past few years. The new Arduino Uno WiFi is powered by a new 8-bit AVR, the ATMega4809. The ATMega4809 is a new part announced just a few months ago, and is just about what you would expect from the next-generation 8-bit Arduino; it runs at 20MHz, has 48 kB of Flash, 6 kB of SRAM, and it comes in a 48-pin package. The ATMega4809 is taking a few lattices of silicon out of Microchip’s playbook and adds Custom Configurable Logic. The CCL in the new ATMega is a peripheral that is kinda, sorta like a CPLD on chip. If you’ve ever had something that could be more easily done with logic gates than software, the CCL is the tool for the job.

But a new 8-bit microcontroller doesn’t make a WiFi-enabled Arduino. The wireless power behind the new Arduino comes from a custom ESP-32 based module from u-blox. There’s also a tiny crypto chip (Microchip’s ATECC508A) so the Uno WiFi will work with AWS. The Arduino Uno WiFi will be available this June.

But this isn’t the only announcement from the Arduino org today. They’ve been hard at work on some killer features for a while now, and now they’re finally ready for release. What’s the big news? Debuggers. Real debuggers for the Arduino that are easy to use. There are also new boards aimed at Arduino’s IoT strategy.

Continue reading “Arduino Just Introduced An FPGA Board, Announces Debugging And Better Software”

Snowboard And Skateboard So Lit You Can Wipe Out And Still Look Good

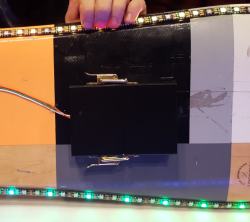
[Nate] has made snowboarding cool with his Bluetooth connected board. Using 202 WS2812 LEDs carefully wrapped around the edge of the board and sealed with a conformal coating, it’s bright and waterproof. It’s controlled with an Arduino Nano and a Bluetooth classic board, as well as a large swappable USB battery bank; he can get roughly four hours of life at full brightness on his toy.

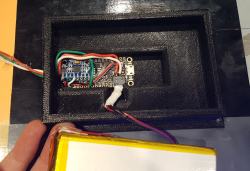
Where it gets even cooler is with a six-axis gyro connected to the Nano, which tracks the board movement, and the lights respond accordingly, creating cool patterns based on his speed, angles, and other factors. The app used to control this intense ice-rider is a custom app written using MIT App Inventor, which has the ability to work with Bluetooth classic as well as BLE. This came in handy when he made the 100-LED skateboard, which is based on a Feather with BLE and a large LiPo battery. The challenging part with the skateboard was making the enclosure rugged enough (yet 3D printed) to withstand terrain that is a lot less fluffy than snow.

The connected skateboard is controlled by his phone and a Feather.

We’ve seen others use flashlights and a professional connected board, but it’s been a few years and we’re due for a refreshing (and nostalgic) look back on the winter.


Open Source Calculator Teaches Us About Quality Documentation

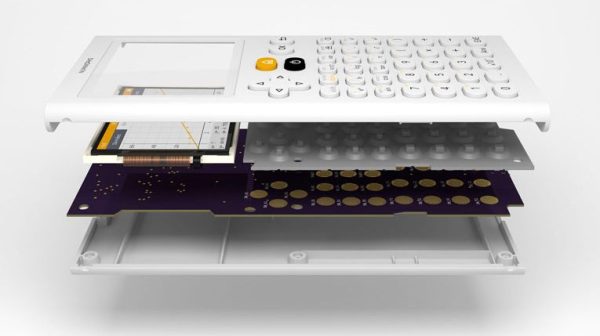
Graphing calculators are one of those funny markets that never seem to change. Standardized testing has created a primordial stew of regulatory capture in which ancient technology thrives at modern retail prices while changing little. The NumWorks calculator certainly isn’t the first competitor to challenge the Texas Instruments dynasty with a more modern interface (and a design from this decade), but behind it’s subtle color pops and elegant lines lies the real gem; a fantastically well documented piece of open source hardware. The last time we wrote about the NumWorks, it was to demonstrate a pretty wild hack that embedded an entire Pi Zero but it’s worth drawing attention to the calculator itself.

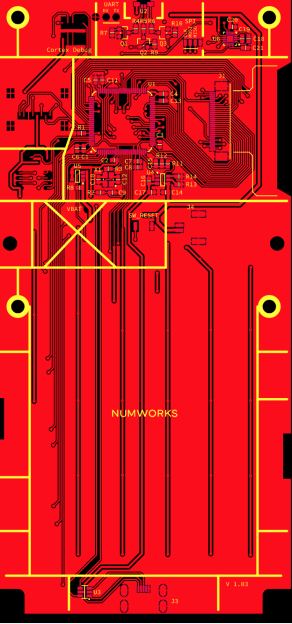
Hackaday readers traveling to the NumWorks website might spy the section at the bottom of the page titled “Developers” with tantalizing links like “Hardware,” “Software,” and “GitHub.” These lead to a wealth of knowledge about how the product is put together and sources to build the enclosure and firmware yourself (the PCB schematic and layout sources seem to be missing, though there is this handy gerber viewer). However merely posting sources is a low bar NumWorks far exceeds.

How is the firmware put together? Here’s a handy architecture guide! Why did they choose C++ and what tradeoffs were made to fit everything in a resource constrained embedded system? Here’s a design guide! How exactly does the math engine take in text, comprehend the expression contained therein, and evaluate it? There’s a document for it! There’s even a multi-platform SDK setup guide.

Firmware documentation is old hat; we’ve come to expect (or at least hope!) for it. For us the most interesting documentation is actually for the mechanical and electrical systems. The EE guides start with part selection (with datasheet links) then move on to walkthroughs of major areas of the schematic. At this point is should be no surprise that the board has pads for a completely standard 10 pin ARM debug connector and documented test points for UART, SPI, and an SD card.

The mechanical pages read like a quick primer on design for injection molding and tricks to reduce assembly errors (called “poka-yoke“). Ever wondered what that funny frame plastic models come in is called? The NumWorks calculator’s buttons are made in one, and it’s called a “sprue”. There are pages describing each piece of the housing one at a time.

Treat yourself to a reading of NumWorks’ excellent documentation. And if you need a new calculator, maybe consider the open source option.

Continue reading “Open Source Calculator Teaches Us About Quality Documentation”

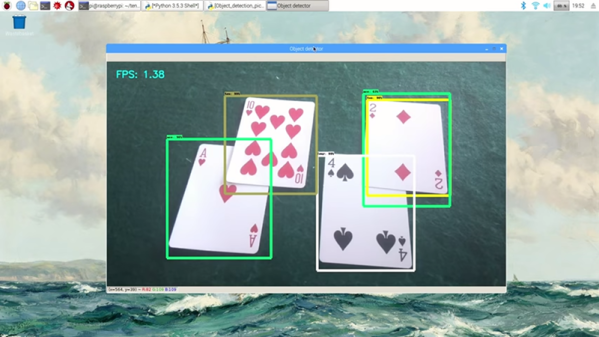
Five Steps To TensorFlow On The Raspberry Pi

If you have about 10 hours to kill, you can use [Edje Electronics’s] instructions to install TensorFlow on a Raspberry Pi 3. In all fairness, the amount of time you’ll have to babysit is about an hour. The rest of the time is spent building things and you don’t need to watch it going. You can see a video on the steps required below.

You need the Pi with at least a 16 GB SD card and a USB drive with at least 1 GB of free space. This not only holds the software, but allows you to create a swap file so the Pi will have enough virtual memory to build everything required.

Continue reading “Five Steps To TensorFlow On The Raspberry Pi”