The concept was to build a staff or cane with a big glowing orb on top. The aim was to 3D print the top as a very thin part so that LEDs inside could glow through it. Eventually, after much trial and error, the right combination of design and printer settings made this idea work. A Pi Pico W was then employed as the brains of the operation, driving a number of through-hole Neopixel LEDs sourced from Adafruit.
Power was courtesy of a long cable running out of the cane and to a USB power bank in the wielder’s pocket. Eventually, it was revealed this wasn’t ideal for dancing with the staff. Thus, an upgrade came in the form of an Adafruit Feather microcontroller and a 2,000 mAh lithium-polymer battery tucked inside the orb. The Feather’s onboard hardware made managing the lithium cell a cinch, and there were no more long cables to worry about.
The result? A neat costume prop that looks fantastic. A bit of 3D printing and basic electronics is all you need these days to build fun glowing projects, and we always love to see them. Halloween is right around the corner — if you’re building something awesome for your costume, don’t hesitate to let us know!
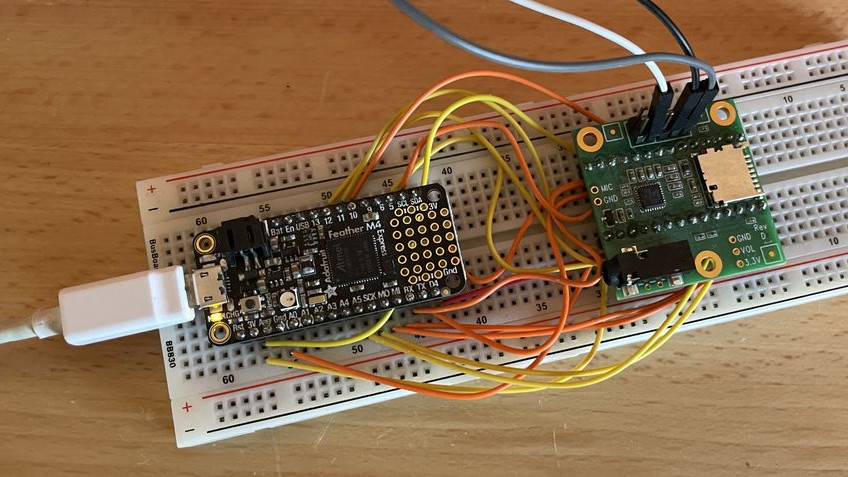
Ever wondered how to approach making your own digital guitar effects pedal? [Steven Hazel] and a friend have done exactly that, using an Adafruit Feather M4 Express board and a Teensy Audio Adapter board together to create a DIY programmable digital unit that looks ready to drop into an enclosure and get put right to work in the studio or on the stage.
The bulk of the work is done with two parts, and can be prototyped easily on a breadboard.
[Steven] also made a custom PCB to mount everything, including all the right connectors, but the device can be up and running with not much more than the two main parts and a breadboard.
On the inside, the Adafruit Feather M4 Express board works with the audio board over I2S, a standard for sending serial digital audio between chips. Working with the audio itself is done with the Teensy Audio Library, providing a fantastic array of easy-to-use functions for processing and manipulating digital audio streams.
Together, all the right pieces are in place and [Steven] provides the code for a simple tremolo effect as a glimpse of what’s possible with the unit. Interested in going a bit further? [Steven] shares additional details about what’s involved in writing a custom effect from scratch using the Teensy Audio Library.
Artist and self-described “maker of objects” [Daric Gill] is sharing some of the world’s most pleasing and acoustically interesting soundscapes with museum patrons in his latest work, ‘The Memory Machine: Sound‘.
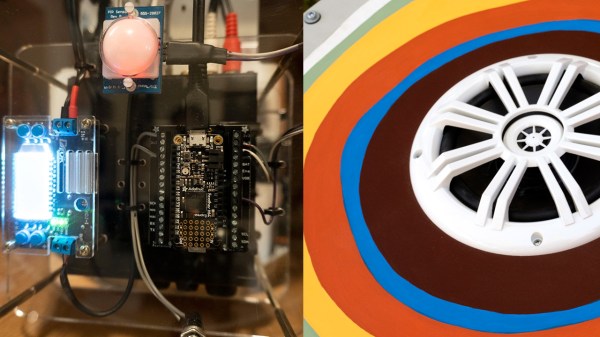
Now featured at the Center of Science and Industry museum, the interactive stereo soundscape generator resembles three decorated ‘tree trunks’, suspended high above the exhibition floor. When visitors approach the artwork, they are treated to a randomly selected soundscape sample.
The build, which is described in blog form here, teases just some of the sixty soundscape samples that can be heard. These include the noisy chattering of crowds underneath the Eiffel Tower in Paris, the mellow melodies of a meadow high in the Swiss Alps, and the pumping atmosphere of a baseball match played in Yankee Stadium, New York City.
Only the middle trunk reveals the electronic soul of the installation – an Adafruit M4 Feather Express, Music Maker Featherwing and a motion sensor. The flanking trunks house the speakers and amplifier. The motion sensor triggers the microcontroller, which then plays a randomly selected sample from an SD card.
[Daric] went to great lengths to reuse discarded materials, and even cannibalized parts from other sculptures to see his vision through. This focus underpins a substantial amount of woodworking and machining that went into this build, so the full video is certainly worth a watch to see the whole project come together.
The sun plays a big biological role in our lives, regulating our circadian rhythms and doing a whole bunch more as well. Some people find the reduced sunlight of the winter months to have negative emotional effects, and rely on artificial lighting to counteract this. [Samasrinivas] built a lamp of their own design for this very purpose.
The lamp is constructed around an abstract sculptural form made in air-dry clay. Light is provided via a string of Neopixel RGBW LEDs. Run by an Adafruit Feather Huzzah, they’re programmed to trigger with the sunrise to provide a bright light in the morning on grey days when the outside world isn’t quite delivering the same. The Adafruit queries an online weather API to get the right sunrise time every day without requiring user intervention. The lamp can also be programmed to provide warm light during later hours.
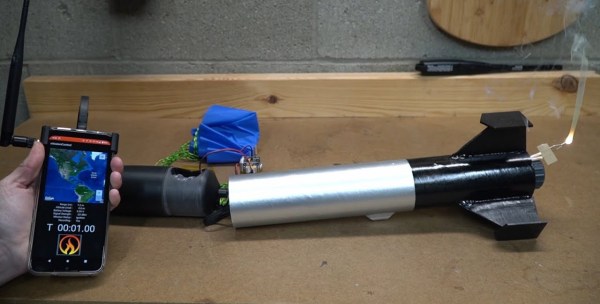
Building and flying model rockets is great fun. Eventually, though, the thrill of the fire and smoke subsides, and you want to know more about what it’s doing in the air. With a thirst for knowledge, [archy587] started building a project to monitor the vital stats of rockets in flight.
The project mounts an M0 Feather microcontroller board into the rocket, along with a 900 MHz LoRa transmitter and a GPS module. This allows the rocket’s journey to be measured and logged, and is particularly useful for when a craft floats off downrange during parachute recovery. There’s also a relay module onboard, which dumps power from a dedicated separate battery into the rocket motor igniter. This allows the rocket to be fired wirelessly.
On the ground, the setup uses an ESP32 fitted with another LoRa module to receive signals from the rocket. It’s designed to hook up to an Android smartphone over its USB-C port. This allows data received from the rocket to be displayed in an Android app, including the rocket’s GPS location overlaid on Google Maps.
Being able to remotely ignite your rockets and track their progress brings some high-tech cool to the launch pad. You’ll be upgrading your rockets with micro flight controllers and vectored thrust in no time. Just be sure whatever tech you’re using is compliant with the rules for model rocketry in your local area.
It’s no surprise that the hacking and making community has traditionally had something of a love affair with movie props, especially those of the science fiction variety. Over the years we’ve seen folks put untold hours into incredible recreations of their favorite pieces of fictional gear — and by the time this post goes out, our 2022 Sci-Fi Contest will be entering into the final stretch. So it’s a safe bet that if you make your living by creating the electronics behind all that Hollywood movie magic, you’ll find ours to be an especially welcoming community.
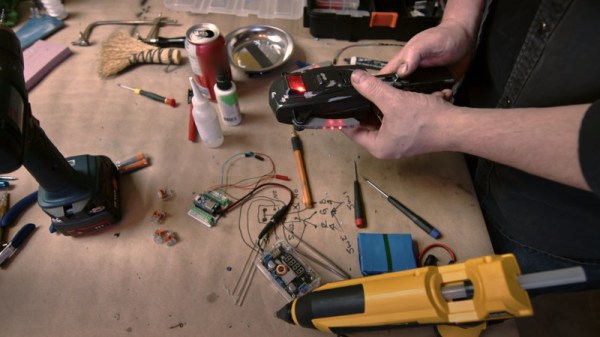
We were fortunate enough to see this in action this week when Ben Eadie stopped by to host the Hack Chat. It’s no exaggeration to say that he’s been living out what most of us would consider a dream, having worked on films from iconic franchises such as Star Trek and Predator. But perhaps his most enviable credit is that of propmaster for 2021’s Ghostbusters: Afterlife, where he got the chance to work on the proton packs and ghost traps; arguably some of the most well-known props in the history of cinema.
Not bad for a guy who only recently got in the game. Ben spent 20 years working as an aerounatical engineer until a friend from his local maker space mentioned they were working on a film and could use a hand. Suddenly he found himself behind the scenes of Star Trek: Beyond in 2015, helping to design and fabricate one of the largest rotating sets ever made. He figures he must have done something right, because Hollywood has been calling ever since.
This anecdote about his first time working on a feature film helped answer what many wanted to know early on in the Chat, which was how one manages to get into the prop and special effects industry. Ben once again confirmed a truth well known to this community: that what you’re capable of is far more important than where you went to school and what you studied. There’s not a lot of formal education out there that can train you to make the impossible possible, and Ben says the majority of his day-to-day knowledge came from a lifetime of fiddling around with electronics. In fact, he attributes much of his professional success with hanging out in maker spaces, reading Hackaday, and watching YouTube. If that’s the recipe, then we should all be in pretty good shape.
Over the last few years, Ben has been trying to pay that forward by documenting some of the tricks of the trade on his own YouTube channel. In a particularly interesting piece of marketing on Sony’s part, some of Ben’s videos have even been featured on the official Ghostbusters YouTube channel as part of a “Maker Monday” series. In fact, we first got in contact with Ben when he left a comment on our coverage of his “PKE Meter” prop build. This is the kind of advertisement we can get behind, and wish more companies would embrace the hacker and maker culture with this kind of interactive content. Ben says the best way to make initiatives like this more popular is to consume it — if Sony sees people watching and sharing this kind of content, hopefully more will follow.
Of course, it wouldn’t be a Hack Chat unless some arcane compartmentalized technical knowledge was dished out. In this case, several of the questions were about the unique challenges posed by operating custom electronics on a movie set. For example, Ben says he always uses addressable LEDs controlled by the APA102 chip as it offers an external clock pin that he can feed with a different frequency to avoid on-screen flickering. The radio spectrum also tends to be pretty noisy on set, so if at all possible, you want to make sure your gear has a wired connection. Otherwise, you’ll need to get intimately acquainted with what other RF signals are being used on set so as not to interfere with the production.
Ben’s creations include the Remote Trap Vehicle (RTV) from Ghostbusters: Afterlife.
But while some of the challenges he has to deal with might seem pretty foreign to us, the technology itself is in some cases more familiar than you might think. It turns out there’s plenty of Sparkfun and Adafruit gear behind the scenes, with Ben specifically mentioning the Feather nRF52 as one of his go-to microcontrollers. Sometimes the graybeards on set grumble about his “consumer grade” tech, but when his gear is up and running in half the time, it’s usually he who gets the last laugh.
Towards the end of the Chat, Ben says the most important thing he’s learned over the years is to always have backups. His motto is “One is None”, and if he can help it, he usually builds four of everything: that gives him two to learn from, and a pair to actually use for whatever the project is. Even if our own projects don’t quite rise to the level of a key prop from a summer blockbuster, there’s no certainly no harm in being prepared.
We want to thank Ben Eadie for taking the time to talk with the community and sharing some of his fascinating stories and tips with us. At the risk of sounding a bit sappy, stories like his are what motivates us here at Hackaday. If we can provide even a small part of the what it takes to help people like Ben achieve their goals, that’s reason enough for us to keep the lights on.
The Hack Chat is a weekly online chat session hosted by leading experts from all corners of the hardware hacking universe. It’s a great way for hackers connect in a fun and informal way, but if you can’t make it live, these overview posts as well as the transcripts posted to Hackaday.io make sure you don’t miss out.
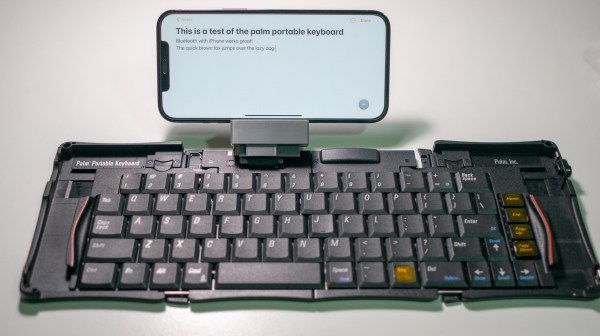
Long ago when digital portables where in their infancy, people were already loath to type on tiny keyboards, stylus or not. So Palm made a sweet little portable keyboard that would fold up and fit in your cargo pocket. And what do we have now for luxury typing on the go? Rubber roll-up jelly keebs? That’s a hard no from this scribe.
Inspired by the work of [cy384] to make a USB adapter as well as [Christian]’s efforts with the ESP32, [Xinming Chen] points out that this version is more power efficient, easier to program, and has a built-in Li-Po charging circuit. It also uses the hardware serial port instead of the software serial, which saves brainpower.
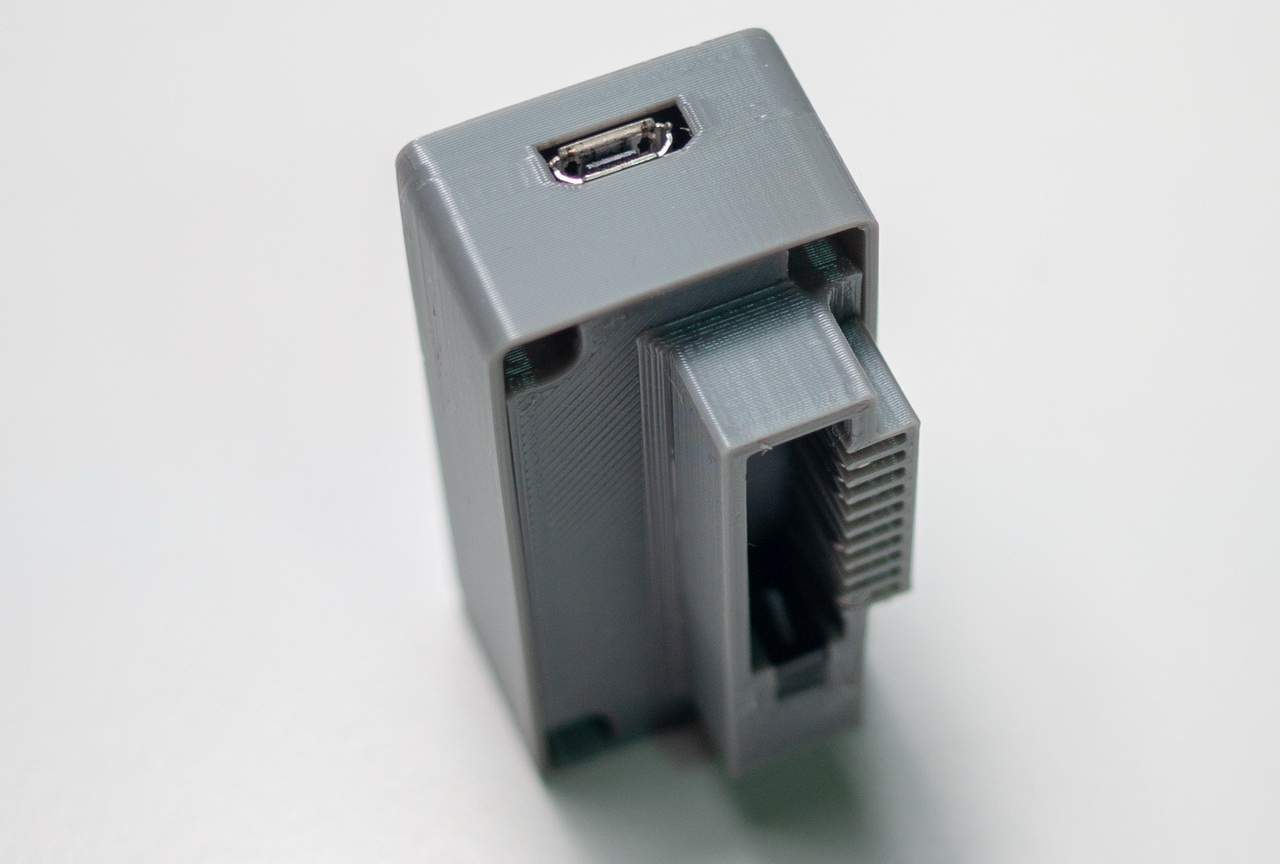
There’s really not much to this build, which relies on the Adafruit Feather nRF52840 and will readily work with Palm III and Palm V keyboards. Since the PPK is RS-232 and needs to be TTL, this circuit also needs a voltage level inverter which can be made with a small handful of components. We love that there’s a tiny hidden switch that engages the battery when the adapter clicks on to the connector.
The schematic, code, and STL files are all there in the repository, so go pick up one of these foldy keebs for cheap on the electronic bay while they’re still around. Watch the demo video unfold after the break.

 The concept was to build a staff or cane with a big glowing orb on top. The aim was to 3D print the top as a very thin part so that LEDs inside could glow through it. Eventually, after much trial and error, the right combination of design and printer settings made this idea work. A Pi Pico W was then employed as the brains of the operation, driving a number of through-hole Neopixel LEDs sourced from Adafruit.