Getting Good At FPGAs: Real World Pipelining

Parallelism is your friend when working with FPGAs. In fact, it’s often the biggest benefit of choosing an FPGA. The dragons hiding in programmable logic usually involve timing — chaining together numerous logic gates certainly affects clock timing. Earlier, I looked at how to split up logic to take better advantage of parallelism inside an FPGA. Now I’m going to walk through a practical example by modeling some functions. Using Verilog with some fake delays we can show how it all works. You should follow along with a Verilog simulator, I’m using EDAPlayground which runs in your browser. The code for this entire article is been pre-loaded into the simulator.

If you’re used to C syntax, chances are good you’ll be able to read simple Verilog. If you already use Verilog mostly for synthesis, you may not be familiar with using it to model delays. That’s important here because the delay through gates is what motivates us to break up a lot of gates into a pipeline to start with. You use delays in test benches, but in that context they mostly just cause the simulator to pause a bit before introducing more stimulus. So it makes sense to start with a bit of background on delays.

Continue reading “Getting Good At FPGAs: Real World Pipelining”

Fail Of The Week: Two Rotors Are Not Better Than Four

Fair warning: [Paweł Spychalski]’s video is mostly him talking about how bad his “dualcopter” ended up. There are a few sequences of the ill-fated UAV undergoing flight tests, most of which seem to end with it doing a reasonable impression of a post-hole auger. We have to admit that it’s a pretty poor drone. But one can only truly fail if one fails to have some fun doing it, [Paweł] enjoyed considerable success, at least judging by the glee with which he repeatedly cratered the craft.

The overall idea seems to make sense, with coaxial props mounted in the middle of a circular 3D-printed frame. Mounted below the props are crossed vanes controlled by two servos. The vanes sit in the rotor wash and provide pitch and roll control, while yaw and thrust are controlled by varying the speeds of the counter-rotating props. [Paweł] knew going in that this was a sketchy aerodynamic design, and was surprised it performed as well as it did. But with ground effects limiting roll and pitch control close to the ground, the less-than-adequate thrust due to turbulence between the rotors, and the tendency for the center of mass and the center of gravity to get out whack with each other, all made for a joyously unstable and difficult to control aircraft.

Despite the poor performance, [Paweł] has plans for a Mark II dualrotor, a smaller craft with some changes based on what he learned. He’s no slouch at pushing the limits with multirotors, with 3D-printed racing quad frames and using LoRa for control beyond visual range. Still, we’re sure he’d appreciate constructive criticism in the comments, and we wish him luck with the next one.

Continue reading “Fail Of The Week: Two Rotors Are Not Better Than Four”

555 Ways To Speed Control A DC Motor

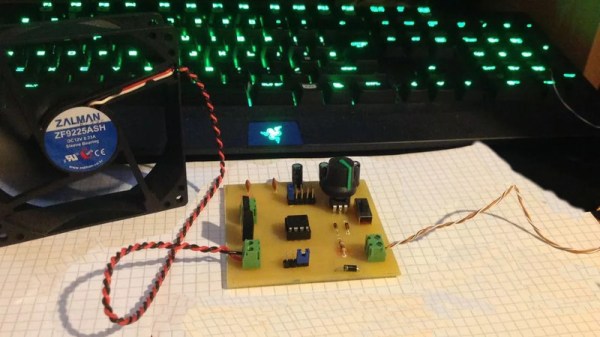
The 555 timer IC is a handful of active components all baked into one beautifully useful 8 pin package. Originally designed for timing purposes, they became ubiquitous parts that can achieve almost anything. In this case, they’re being used to create a  basic PWM motor controller.

The trick is to set the 555 up in astable mode, and use diodes and a potentiometer in the charge/discharge loop. By hanging a diode off either side of a potentiometer, leading to the charge and discharge pins, and connecting the center lug to the main capacitor, you can vary the resistance seen by the capacitor during charge and discharge. By making charging take longer, you increase the pulse width, and by making discharge take longer, you reduce the pulse width. The actual frequency itself is determined largely by the capacitor and total resistance of the potentiometer itself.

This is a very old-school way to generate a PWM signal, which could be used to vary intensity of a light or make noise on a buzzer. However, in this case, the output of the 555 is connected to a MOSFET which is used to vary the speed of a computer fan motor.

It’s an excellent way to learn about both PWM motor control and the use of 555 timers, all with a very low parts cost and readily available components. We’ve seen such setups before, used as easy-to-build dimmer switches, too.