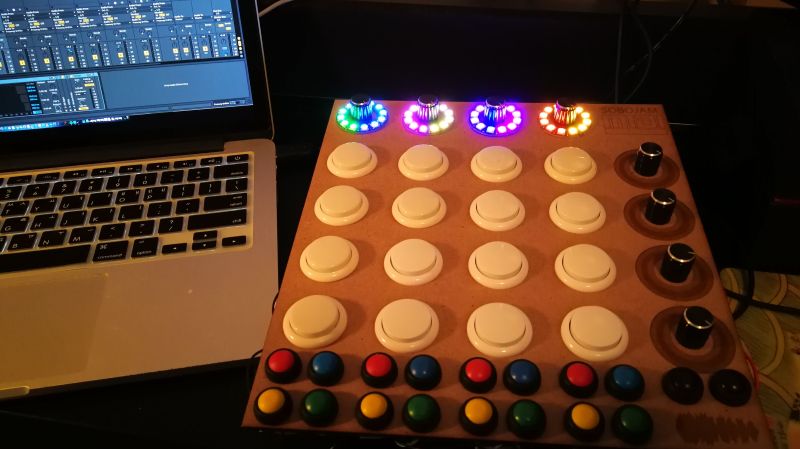
When [Mr. Sobolak] started his DIY Midi Fighter he already had experience with the MIDI protocol, and because it is only natural once you have mastered something to expand on the success and build something more impressive, more useful, and more button-y. He is far from rare in this regard. More buttons mean more than extra mounting holes, for example an Arduino’s I/O will fill up quickly as potentiometers hog precious analog inputs and button arrays take digital ones. Multiplexing came to the rescue, a logic-based way to monitor or control more devices, in contrast to the serial protocols used by an IO expander.
Multiplexing was not in [Mr. Sobolak]’s repertoire, but it was a fitting time to learn and who doesn’t love acquiring a new skill by improving upon a past project? All the buttons were easy enough to mount but keeping the wires tidy was not in the scope of this project, so if you have a weak stomach when it comes to a “bird’s nest” on the underside you may want to look away and think of something neat. Regardless of how well-groomed the wires are, the system works and you can listen to a demo after the break. Perhaps the tangle of copper beneath serves a purpose as it buoys the board up in lieu of an enclosure.
We are looking forward to the exciting new versions where more solutions are exercised, but sometimes, you just have to tackle a problem with the tools you have, like when the code won’t compile with the MIDI and NeoPixel libraries together so he adds an Uno to take care of the LEDs. Is it the most elegant? No. Did it get the job done? Yes, and if you don’t flip over the board, you would not even know.


Please be kind and respectful to help make the comments section excellent. (Comment Policy)