The X Macro: A Historic Preprocessor Hack

If we told you that a C preprocessor hack dated back to 1968, you’d be within your rights to remind us that C didn’t exist in 1968. However, assemblers with preprocessors did, and where there is a preprocessor, there is an opportunity to do clever things. One of those things is the so-called X macro, which saw a lot of use in DEC System 10 code but probably dates back even earlier. You can still use it today if you like, even though there are, of course, other arguably better ways to get the same result. However, the X macro can be very efficient, and you may well run into it in some code, too.

Background

Preprocessing used to be a staple of programming. The idea is that code is manipulated purely at the text level before it is compiled. These days, languages with a preprocessor usually handle it as part of the compiler, but you can also use an external preprocessor like m4 for more sophisticated uses.

Modern languages tend to provide other ways to accomplish many of the tasks handled by the preprocessor. For example, if you have a constant you want to set at compile time, you could say:

int X = 32;
y = X;

But then you’ve created a real variable along with the overhead that might entail. A smart compiler might optimize it away for you, but you can be sure by writing:

#define X 32
y = X;

A modern compiler would prefer you to write:

const int X=32;
y = X;

But there are still some common uses for macros, like including header files. You can also make more sophisticated macros with arguments so you don’t incur a function call penalty, although modern usage would be to mark those functions as inline.

The Problem

Which brings us to the X macro. With all great hacks, there is first a problem to solve. Imagine you have a bunch of electronic parts you want to deal with in your code. You don’t want a database, and you don’t want to carry a bunch of strings around, so you define an enumerated type:

Continue reading “The X Macro: A Historic Preprocessor Hack”

Laser And Webcam Team Up For Micron-Resolution Flatness Measurements

When you want to measure the length, breadth, or depth of an object, there are plenty of instruments for the job. You can start with a tape measure, move up to calipers if you need more precision, or maybe even a micrometer if it’s a really critical dimension. But what if you want to know how flat something is? Is there something other than a straightedge and an eyeball for assessing the flatness of a surface?

As it turns out, there is: a $15 webcam and a cheap laser level will do the job, along with some homebrew software and a little bit of patience. At least that’s what [Bryan Howard] came up with to help him assess the flatness of the gantry he fabricated for a large CNC machine he’s working on.

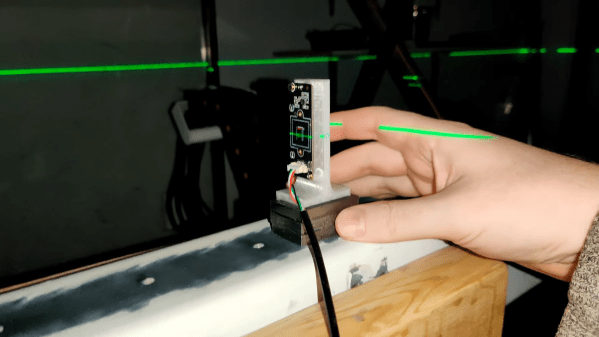
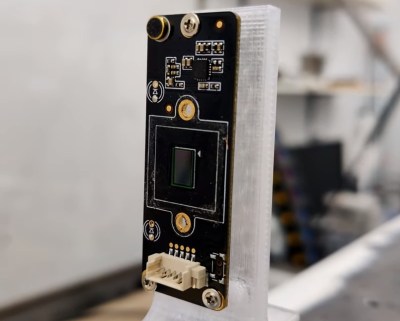
The gantry arm is built from steel tubing, a commodity product with plenty of dimensional variability. To measure the microscopic hills and valleys over the length of the beam, [Bryan] mounted a lens-less webcam to a block of metal. A cheap laser level is set up to skim over the top of the beam and shine across the camera’s image sensor.

On a laptop, images of the beam are converted into an intensity profile whose peak is located by a Gaussian curve fit. The location of the peak on the sensor is recorded at various points along the surface, leading to a map of the microscopic hills and valleys along the beam.

As seen in the video after the break, [Bryan]’s results from such a quick-and-dirty setup are impressive. Despite some wobblies in the laser beam thanks to its auto-leveling mechanism, he was able to scan the entire length of the beam, which looks like it’s more than a meter long, and measure the flatness with a resolution of a couple of microns. Spoiler alert: the beam needs some work. But now [Bryan] knows just where to scrape and shim the surface and by how much, which is a whole lot better than guessing.   Continue reading “Laser And Webcam Team Up For Micron-Resolution Flatness Measurements”

Wooden ITX PC Case Smacks Of Sophistication

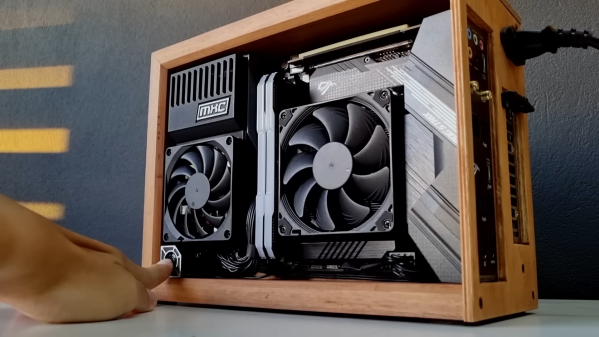
Computer cases have come a long way from the ugly beige boxes of the early 2000s. Still, if it was going to sit on his desk, [MXC Builds] wanted something with a little more class. His custom Ironbark ITX PC seems to fit the aesthetic nicely.

The case’s outer shell is ironbark wood cut at 45 degrees and joined for a beautiful waterfall edge (the wood grain seems to flow uninterrupted). The power supply was heavily modified to take a thinner but larger fan, and a new cover and intake grill were 3D printed. As there were no mounting holes on the bottom of the power supply, he printed a bracket with spring clips to hold the PSU securely. Next, he routed a PCI riser cable to the other side of the internal panel so the GPU could mount on the back. He cut custom cables to match up the lengths needed for every run. Finally, rather than placing the power button on the front or top, it was on the side in a custom bracket.

It’s an absolutely gorgeous build that packs some respectable hardware in a tiny space (7.9 L or ~482 in3). The use of 3D printed parts and careful planning results in an incredibly tidy computer that most would proudly display on their desk. It is an open-air case, and if you’re looking for something a little more enclosed, perhaps this mid-century PC might whet your appetite.

Continue reading “Wooden ITX PC Case Smacks Of Sophistication”