Coffee Grinder Gets Bluetooth Weighing

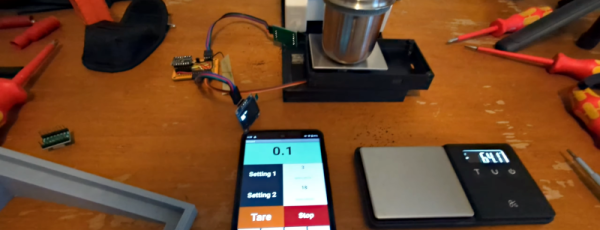
Some people take their coffee grinding seriously. So what do you do when the hot new grinders automatically weigh coffee, and yours doesn’t? Well, if you are like [Tech Dregs] and the rest of us, you hack your existing grinder, of course. The link is to the source code, but for a quick overview, check out the video below.

In true hacker fashion, the first order of business was to pull a load cell out of a cheap scale. Originally, he intended to reuse the processor inside, too, but it was epoxied, so it was a good excuse to use some more modules. A load cell amplifier, an OLED display, and a tiny Xiao processor, which he describes as “ridiculous.” From the context, we think he means ridiculously small in the physical sense and ridiculously powerful for such a tiny board.

With the modules, the wiring wasn’t too hard, but you still need some kind of app. Thanks to App Inventor, an Android app was a matter of gluing some blocks together in a GUI. Of course, the devil is in the details, and it took a lot of “focused cursing” to get everything working correctly.

The coffee grinder has a relay to turn the motor on and off, so that’s the point the scale needs to turn the motor on and off. Conveniently, the grinder’s PCB had an unpopulated pin header for just this purpose.

This is one of those simple projects you can use daily if you drink coffee. We are always impressed that the infrastructure exists today and that you can throw something like this together in very little time without much trouble.

WiFi hacking coffee makers is a popular Java project in these parts. Upgrading a machine can get pretty serious with PID control loops and more.

Continue reading “Coffee Grinder Gets Bluetooth Weighing”

8086 Multiply Algorithm Gets Reverse Engineered

The 8086 has been around since 1978, so it’s pretty well understood. As the namesake of the prevalent x86 architecture, it’s often studied by those looking to learn more about microprocessors in general. To this end, [Ken Shirriff] set about reverse engineering the 8086’s multiplication algorithm.

[Ken]’s efforts were achieved by using die photos of the 8086 chip. Taken under a microscope, they can be used to map out the various functional blocks of the microprocessor. The multiplication algorithm can be nutted out by looking at the arithmetic/logic unit, or ALU. However, it’s also important to understand the role that microcode plays, too. Even as far back as 1978, designers were using microcode to simplify the control logic used in microprocessors.

[Ken] breaks down his investigation into manageable chunks, exploring how the chip achieves both 8-bit and 16-bit multiplication in detail. He covers how the numbers make their way through various instructions and registers to come out with the right result in the end.

It’s a fun look at what’s going on at the ground level in a chip that’s been around since before the personal computer revolution. For any budding chip designers, it’s a great academic exercise to follow along at home. If you’ve been doing your own digging deep into CPU architectures, don’t hesitate to drop us a line!

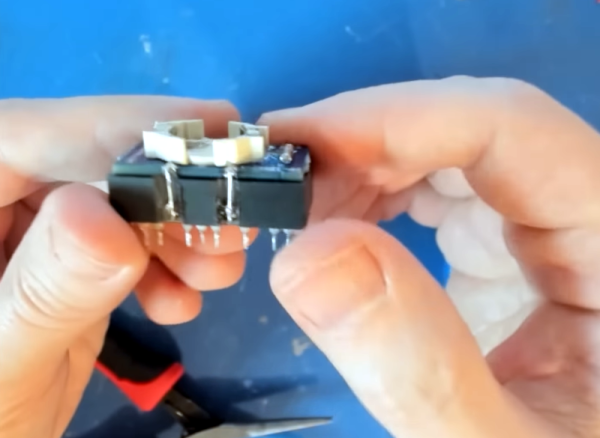
Replacing A Clock IC’s Battery

You can find a lot of strange things inside IC packages. For example, the Dallas DS12885 and DS12887 real time clock “chips” were available in a large package with an internal battery. The problem, of course, is that batteries die. [New Old Computer Show] wanted to restore a machine that used one of these devices and was able to repair the device. You can see two videos below. In the first video, he replaces both the battery and adds an external oscillator which would be necessary for the DS12885. However, he actually had the DS12887, which has an internal oscillator, something the second video explains.

The repair used a PCB he ordered from Tindie. However, the board is only part of the problem. You also need to disconnect the dead battery which requires a Dremel and a steady hand.

Continue reading “Replacing A Clock IC’s Battery”

Taking Apart IKEA’s Latest Air Quality Sensor

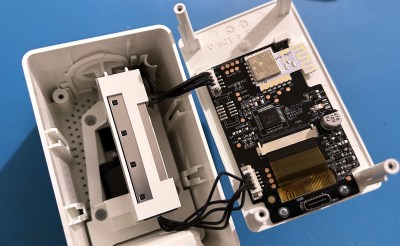
Whether it’s because they’re concerned about worsening pollution or the now endemic variants of COVID-19, a whole lot of people have found themselves in the market for a home air quality monitor thee last couple of years. IKEA noted this trend awhile back, and released the VINDRIKTNING sensor to capitalize on the trend.

The device must have sold pretty well, because last month the Swedish flat-packer unveiled the considerably more capable (and more expensive) VINDSTYRKA. Now thanks to the efforts of [Oleksii Kutuzov] we’ve got a fantastic teardown of the new gadget, and some more information on the improvements IKEA made over its predecessor.

Certainly the most obvious upgrade is the addition of an LCD readout that displays temperature, humidity, and how many particulates the device detected in the air. There’s even a “traffic light” colored indicator to show at a glance how bad your air supply is. The other big change is the addition of wireless, though unlike the WiFi hacks we saw for the VINDRIKTNING, this built-in capability uses Zigbee and is designed to plug into IKEA’s own home automation ecosystem.

Speaking of those hacks, a GitHub user by the name of [MaartenL] chimes in to say they’ve managed to hook an ESP32 up to test pads on the VINDSTYRKA motherboard, allowing the parasitic microcontroller to read the device’s sensors and report their data on the network over a service like MQTT, without impacting the sensor’s normal operations. This is how the first hacks on the older VINDRIKTNING were pulled off, so sounds like a promising start.

But even if you aren’t looking to modify the device from its original configuration (how did you find this website?), it seems pretty clear the VINDSTYRKA is a well-built piece of kit that will serve you and your family well. Which is more than what could be said for some of the cheapo environmental sensors flooding the market.

Thanks to [killergeek] for the tip.

Robot Hand Looks And Acts Like The Real Thing

Throughout history, visions of the future included human-looking robots. These days we have plenty of robots, but they don’t look like people. They look like disembodied arms, cars, and over-sized hockey pucks concealing a vacuum cleaner. Of course there’s still demand for humanoid robots like Commander Data, but there are many challenges: eyes, legs, skin, and hands. A company known as Clone may have the solution for that last item. The Clone Hand is “the most human-level musculoskeletal hand in the world,” according to the company’s website.

The 0.75 kg hand and forearm offer 24 degrees of freedom and two hours of battery life. It sports 37 muscles and carbon fiber bones. The muscle fibers can cycle over 650,000 times. You can watch the hand in action in the video below.

There is a hydraulic pump that the company likens in size to a human heart. The hand can also sense for feedback purposes. If you want to build your own, you’ll have to figure it out yourself. The Clone Hand is proprietary, but it does show what is in the art of the possible. The company claims they cost under $3,000, but it isn’t clear if that’s their cost or a projected future retail price.

Of course, human hands aren’t always the perfect robot manipulator. But when you need a realistic hand, you really need it. We see a lot of attempts at realistic hands, and we have to say they are getting better.

Continue reading “Robot Hand Looks And Acts Like The Real Thing”

Hackaday Berlin: Final Schedule, Last Call For Tickets, And More

Hackaday Berlin is just about a week away, and we’ve just put the finishing touches on our preparations. And that includes a snazzy landing page, the full schedule, details on the Friday night meetup, and more.

We’ll be meeting up Friday the 24th at 19:00 at DogTap / Brew Dog, Im Marienpark 23 for an ice breaker. This is a great time to unwind from your travels, catch up with old friends, and start getting into gear for the days ahead.

Saturday the 25th starts off at 9:30, you’ll get your badge and schwag bag, and have some breakfast. Then it’s talks, workshops, lightning talks, badge hacking, food and music until the wee hours.

Sunday morning starts up again at 11:00, but it’ll feel like 10:00 due to Daylight Savings time. We’ll have brunch, show off whatever cool hacks you’ve brought along, and just generally chill out into the afternoon. Some people are planning to go sightseeing around Berlin afterwards, so if that’s your thing, you’re in good company.

For any chat related to Hackaday Berlin, we have a not-so-cryptically named #Berlin channel over on the Hackaday Discord server.

There are still a few tickets left, so you procrastinators, now’s your time to snap them up. All the rest of you, put those finishing touches on whatever you’re bringing with you, and we’ll see you next week!

(Oh, and press the play button on the landing page.)

Dobsonian Telescope Adds Plate Solver

The amateur astronomy world got a tremendous boost during the 1960s when John Dobson invented what is now called the Dobsonian telescope. Made from commonly-sourced materials and mechanically much simpler than what was otherwise available at the time, the telescope dramatically reduced the barrier to entry for larger telescopes and also made them much more portable and inexpensive.

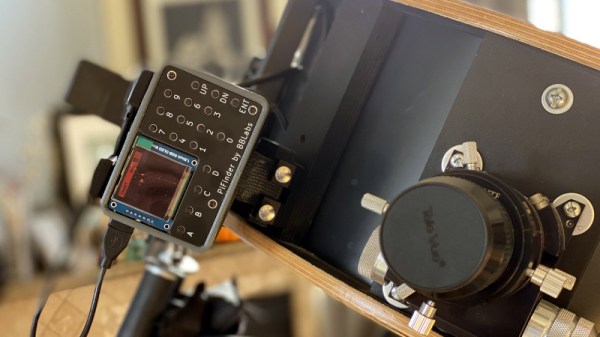
For all their perks, though, a major downside is increased complexity when building automatic tracking systems. [brickbots] went a different way when solving this problem, though: a plate solver.

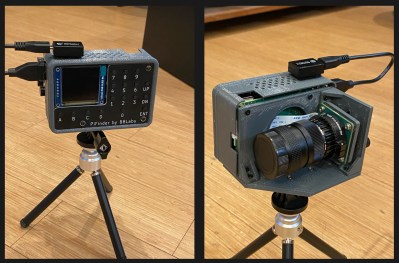
Plate solving is a method by which the telescope’s field of view is compared to known star charts to determine what it’s currently looking at. Using a Raspberry Pi at the center of the build, the camera module pointed at the sky lets the small computer know exactly what it’s looking at, and the GPS system adds precise location data as well for a quick plate solving solution. A red-tinted screen finishes out the build and lets [brickbots] know exactly what the telescope is pointed towards at all times.

While this doesn’t fully automate or control the telescope like a tracking system would do, it’s much simpler to build a plate solver in this situation. That doesn’t mean it’s impossible to star hop with a telescope like this, though; alt-azimuth mounted telescopes like Dobsonians just need some extra equipment to get this job done. Here’s an example which controls a similar alt-azimuth telescope using an ESP32 and a few rotary encoders.