DisplayPort: Under The Hood

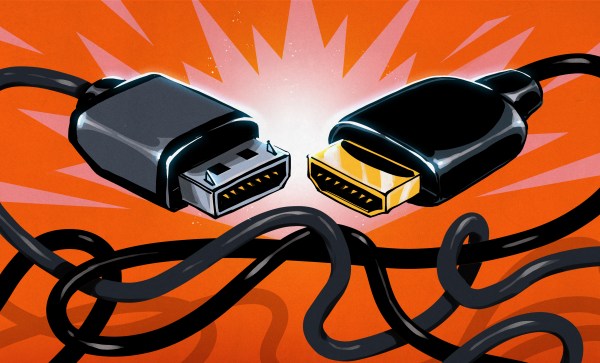
Last time, we looked at all the things that make DisplayPort unique for its users. What about the things that make it unique for hackers? Let’s get into all the ways that DisplayPort can serve you on your modern tech wrangling adventures.

You Are Watching The AUX Channel

With DisplayPort, the I2C bus we’ve always seen come bundled with VGA, DVI and HDMI, is no more – it’s been replaced by the AUX bus. AUX is a 1 MHz bidirectional diffpair – just a bit too complex for a cheap logic analyzer, though, possibly, something you could wrangle with the RP2040’s PIOs. Hacking thoughts aside, it’s a transparent replacement for I2C, so that software doesn’t have to be rewritten – for instance, it usually does I2C device passthrough over AUX, so that EDID data can still be stored in a separate EEPROM chip on the monitor or eDP LCD panel.

AUX isn’t just a differential bus, it’s more pseudodifferential, like USB2 – for instance, AUX_P and AUX_N are used separately, with a combination of 1 MΩ and 100 kΩ pullups and pulldowns signaling different states of the physical connection – for instance, a pullup on AUX+ and a pulldown on AUX- means that an external device has been connected. If you’d like to learn which combination of resistors means what, you can find in the DisplayPort specification, which isn’t distributed openly but isn’t hard to come by, either.

Also, DisplayPort link training happens over AUX, and in order to facilitate that, a piece of DisplayPort controller’s external memory is usually exposed over the AUX channel, through a mechanism that’s called DPCD. If you dig a bit, using “DPCD” as the keyword, you can easily reach into the lower-level details of your DisplayPort connection. Some of the DPCD memory map is static, and some parts are FIFOs you can funnel data into, or out of. You can find a wide variety of documents online which describe the DPCD structure – for now, here’s a piece of Bash that works on Linux graphics drivers for AMD and Intel, and will show you you the first 16 bytes of DPCD:

# sudo dd if=/dev/drm_dp_aux0 bs=1 skip=256 count=16 |xxd
00000000: 0084 0000 0000 0000 0108 0000 0000 0000 ................
[...]

In particular, the 4th nibble (digit) here describes the amount of lanes for the DisplayPort link established – as you can see, my laptop uses a four-lane link. Also, the /dev/drm_dp_aux0 path might need to be adjusted for your device. In case you ever want to debug your DP link, having direct access to the DPCD memory space like this might help you quite a bit! For now, let’s move onto other practical aspects. Continue reading “DisplayPort: Under The Hood”

Finding Undocumented 8086 Instructions Via Microcode

Video gamers know about cheat codes, but assembly language programmers are often in search of undocumented instructions. One way to find them is to map out all of a CPU’s opcodes and where there are holes, try those values, and see what happens. Not good enough for [Ken Shirriff]. He prefers examining the CPU’s microcode and deducing what each part of it does.

Microcode is a feature of many modern CPUs. The CPU runs several “microcode” instructions to process a single opcode. For the Intel 8086, there are 512 micro instructions, each with 21 bits. Each instruction has two parts: a part that moves a source to a destination and another that performs some other operation, such as an ALU operation. [Ken] explains it all in the post, including several hidden registers you can’t see, but the microcode can.

Searching for holes in the opcode table.

Some of the undocumented instructions are probably not useful. They are either impractical or duplicate a function you can already do another way. Not all of the instructions are there for technical reasons. For example, opcode D6, commonly known as SALC for “Set AL to Carry”, seems to exist only as a trap for anyone making a carbon copy of Intel’s microcode. When other companies like NEC made 8086 clones, having an undocumented instruction would strongly suggest they just copied Intel’s intellectual property (in NECs case, they didn’t).

Other cases happen where an instruction just doesn’t make sense. For example, you can pop all segment registers, and though it is not documented, you can deduce that POP CS should be opcode 0F. The problem is there is no sane reason to pop CS off the stack. The instruction works; it just isn’t useful. The opcodes from 60-6F are conditional jumps that are no different from the instructions at 70-7F because of decoding. There is no reason to document both identical instruction ranges.

The plot thickens when you go to two-byte instructions. You’ll find plenty of instructions of dubious value. You don’t hear much about undocumented instructions anymore. Why? Because modern CPUs have enough circuitry to dedicate some to detecting illegal instructions and halting the CPU. But the 8086 was squeezed too tight to allow for such a luxury. Good thing for people like us who enjoy solving puzzles.

You can still get a modern CPU to tell you more about instructions even if it won’t run them. Even the 80286 had some secret opcodes.

DIY Laser For Ablating Metal

For those who wish to go beyond through-hole construction on perfboard for their circuit boards, a printed circuit board is usually the next step up. Allowing for things like surface-mount components, multi-layer boards, and a wider array of parts, they are much more versatile but do have a slight downside in that they are a little bit harder to make. There are lots of methods for producing them at home or makerspace, though, and although we’ve seen plenty of methods for their production like toner transfer, photoresist, and CNC milling, it’s also possible to make them using laser ablation, although you do need a special laser to get this job done.

The problem with cutting copper is that it reflects infra-red, so a higher-wavelength blue green laser is used instead. And because you want to ablate the copper, but not melt the surrounding areas or cut straight through the board, extremely short, high-power pulses are the way to go. Here, the [Munich Fab Lab] is using 9 kW pulses of around 30 microseconds each.  With these specifications the copper is ablated from the surface of the board allowing for fine details in the range of about 20 µm, which is fine enough for just about any circuit board. The design of the laser head itself is worth a look.

Aside from the laser, the rest is standard CNC machine fodder, but with an emphasis on safety that’s appropriate for a tool in a shared workspace, and the whole project is published under an open license and offers an affordable solution for larger-scale PCB production with extremely fine resolution and without the need for any amounts of chemicals for the more common PCB production methods. There is a lot more information available on the project’s webpage and its GitHub page as well.

Of course, there are other methods of producing PCBs by laser if you happen to have a 20 W fiber laser just kicking around.