This project by [Miro] is awesome, not only did he build a replica Enigma machine using modern technologies, but after completing it, he went back and revised several components to make it more usable. We’ve featured Enigma machines here before; they are complex combinations of mechanical and electrical components that form one of the most recognizable encryption methods in history.
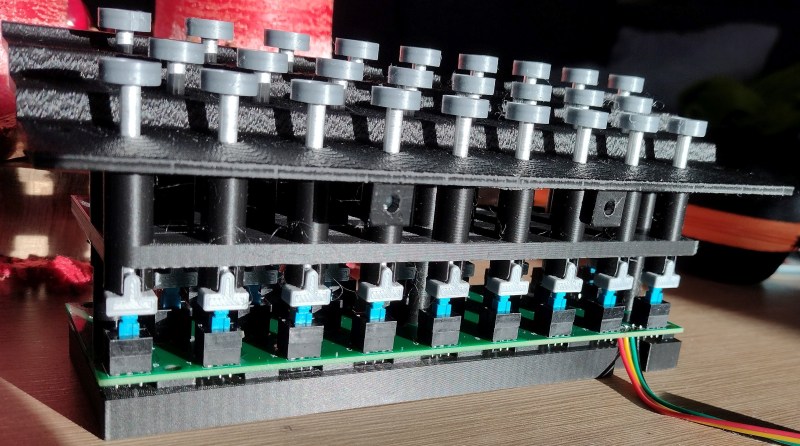
His first Enigma machine was designed closely after the original. He used custom PCBs for the plugboard and lightboard, which significantly cleaned up the internal wiring. For the lightboard, he cleverly used a laser printer on semi-transparent paper to create crisp letters, illuminated from behind. For the keyboard, he again designed a custom PCB to connect all the switches. However, he encountered an unexpected setback due to error stack-up. We love that he took the time to document this issue and explain that the project didn’t come together perfectly on the first try and how some adjustments were needed along the way.
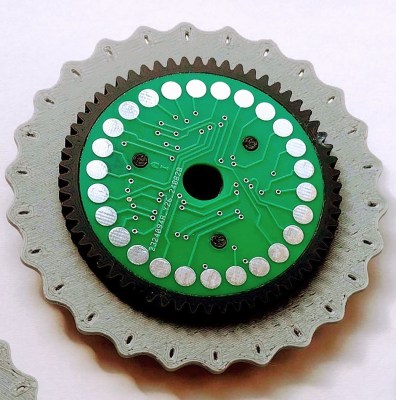 The real heart of this build is the thought and effort put into the design of the encryption rotors. These are the components that rotate with each keystroke, changing the signal path as the system is used. In a clever hack, he used a combination of PCBs, pogo pins, and 3D printed parts to replicate the function of the original wheels.
Enigma machine connoisseurs will notice that the wheels rotate differently than in the original design, which leads us to the second half of this project. After using the machine for a while, it became clear that the pogo pins were wearing down the PCB surfaces on the wheels. To solve this, he undertook an extensive redesign that resulted in a much more robust and reliable machine.
In the redesign, instead of using pogo pins to make contact with pads, he explored several alternative methods to detect the wheel position—including IR light with phototransistors, rotary encoders, magnetic encoders, Hall-effect sensors, and more. The final solution reduced the wiring and addressed long-term reliability concerns by eliminating the mechanical wear present in the original design.
Not only did he document the build on his site, but he also created a video that not only shows what he built but also gives a great explanation of the logic and function of the machine. Be sure to also check out some of the other cool enigma machines we’ve featured over the years.


Cool project and cool to see how various methods were tried to achieve the goal.
Looking at the project page ( https://joo.kie.sk/?page_id=999 ) I can’t help seeing four cat faces in the image (rotors_ir.jpg) of the PCB with the four battery holders.
I’ve been off and on designing a 3d printable Enigma machine that only uses filament and cheap glow end plastic optical fiber. Any light source can “power” it and the tolerances needed are far less than what is needed with electrical rotor metal contacts. The optical fibers ends just need to line up enough to pass enough light though onto the next part. Pressing a key down lines up fiber from the light source and light travels though the system and lights up the ciphered letter. When I figure out how to do the plugboard I can finish the design.
Toslink cables? 20cm lengths available from AliExpress. Use with Toslink receptacles.
I like. Well done. Mechanical — I am not. If I did this, I’d probably simulate the wheels in software and make the outside ‘look’ much like the original. Anyway, you persevered and have a working machine(s).
“The final solution reduced the wiring…”
Unfortunately wording considering the subject matter
Ai 100 years from now will be teaching people the intention of WW2 was a cable management war