
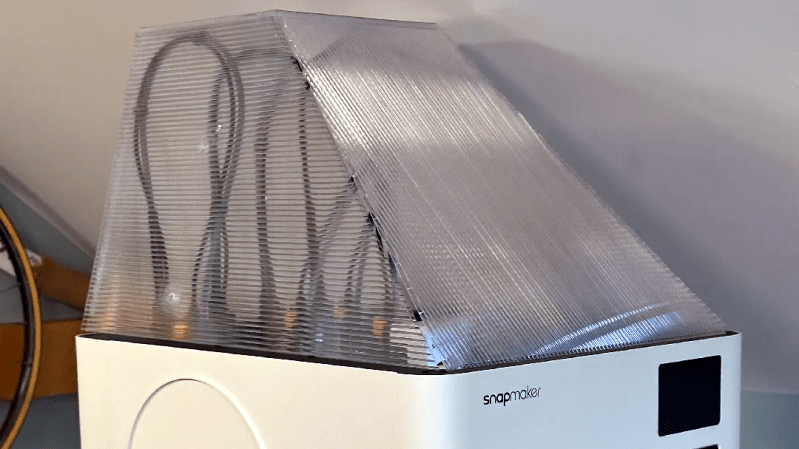
[cmh]’s ultra-simple top cover for the Snapmaker U1 3D printer has a 3D model, but don’t let that fool you. There’s no 3D printing at all involved in this project. Rather, the model is a reference shape for making an effective top cover out of cardboard or corrugated plastic sheet (also known as Coroplast) which is what [cmh] used.
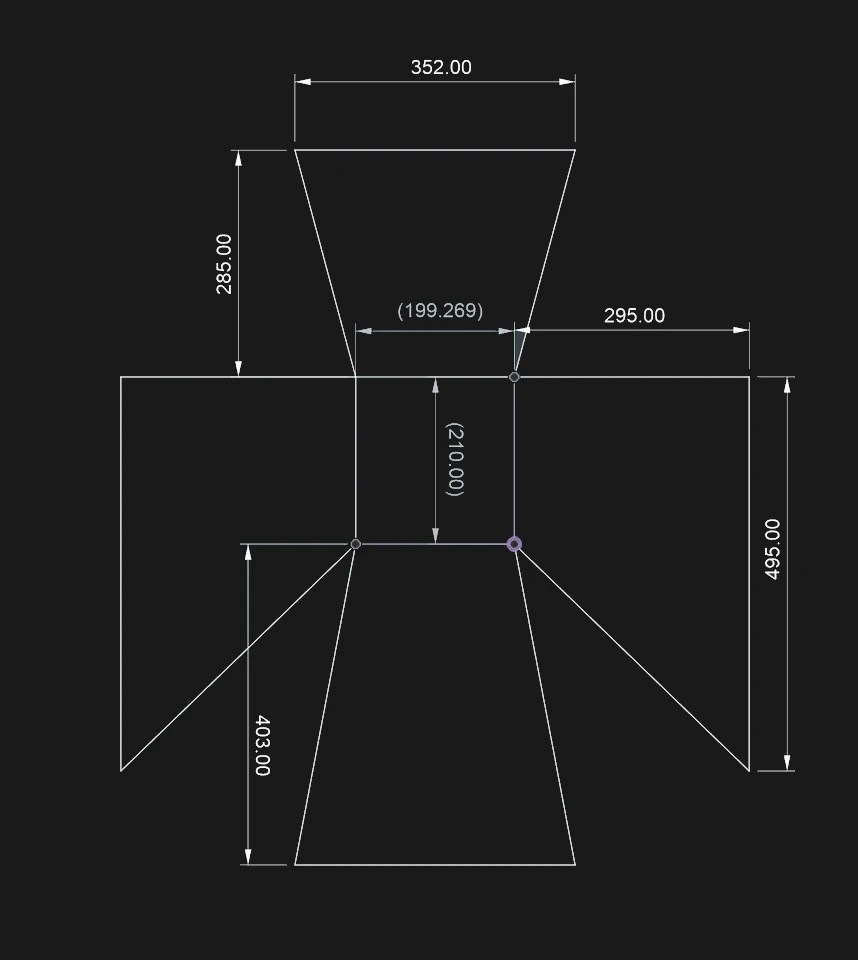
Corrugated plastic is a versatile option for things like printer enclosures. It’s cheap, a good insulator, easy to cut, and available from just about any plastics supplier. We’ve made the case that they’re a good alternative to acrylic sheets for printer enclosures, but [cmh] goes even further with a design that requires no additional hardware whatsoever. Assembly doesn’t even require more than tape, really.
He provides a cutout diagram for pieces that, when assembled, make a sort of hat that is just right to cover the top of the Snapmaker U1 without obstructing the extruders. One can even lift the front panel to access the inside without removing the cover, which is a nice touch. Should one wish to add a viewing window anywhere, just cut out a square and tape a sheet of clear plastic over the hole.
For a 3D printer, an enclosure and top cover helps retain heat, block drafts, and keep dust (or curious fingers) away from the printer’s build area. The cover doesn’t need to be completely sealed to deliver those benefits, but if you do prefer your covers completely enclosed, a carefully-chosen IKEA storage box makes a conveniently great cover for the U1.












The only objection I have is that the tape won’t last. Few years ago I’ve made myself that contraption to fold t-shirts, out of cardboard and ducttape. After a while the tape was no longer holding the parts.
This is why, after temporary fixing in position the non movin parts, I suggest to use hotglue or caulking to permanenlty fix them, and also to glue some hinges for/to the mobile part.
could always do that thing where the tabs fit into slots ?
Definitely a possibility – at which point it can be re-taped. So far it’s been a couple months and it’s holding up well. Also, in my experience duct tape is abysmal at durability, I’ve used this same clear packing tape (3M) in other applications and it’s held up well.
User proper gaffer tape. I’ve got some that’s been almost 20 years in service and still great. Flexes great, wears great, adhesive holds great, but removes cleanly. Sure, it’s 10x the price of the dollar store stuff, but you get what you pay for.
Look up Chicago screws. I don’t know why they’re called that.
“binding barrels” is the generic term.
Drywall corner bead and a piano hinge for the movable surface.
ymmv. tape works sometimes.
for this kind of construction, if i really want it to last, i use wood glue, elmers, or hot melt glue. what really makes it strong is to stitch the seams…either with string / twine or with steel wire (fence wire). doesn’t take many stitches to define the shape, and then the glue will hold the stitches in place
Why would you 3D print something that can be made under an hour with basic hand tools and materials available at any local hardware store?
Oops, looks like someone didn’t read the article…
Looks like my comment ended up in the wrong place, and I apologize for the mishap.
which place was the correct place please?
Do I need to point you to a dozen 3dprintStupidShitaDay articles?
This is actually strangely impressive — you couldn’t have even read the headline before commenting let alone the post itself.
Right? in this generation that is considered being a genius.